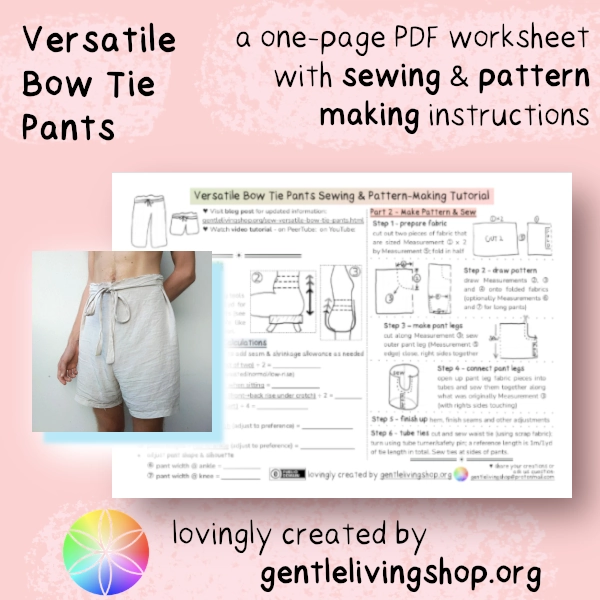
Versatile Bow Tie Pants Sewing & Pattern-Making Tutorial
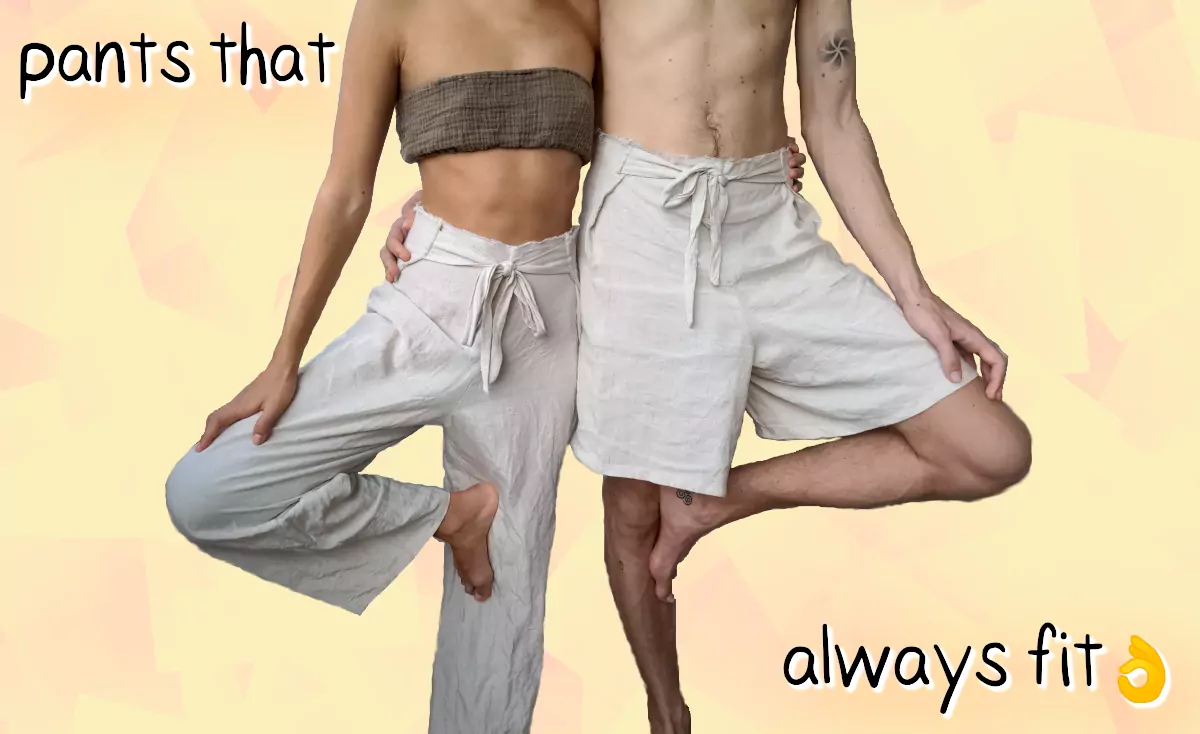
These pants are inspired by Thai Fisherman Pants and resemble paper bag pants. You will learn simple pattern drafting and use beginner sewing techniques. Our family likes a minimal look with versatile fit options – these pants are just that! They have no front and back and can be customised to your own needs. You can make a pair that fits you no matter how your weight/shape fluctuates; if you are pregnant or want to share the same pants with your partner who has a similar shape – you will always look good in these versatile bow tie pants!

Video Tutorial
You can also watch it on YouTube.
A little back story... (why bow tie?)
Since we started sewing our own pants and shorts, we've only used elastic rubber bands to make the waistband. It was what we knew best from growing up. It's a good option as it has a decent fit for moving about during the day and wouldn't squeeze you like a balloon after eating a meal.
- bad for the environment (and ourselves) - rubber can be natural or synthetic. Unless you specifically source for natural rubber elastic bands, you are purchasing rubber of an unknown source knitted with polyester threads. Rubber degrades with time and the waistband will need to be swapped out - but polyester is made from plastic so it does not decompose easily! It will also shed microfibres that get into your water, your food and your environment in general - definitely not nutritious :(
- nasty sweat band - like those sweat-absorbing headbands you wear when exercising, the elastic waistband of a pair of pants does the same thing. It not only acts as a barrier preventing sweat from spreading to the rest of the fabric, it actually also encourages extra sweating (and stinking) because polyester is in fact not breathable.
- not long-lasting - the elastic disintegrates over time and need to be replaced. We have a roll of elastics that are in our sewing stash waiting to be used and it's already breaking down just by sitting there.
But... we had a couple problems with the elastic bands:
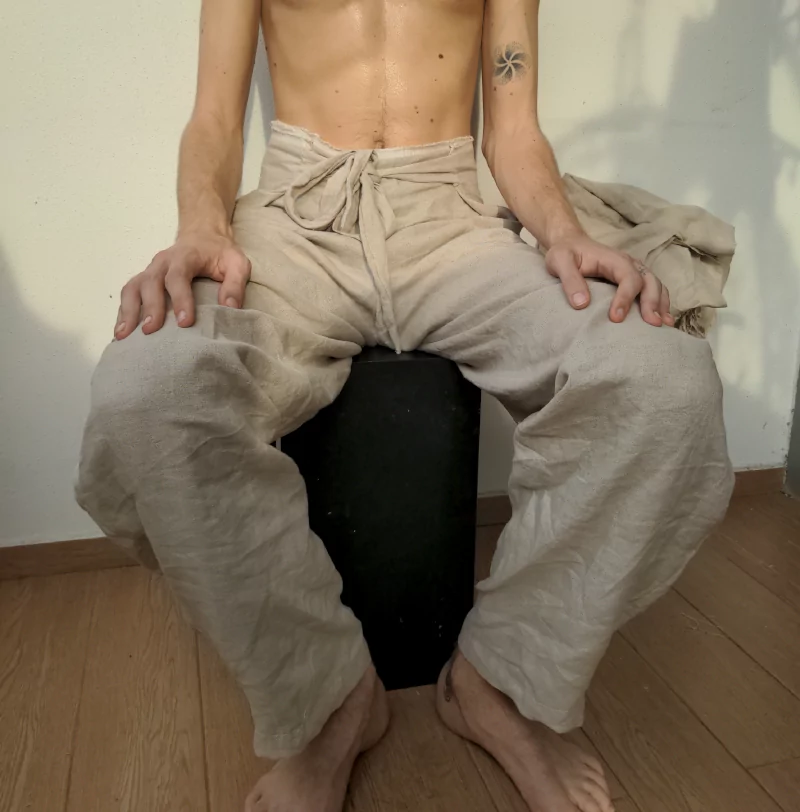
Those were the (main) gripes we have with wearing rubber elastics in our pants. This is when we began researching for an alternative that our ancestors would recognise and approve. We learned about the Thai fisherman pants and the wrap pants. Both were adapted from wearing sarongs in a hot climate. We love the bow tie idea as that would eliminate the elastic band. We have previously made a dress with a bow tie waistband so it seems like now it's the time to incorporate that into pants and shorts!
Why bow tie?
- no plastic is used!
- easy to repair
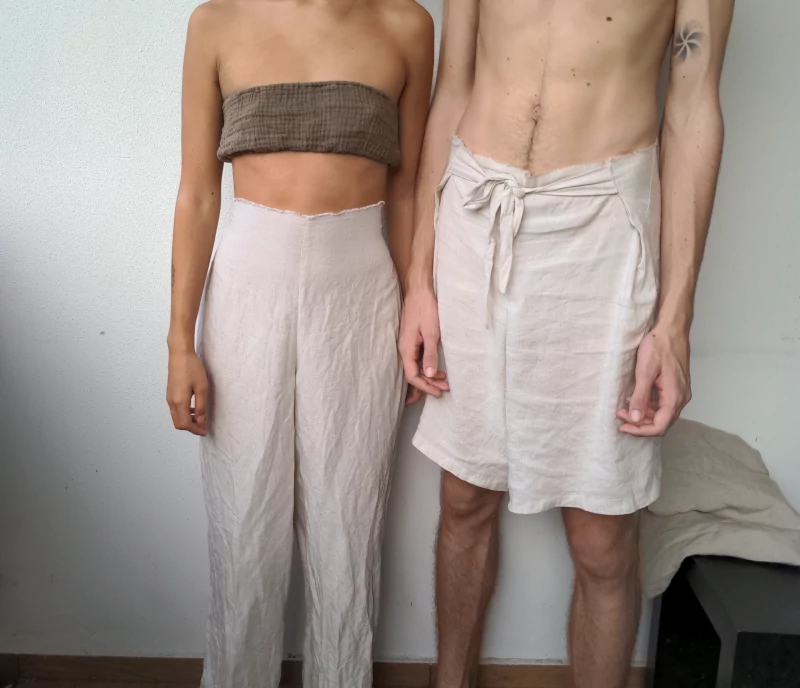
- versatile fit - no matter if you gain/lose weight or become pregnant or need to wear your someone else's bow tie pants real quick, these pants will (almost definitely) fit! 😄
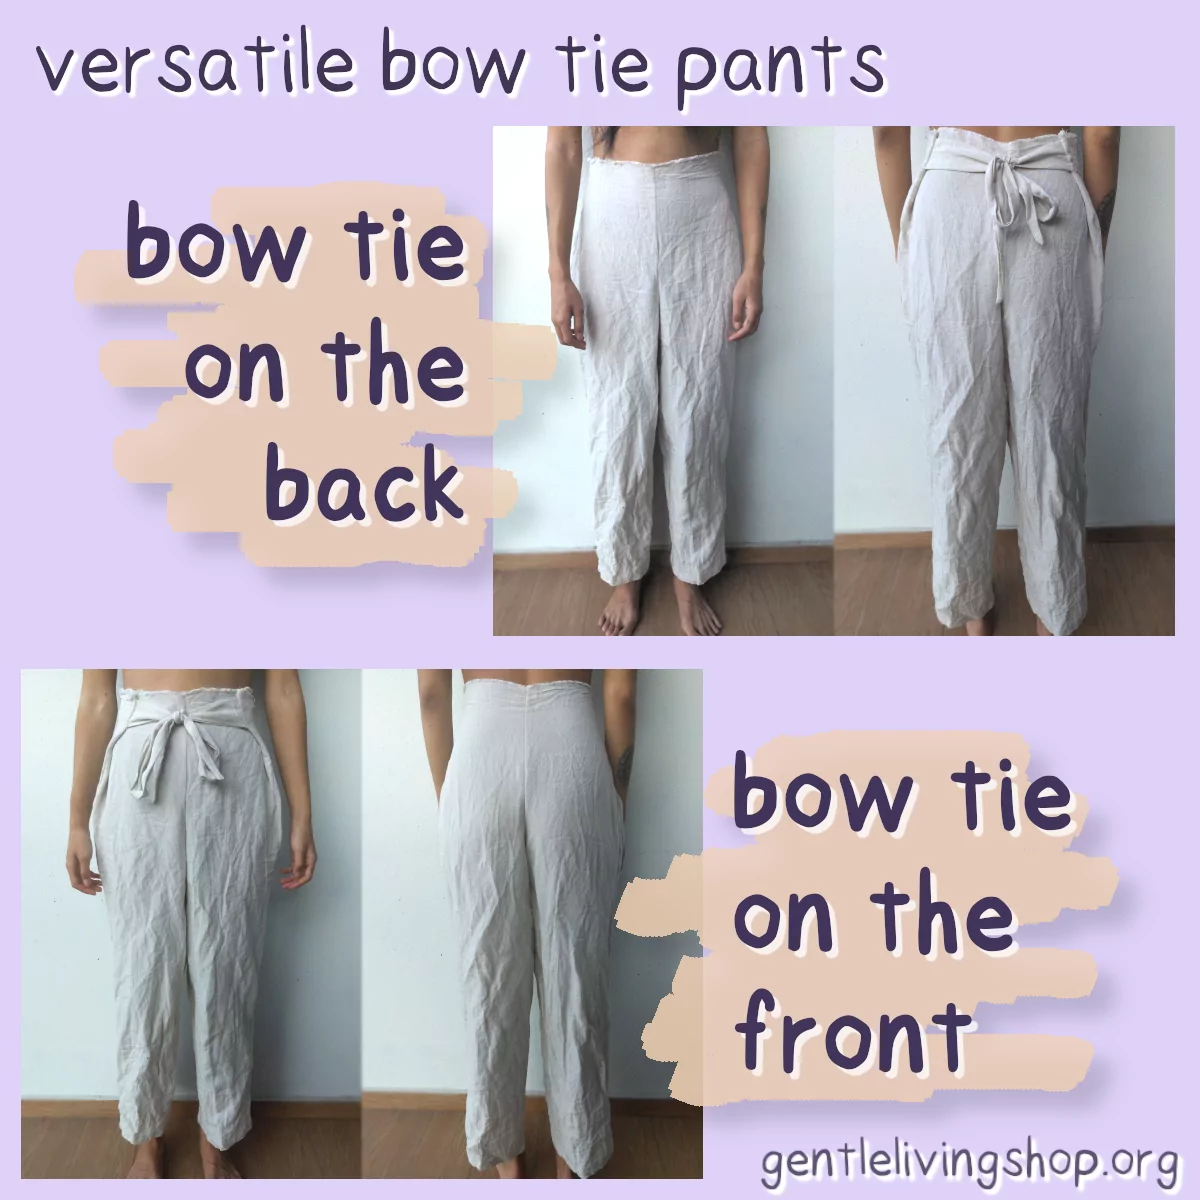
- no front or back side - easy to put on
- less pressure on your tummy - just loosen it when you need to
Part 0 - Tools & Materials
- measureing tape
- fabric scissors
- fabric chalk
- sewing machine / hand sewing tools
- fabric of choice - about 1m/1yd for shorts; 2m/2.2yd for long pants (see Step 1 for fabric usage). We like natural fabrics – linen and cotton.
Part 1 - Measurements & Calculations
Take a piece of paper or use our PDF worksheet to write down and calculate measurements needed for this pattern.
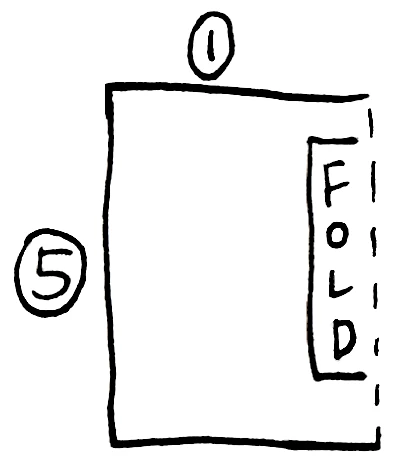
Measurement ➀
pant width = hips/waist (widest of two) ÷ 2
· choose the rise you want (high-waisted/normal/low-rise)
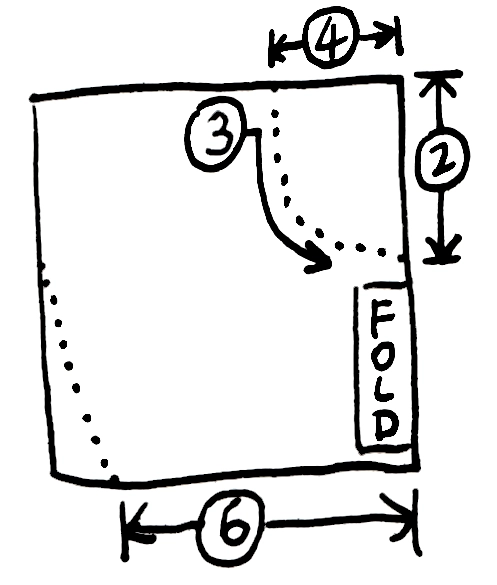
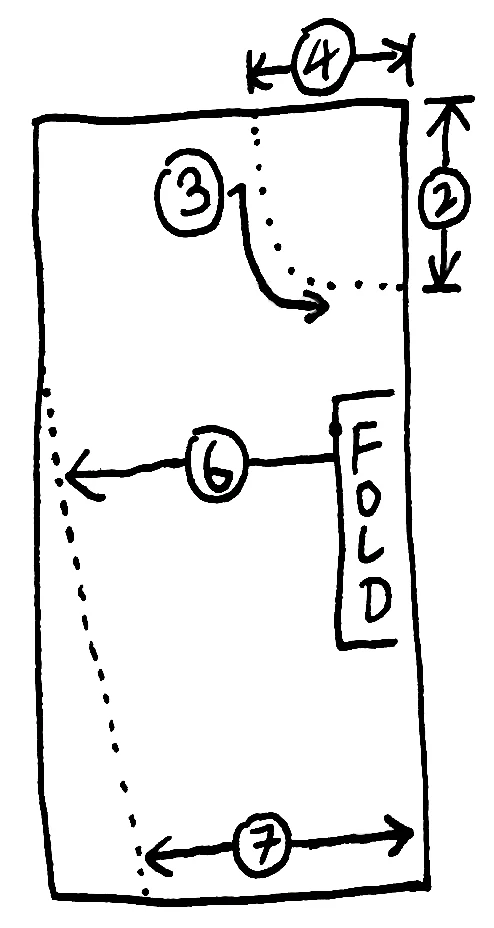
Measurement ➁
crotch depth = rise to floor when sitting
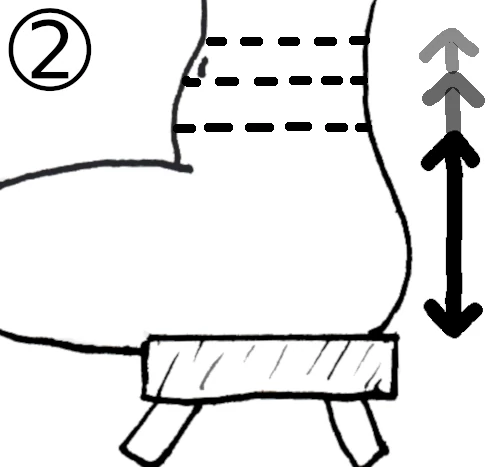
Measurement ➂
pant scoop = crotch length (front → back rise under crotch) ÷ 2
Measurement ➃
crotch width = thigh (widest part) ÷ 4
Measurement ➄
· if making shorts:
shorts length = rise to thigh (adjust to preference)
· if making long pants:
pants length = rise to anckle (adjust to preference)
· (optional) adjust pant shape & silhouette
take inspiration from pants you already own or make anything your imagination fancies 😺 (bell bottoms? palazzo? or just leave it for a wide fit!)
Measurement ➅
pant width @ thigh
Measurement ➆ (for long pants)
pant width @ ankle
Part 2 - Make Pattern & Sew
We will be drawing the pattern straight onto the fabric, let's go!
*remember to add seam & shrinkage allowance as needed!
Step 1 - prepare fabric
cut out two pieces of fabric that are sized Measurement ➀ x 2 by Measurement ➄
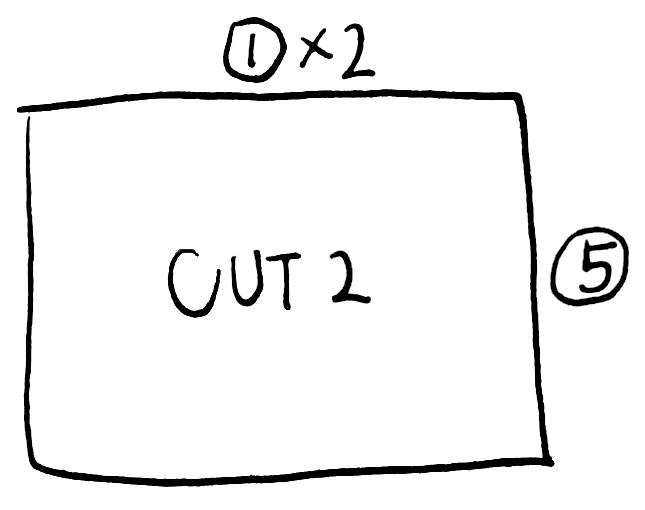
fold cut fabric pieces in half
Step 2 - draw pattern
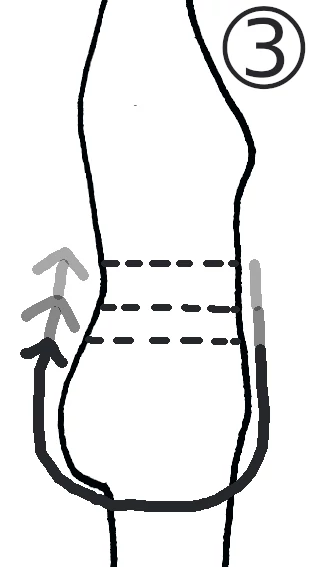
draw Measurements ➁ , ➂ and ➃ onto folded fabrics
optional: draw on Measurements ➅ and ➆ (for long pants) to adjust pant shape and silhouette.
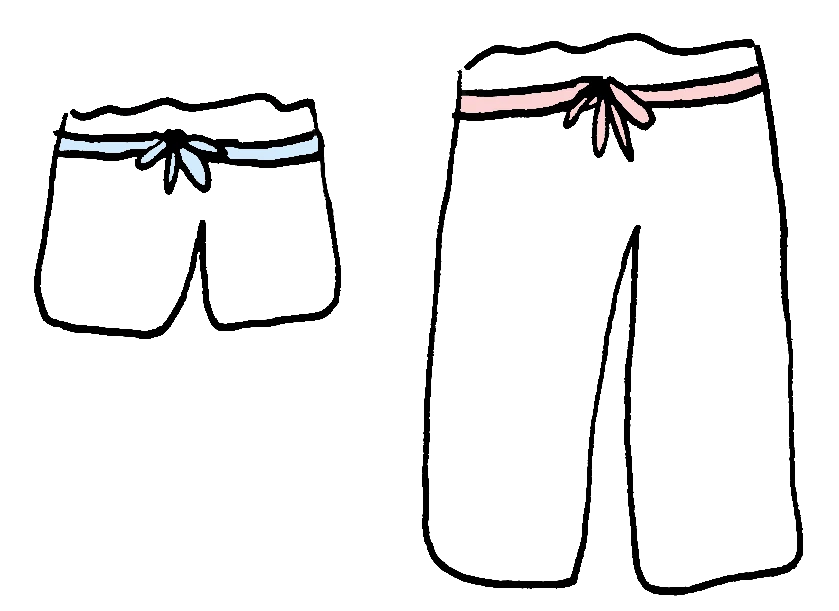
shorts pattern
long pants patten
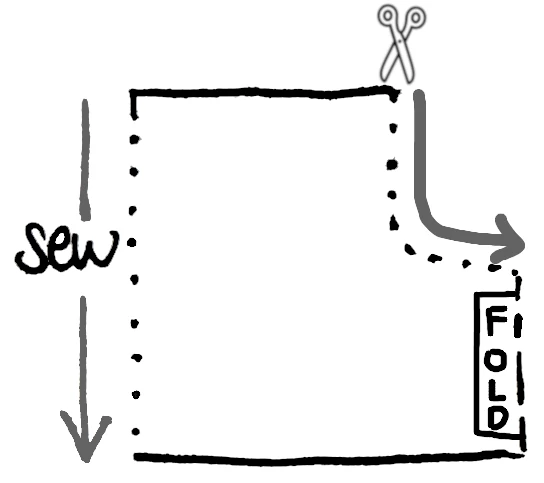
Step 3 - make pant legs
cut along Measurement ➂ ; sew outer pant leg (Measurement ➄ edge) close, right sides together (or wrong sides together for a french seam)
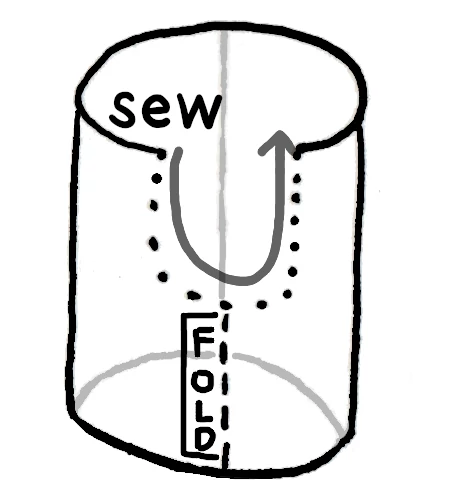
Step 4 - connect pant legs
open up pant leg fabric pieces into tubes and flip one right side out. put one inside the other with crotch seam touching (originally Measurement ➂); sew them together (with rights sides touching or wrong sides touching for a french seam)
Step 5 - finish up
finish seams, hem and make other adjustments. We like to keep some raw hems and fray the edge a little for a fun look.
Step 6 - tube ties
cut and sew waist tie (preferrably using scrap fabric); turn using tube turner/safety pin; a reference length is 1m/1yd of tie length in total. Sew ties at sides of pants.
*if you used a heavier-weight fabric or intend to do lots of jumping exercise in them, we recommond putting some belt loops along the top for the tie strings to better hold up the pants
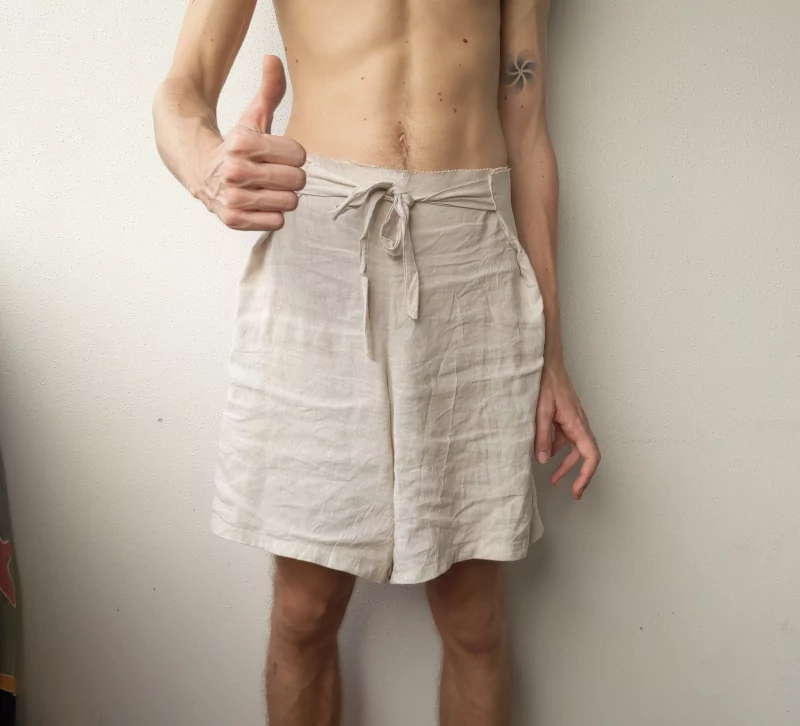
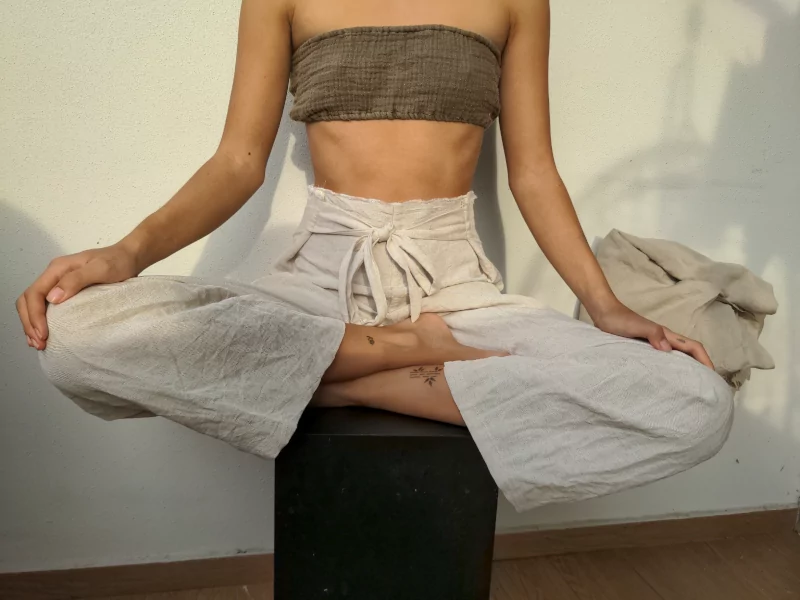
Pants (trousers) are finished!
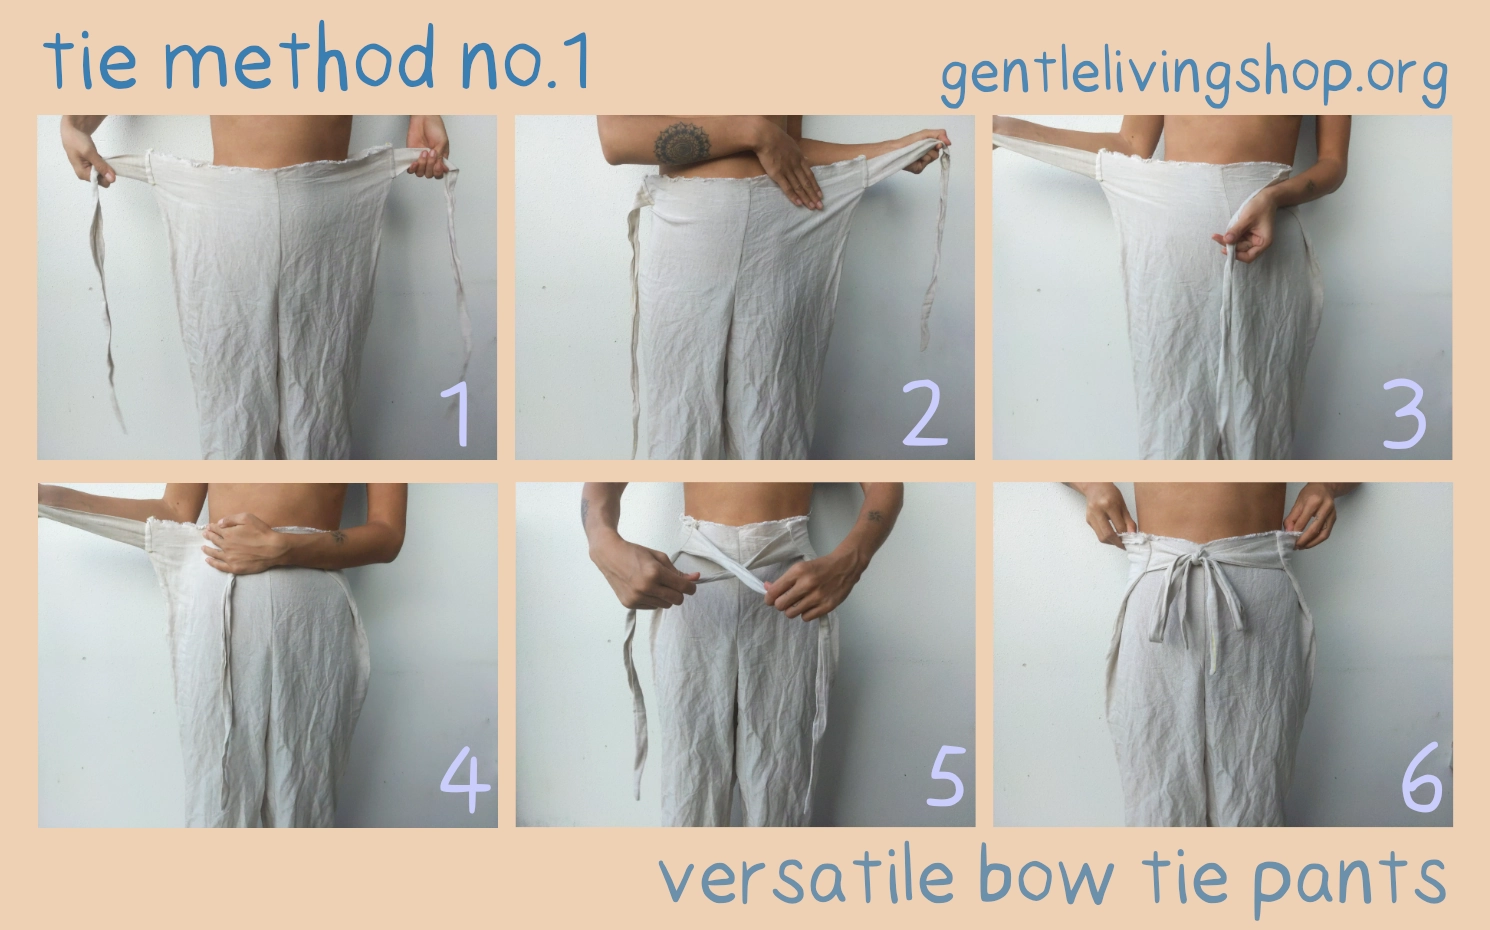
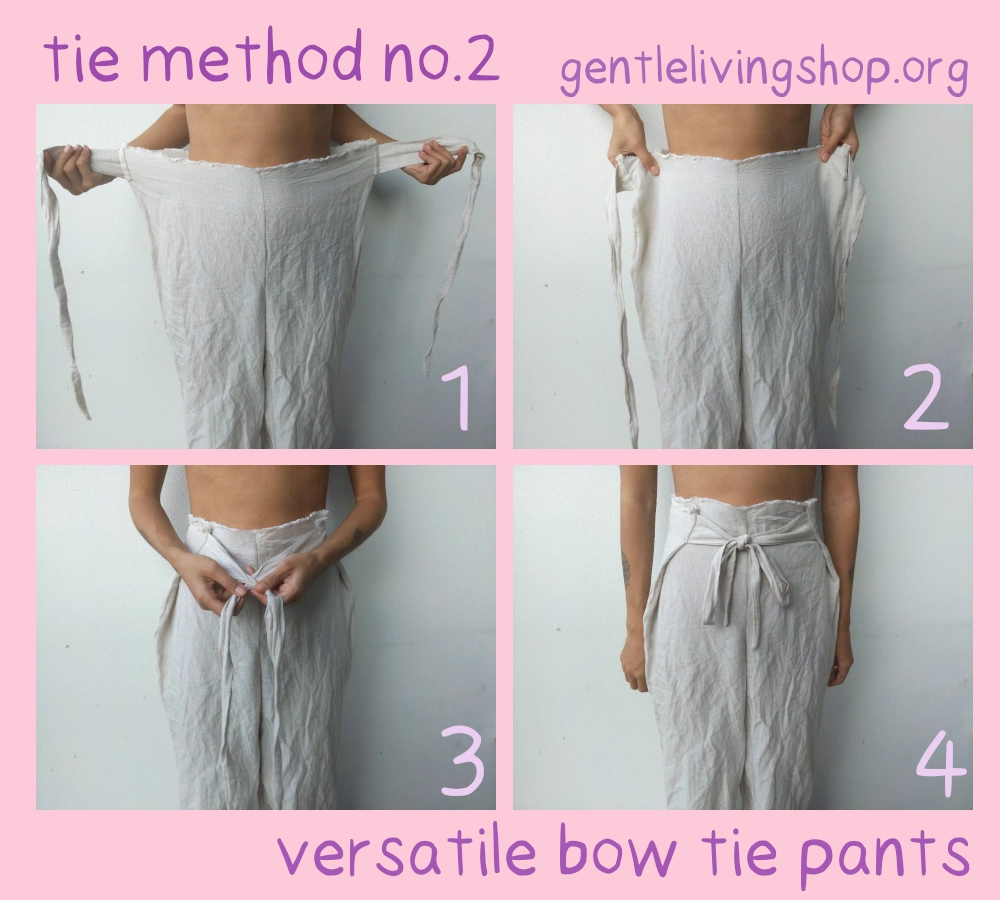
How to wear them?!
Download PDF worksheet
Thank you for reading!
We hope you were able to make some good fitting pants! Share your creations with us or ask any questions by email (see footer)!