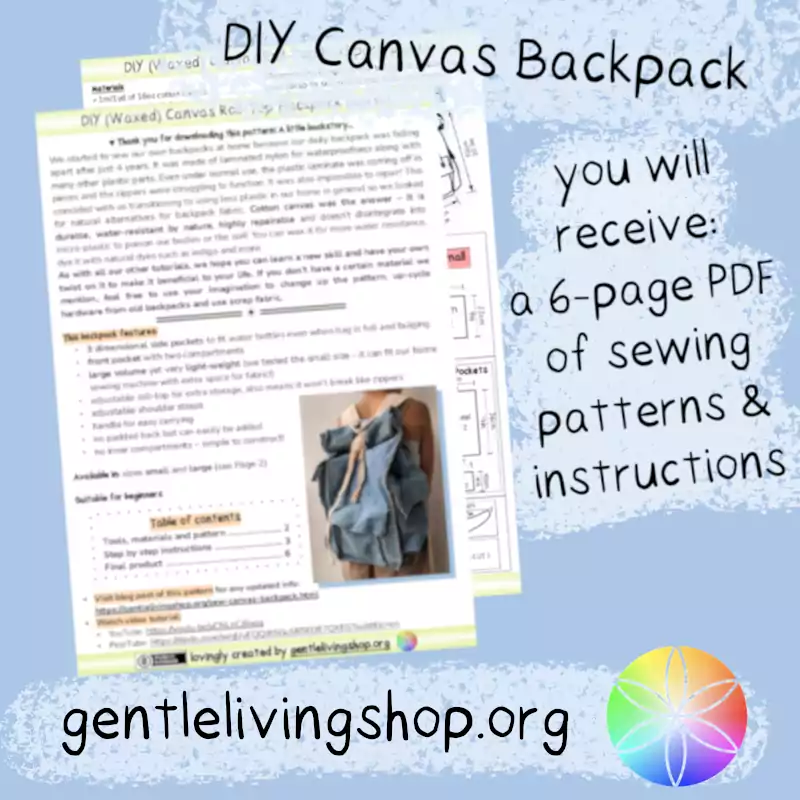
Sew a Canvas Backpack from Scratch (Tutorial + Pattern)
Video Tutorial
You can also watch it on YouTube.
A little backstory...
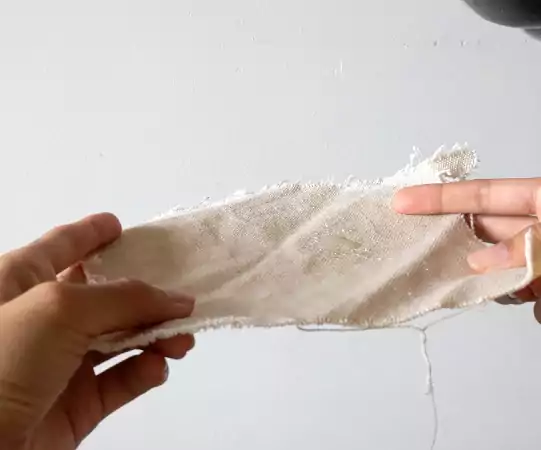
We started to sew our own backpacks at home because our daily backpack was falling apart after just 4 years. It was made of laminated nylon for waterproofness along with many other plastic parts. Even under normal use, the plastic laminate was coming off in pieces and the zippers were struggling to function. It was also impossible to repair! This coincided with us transitioning to using less plastic in our home in general so we looked for natural alternatives for backpack fabric. Cotton canvas was the answer – it is durable, water-resistant by nature, highly repairable and doesn’t disintegrate into micro-plastic to poison our bodies or the soil! You can wax it for more water resistance, dye it with natural dyes such as indigo and more.
As with all our other tutorials, we hope you can learn a new skill and have your own twist on it to make it beneficial to your life. If you don't have a certain material we mention, feel free to use your imagination to change up the pattern, up-cycle hardware from old backpacks and use scrap fabric.
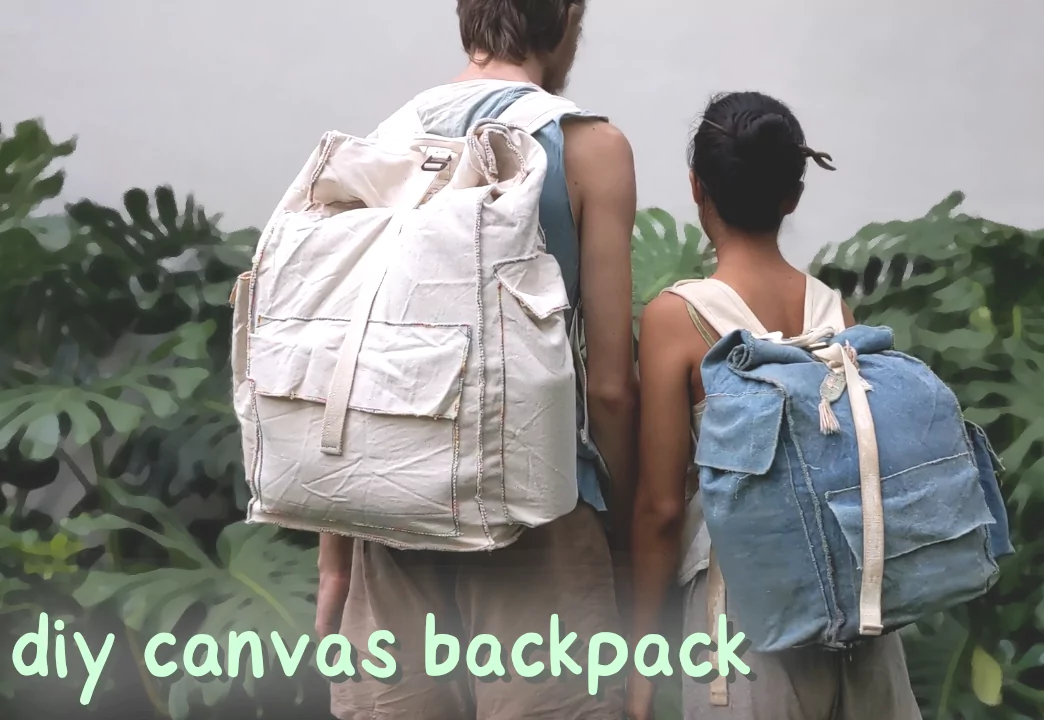
Features of this backpack
| 3 dimensional side pockets | so your water bottles can fit even when bag is full and bulging |
|---|---|
| handle | for easy carrying |
| front pockets | for easy access |
| adjustable roll-top | large volume, we can fit a domestic sewing machine in the size small version with extra space left for fabrics! |
| adjustable straps | so it fits you better |
| no inner compartments | simple to construct and functional in use |
| no zippers | because they break and are hard to repair :( |
| no padded back | more lightweight this way, structural frames can always be added when needed |
| no other bells and whistles | we find normal backpacks to have way too many buckles, clasps, closures... |
Tools and materials
- Needle & thread / sewing machine
- Fabric chalk
- Fabric scissors
- 1m/1yd of 16oz cotton canvas (fabric width 1.6m/1.7yd)
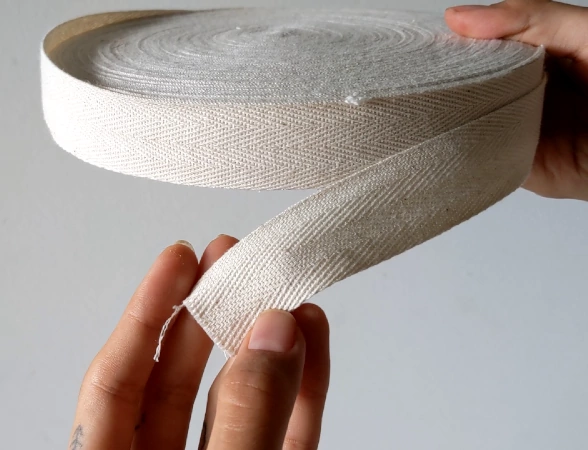
- 2m/2yd of 2.5cm/1in canvas webbing
- 2m/2yd of 2.5cm/1in light-weight cotton twill ribbon (for edge binding)
- (optional) soy wax
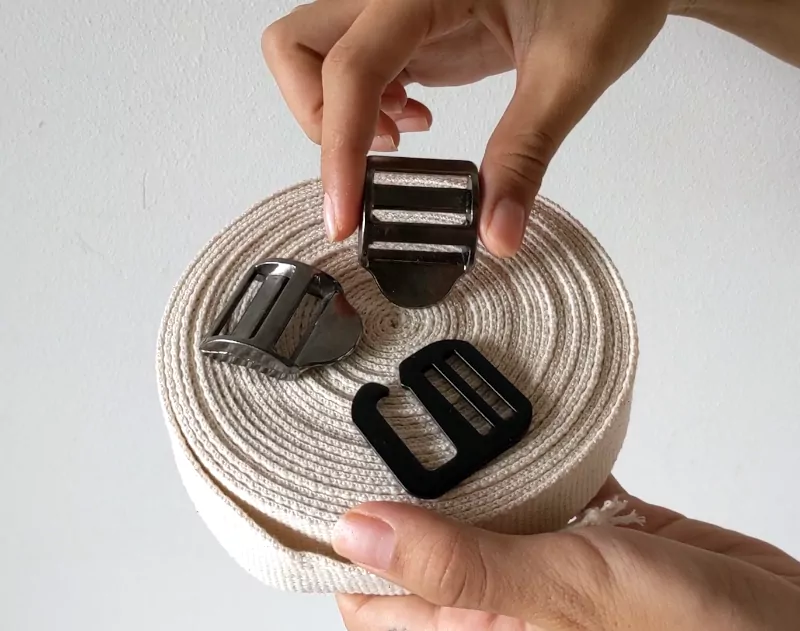
- 2 pieces 2.5cm/1in ladder slider adjustable buckle (double bar)
- 1 piece 2.5cm/1in adjustable G hook
Tools
Materials
Hardware (we used metallic ones)
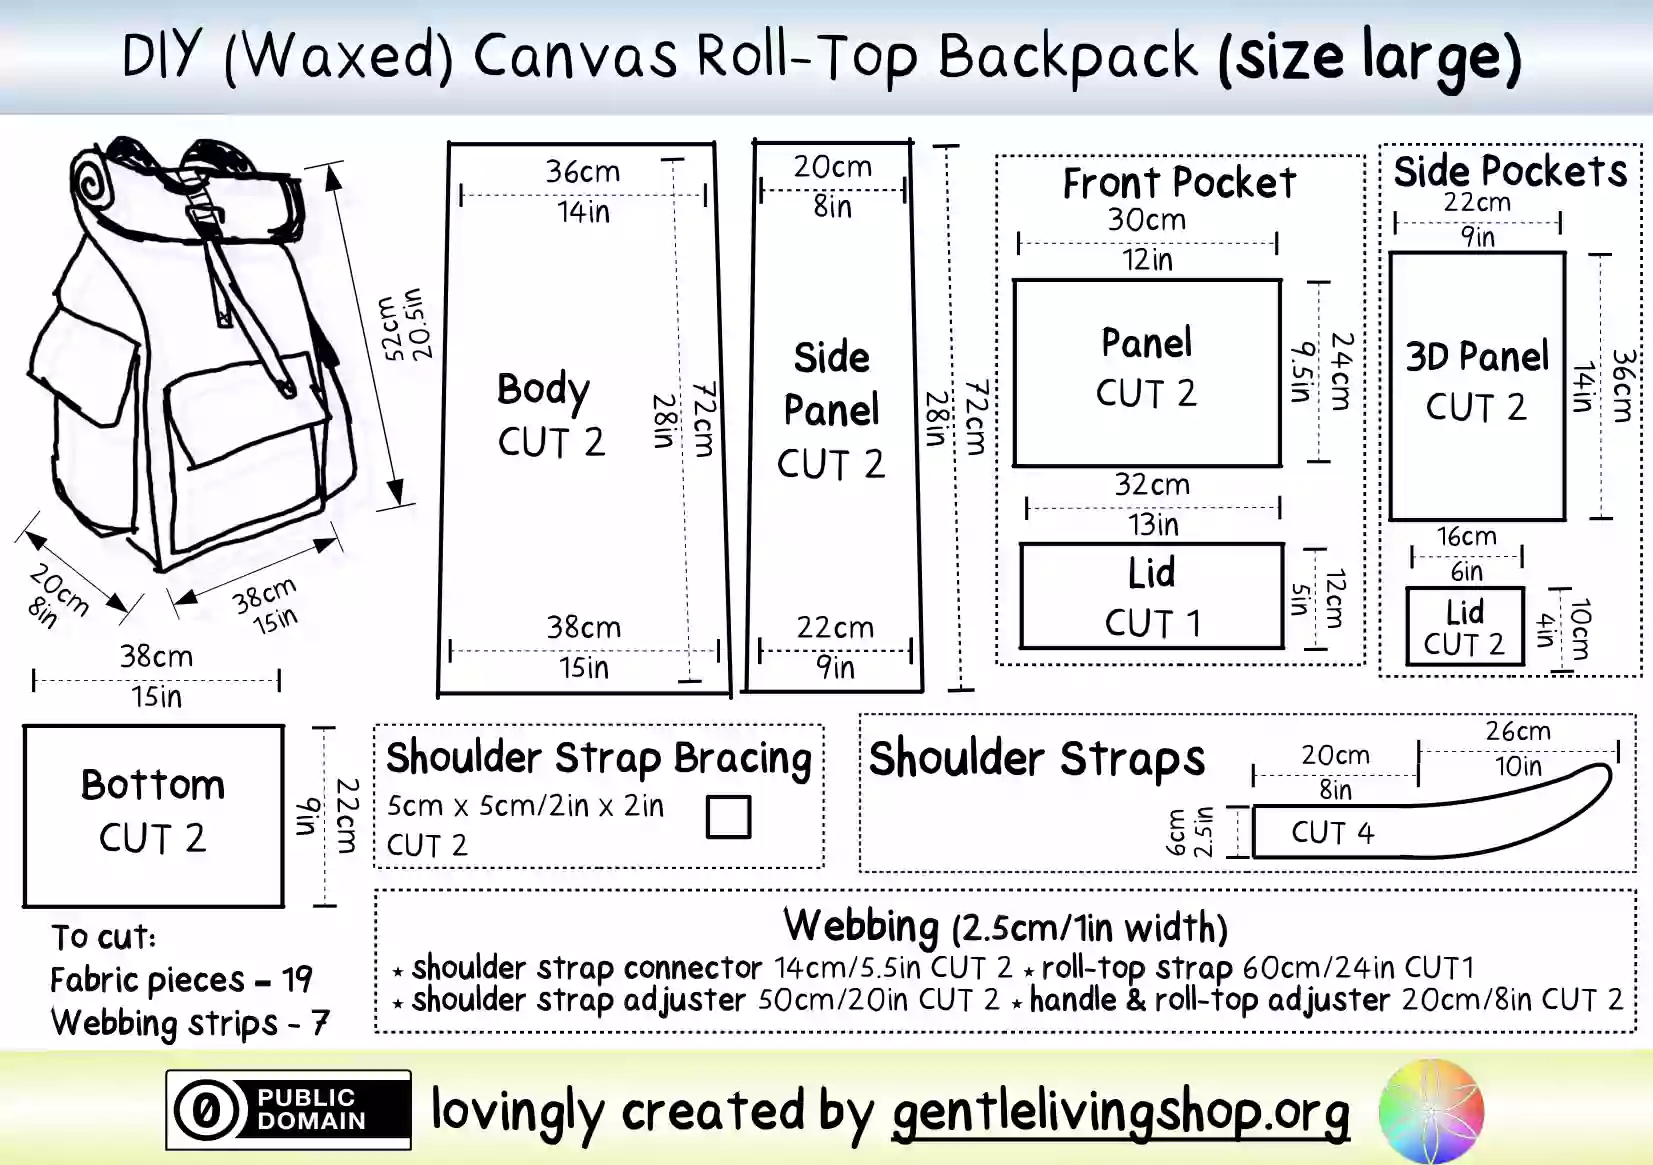
Simplified pattern
Size small (PDF download)
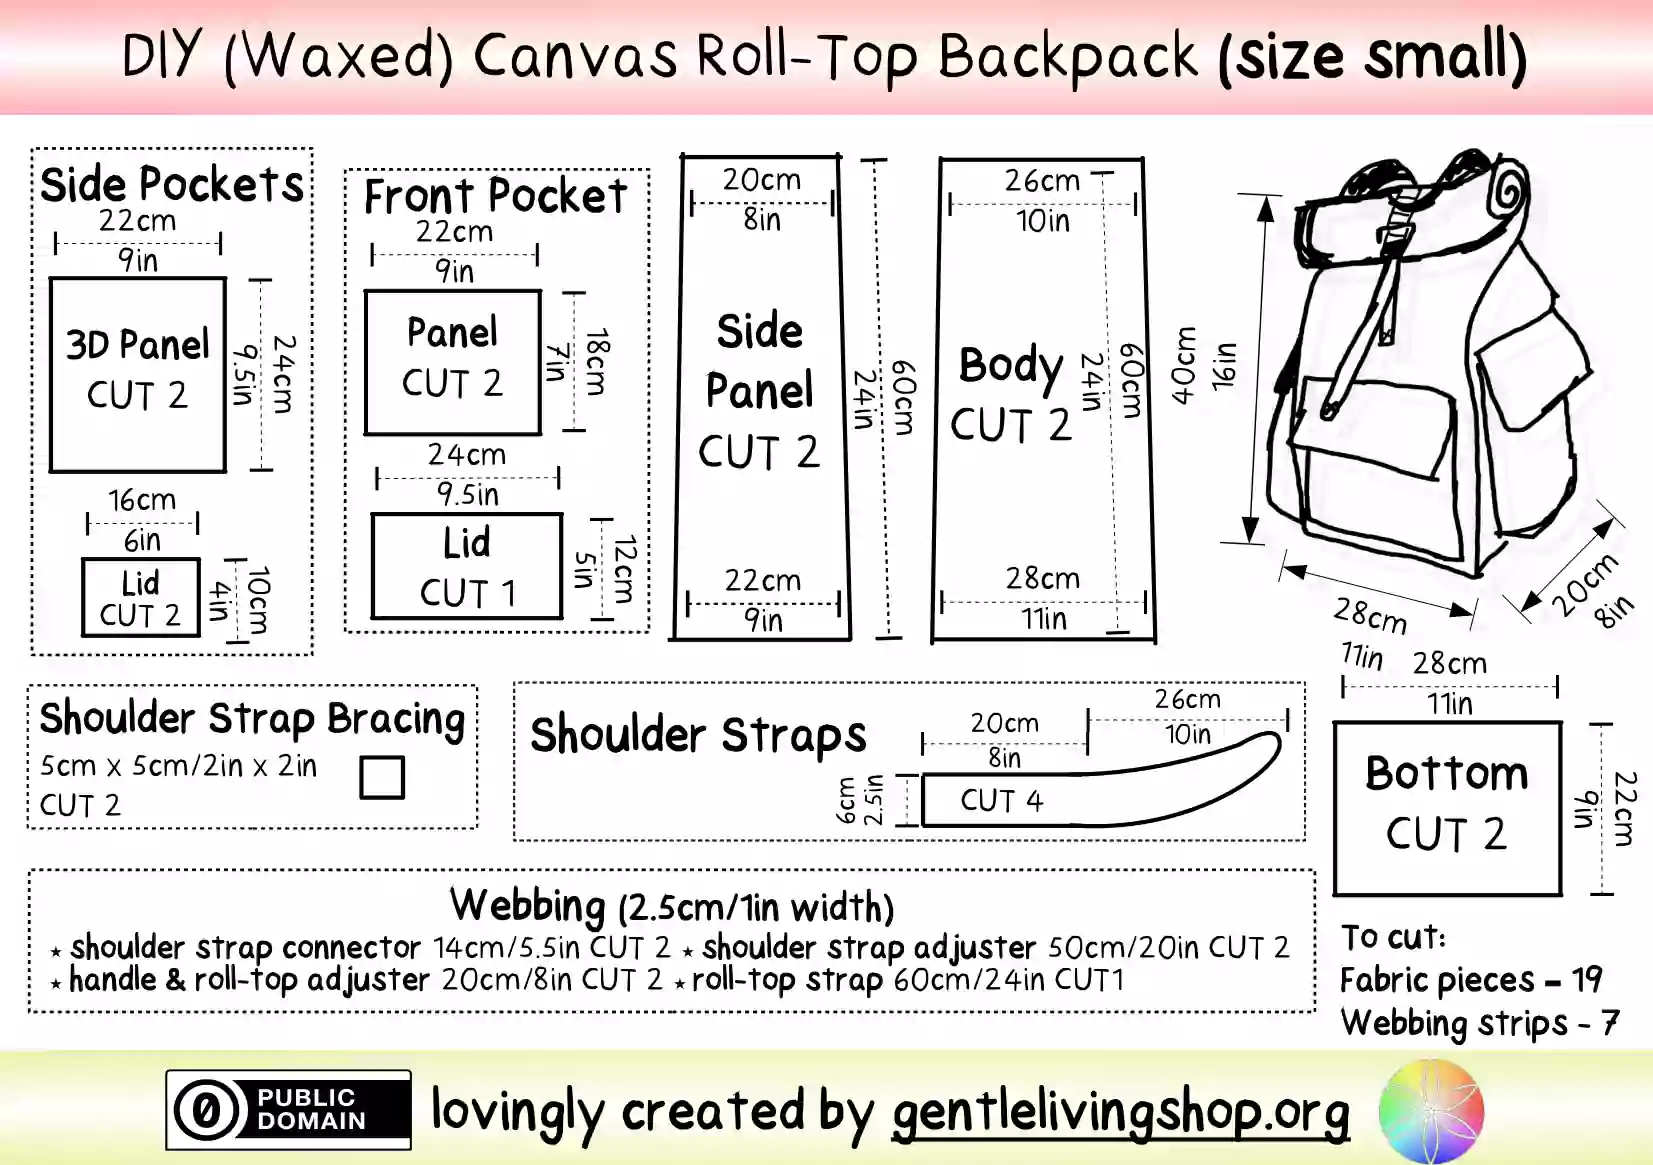
Size large (PDF download)
Step by step instruction
Stage 1 – Prepare canvas fabric
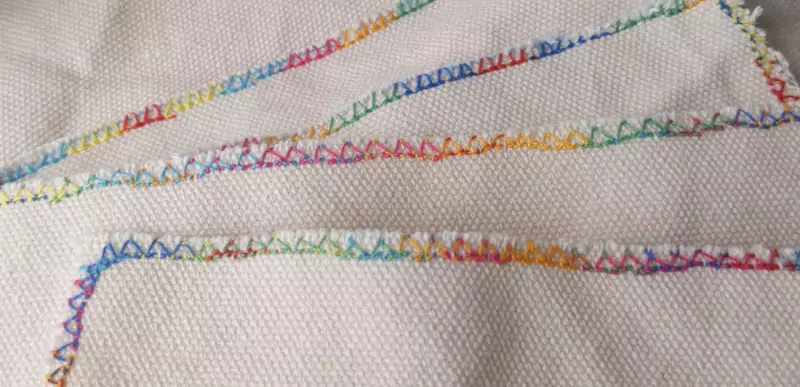
1.1 Measure, cut and overcast
Cut out all pieces (19 fabric pieces; 7 webbing strips). To prevent fraying edges, overcast edges by hand or machine, skip shoulder straps. Dye fabric if you want.
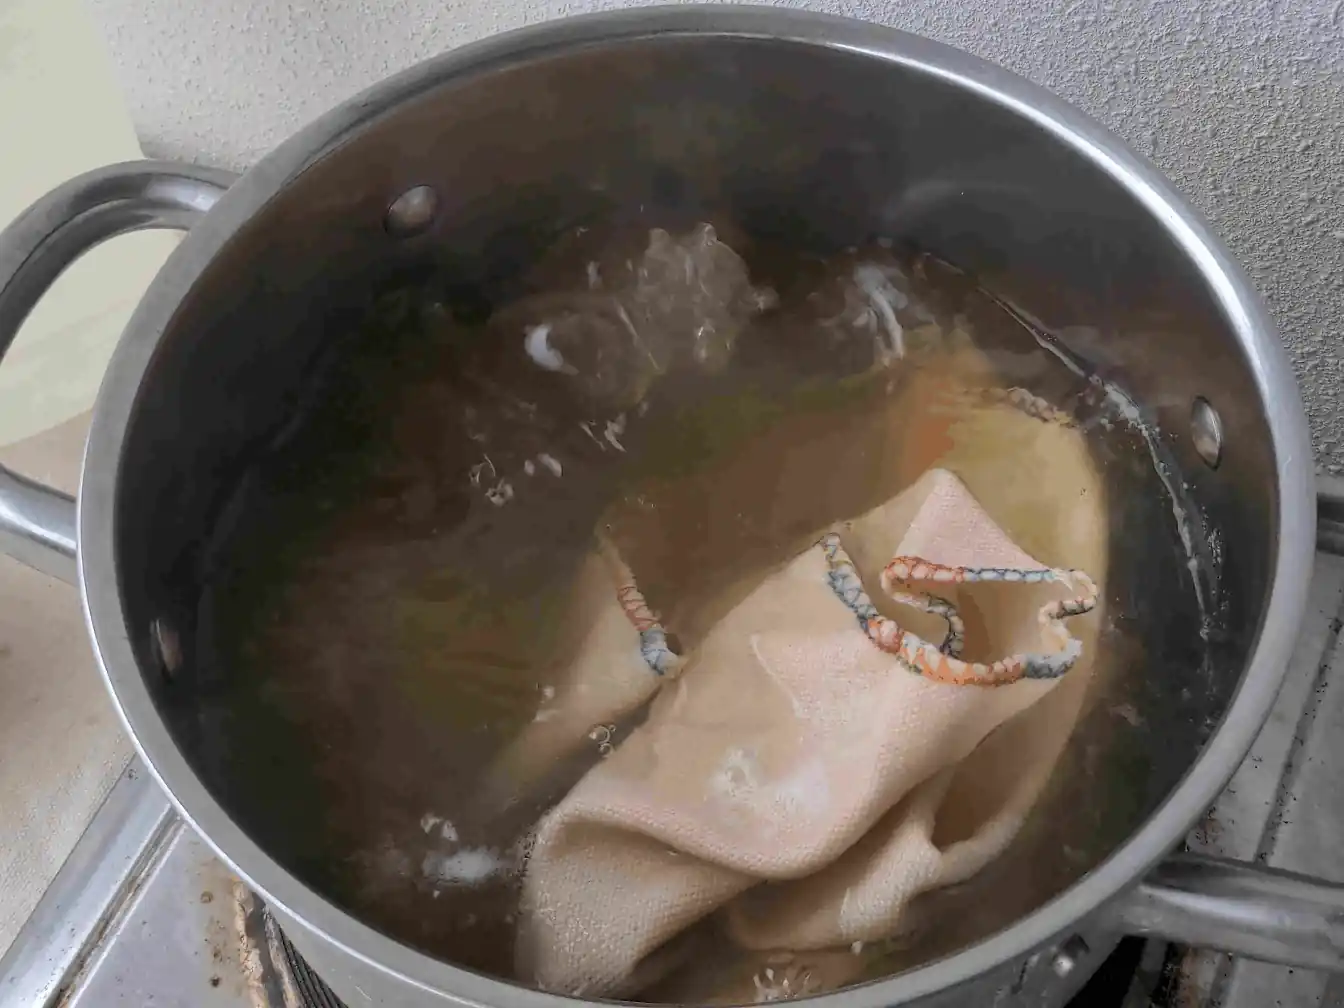
1.2 (optional) Scour and wax
- Scour all pieces but shoulder straps. Scouring uses soap and washing soda in boiling water to clean fabric of oils and in turn makes it lighter. Read more about scouring.
- Wax all pieces but shoulder straps. Waxing helps canvas be more water and cut resistant but adds weight. Read more about waxing canvas.
Stage 2 – Basic construction
2.1 Side Pockets
Mark out a 4 by 4cm (1.5in) square at bottom corners of the fabric. Fold and sew down the corners in so two lines marked out are touching.
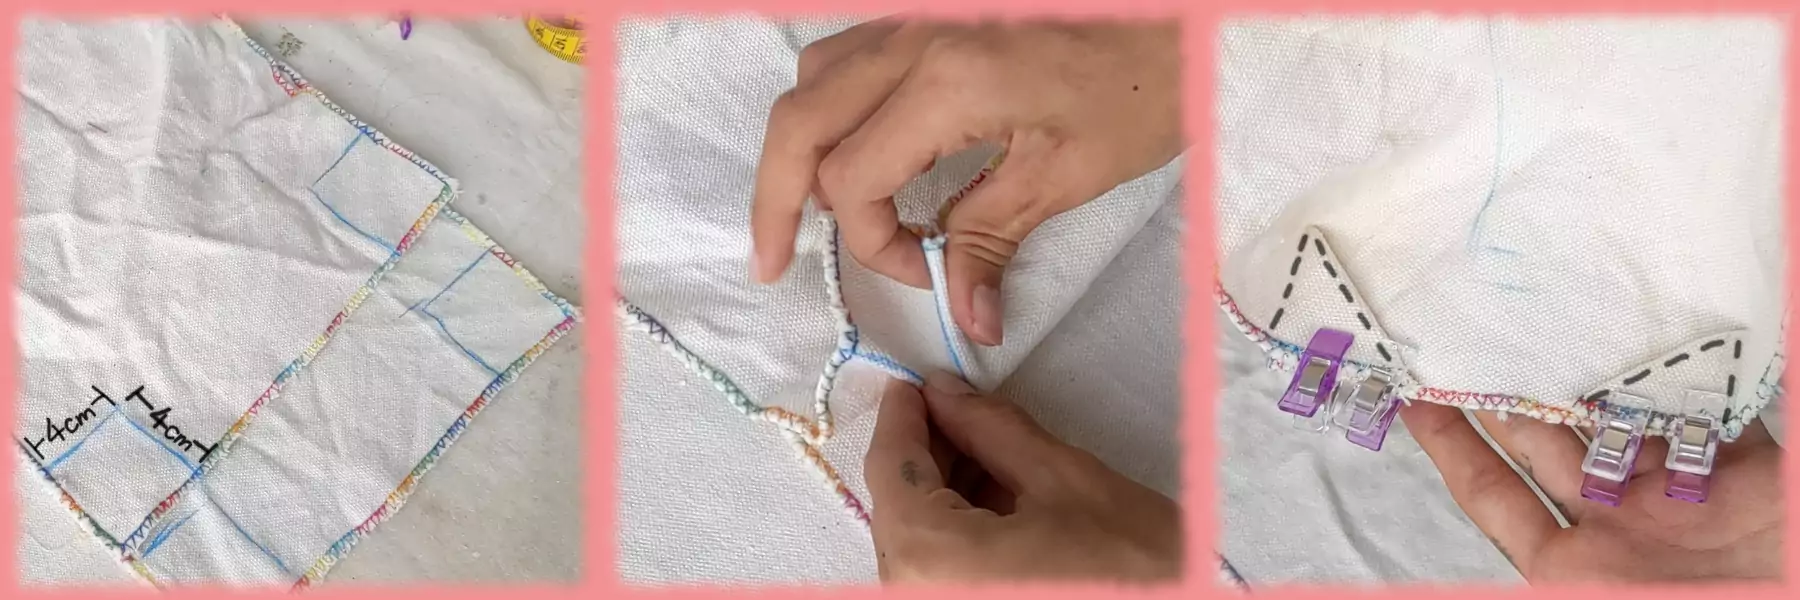
Make a little snip at each of the bottom corners, flatten the edges and sew onto the side panels. Sew on the lids.
2.2 Front Pockets
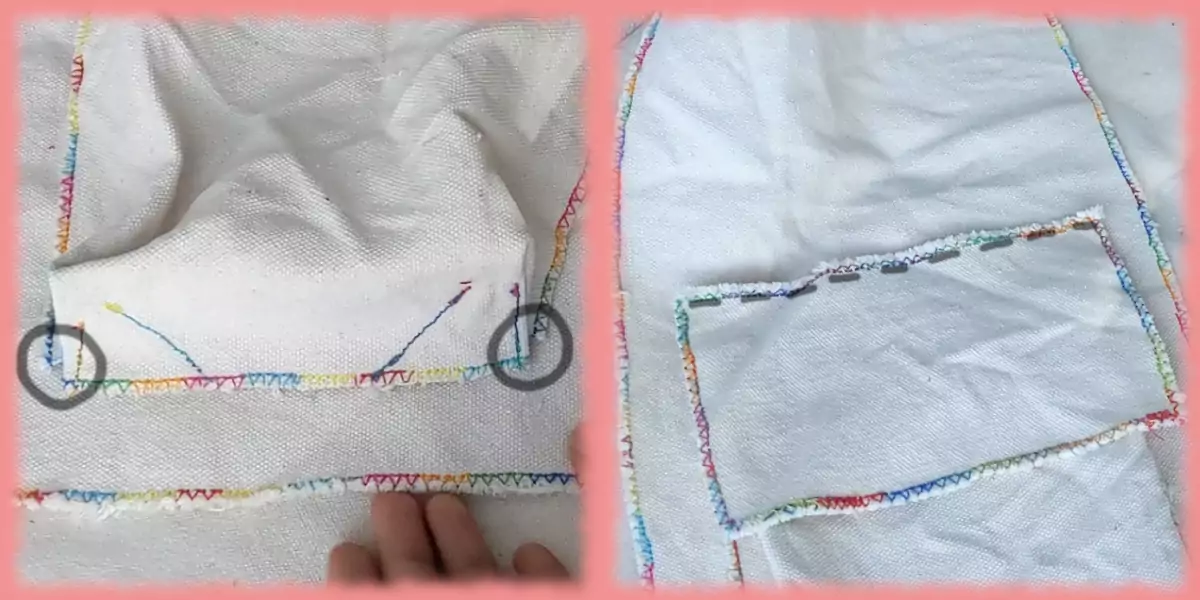
Sew two front pocket panel together (customise it to your liking! we stacked them). Sew that and lid onto front panel.
2.3 Bottom, front, back and side panels*
- Sew two bottom pieces together.
- Sew front, back and side panels onto bottom panel.
Stage 3 - Shoulder straps
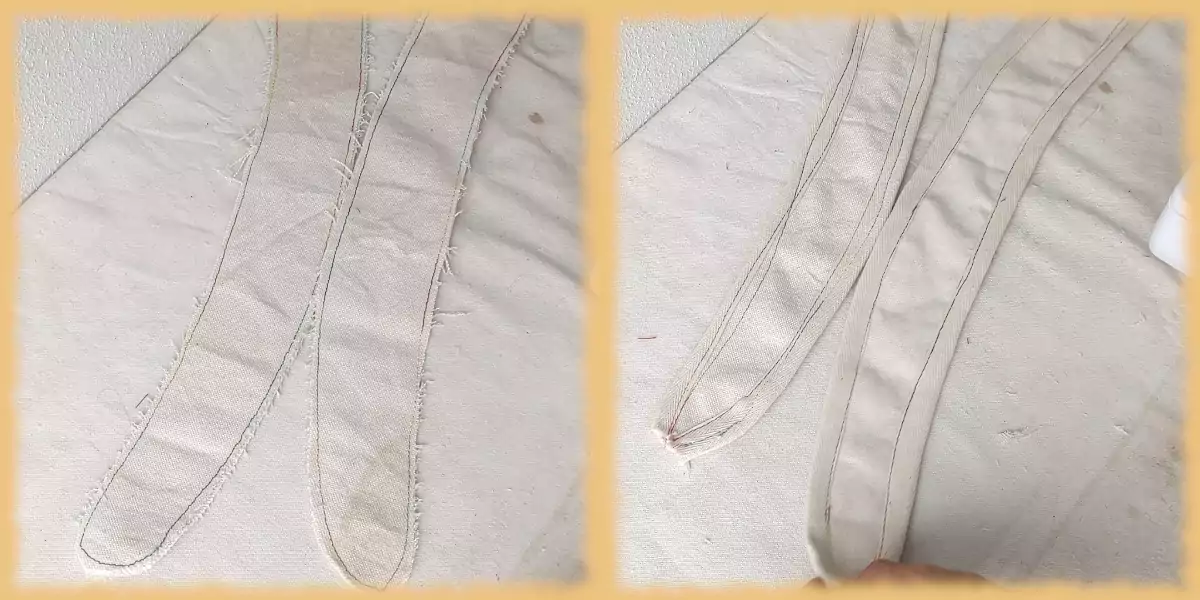
3.1 Prepare shoulder straps
- Sew two pieces of shoulder straps together, so you end up with 2 straps, each with two layers.
- Bind edges with cotton ribbon to prevent fraying.
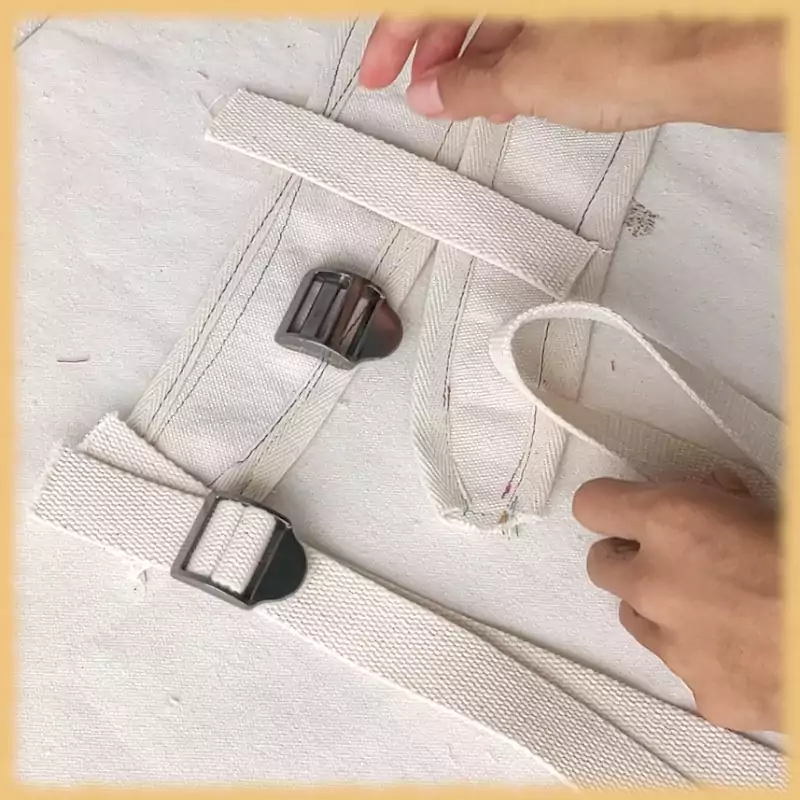
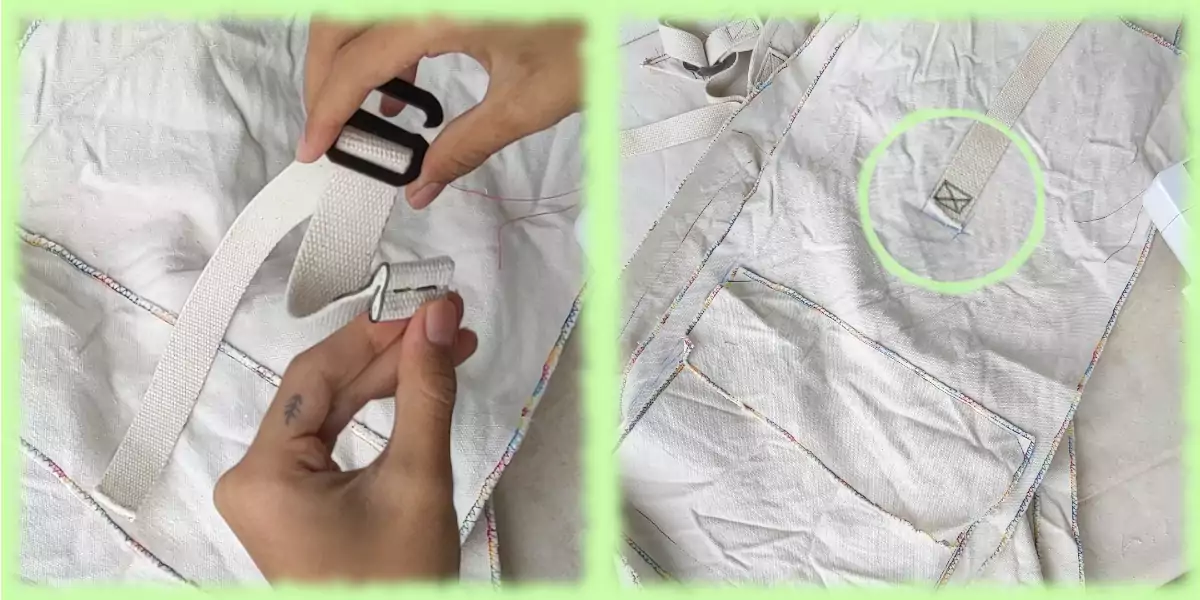
3.2 Prepare ladder slider adjustable buckle
- Loop the 14cm/5.5in long canvas webbing around top bar of ladder slider adjustable buckle.
- Loop the 50cm/20in long canvas webbing around bottom bar of ladder slider adjustable buckle. Thread it through the middle opening back to front and through the bottom opening front to back.
3.3 Shoulder strap & buckle sandwich
- Sandwich the shoulder straps end in between short webbing strips and sew together with 'box x' stitch (webbing-shoulder strap-webbing).
- For the long webbing strip side wrapped around bottom bar of buckle, fold tips of top half in twice and sew (prevent it from coming out of the buckle).
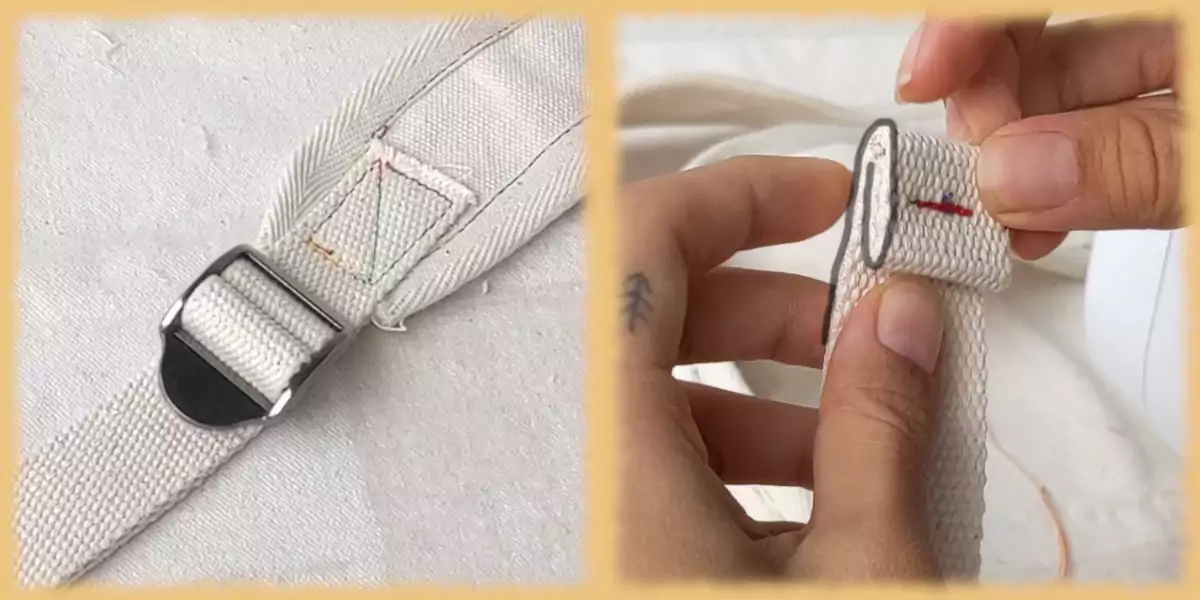
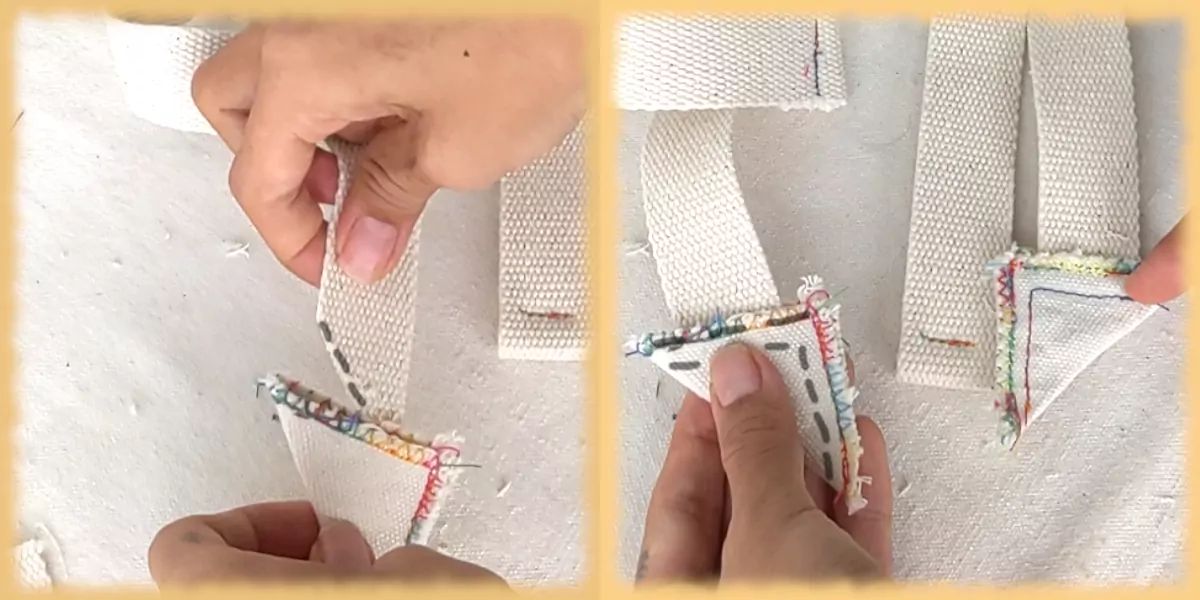
3.4 Shoulder strap bracing
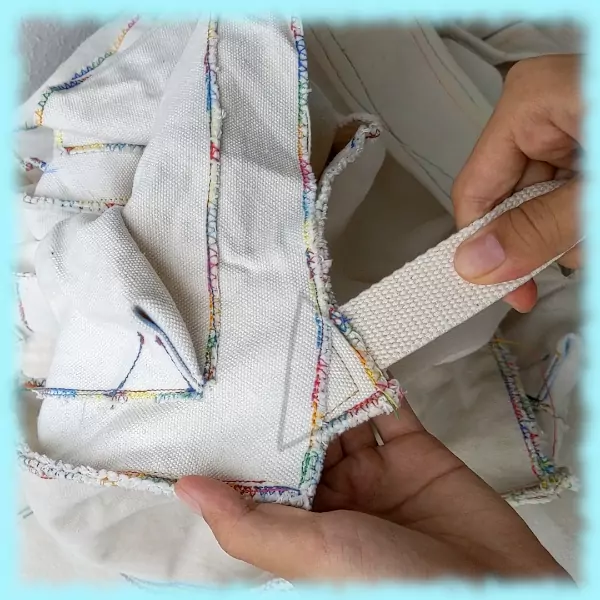
- Fold shoulder strap bracing squares in half into triangles and sew one open edge closed.
- Trim outside corners off the ends of bottom half of the long canvas webbing strip and sandwich trimmed corner between the opening of the shoulder strap bracing. Sew attached.
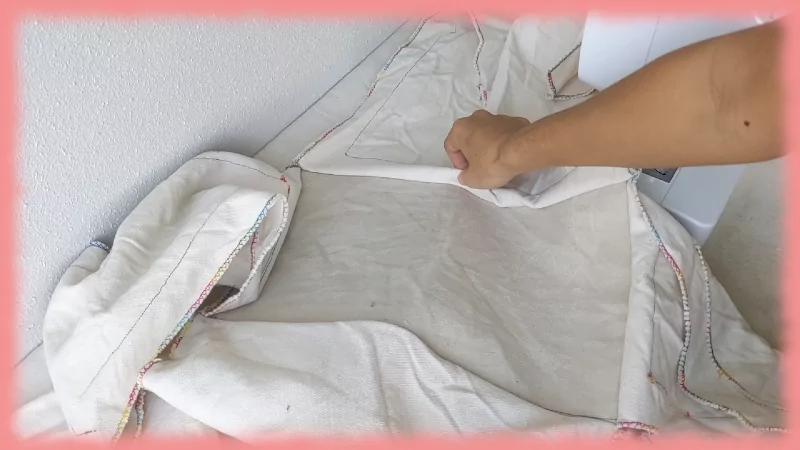
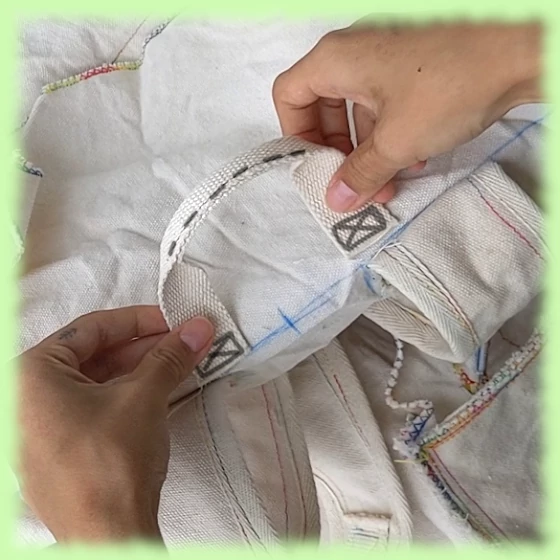
3.5 Attach straps to backpack
The roll-top of backpack is 20cm long so stitch shoulder straps onto back panel 20cm below top edge with a ‘box x’ stitch.
Stage 4 – Handle & Adjustable roll-top
4.1 Handle
Fold middle section (10cm long) of 20cm/8in long canvas webbing strip in half. Stitch to secure. Attach handle to middle of the back panel just above shoulder straps.
4.2 Roll-top strap
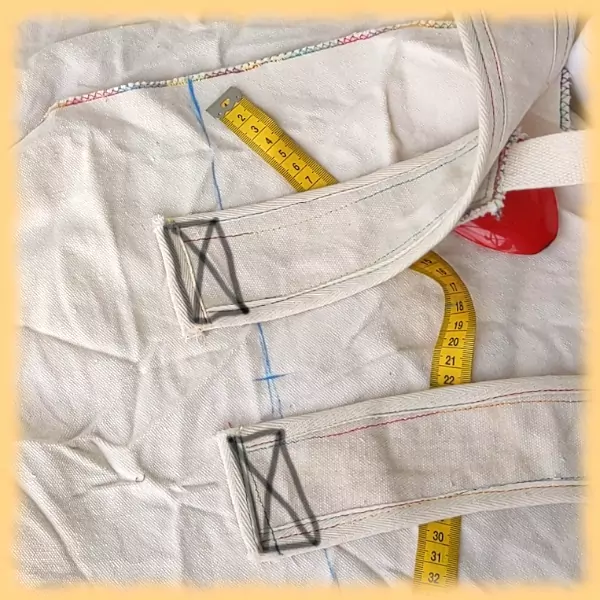
Thread 60cm/24in long canvas webbing strip onto G hook. Fold and sew one end like the should strap webbing. Attach roll top strap onto centre of front panel about 25cm/10in below top edge with a ‘box x’ stitch.
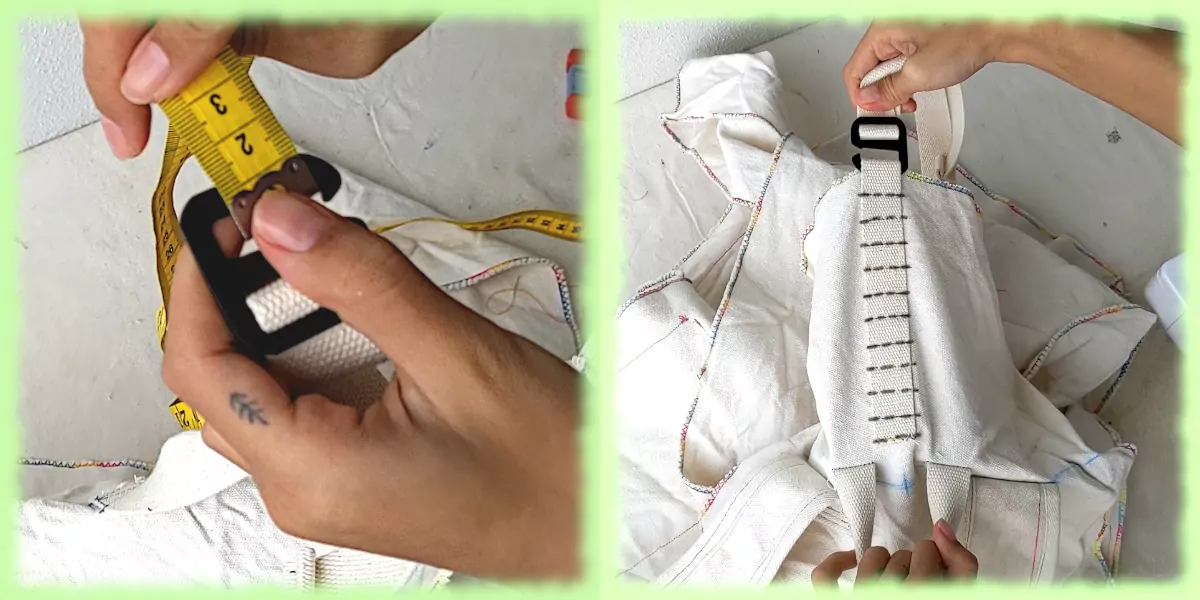
4.3 Roll-top slots
Measure G hook’s size, mark out appropriate slots for it onto 20cm/8in long canvas webbing strip. Sew down each slot onto top of back panel leaving a bit at the top to fold to the inside.
Stage 5 – Final assembly
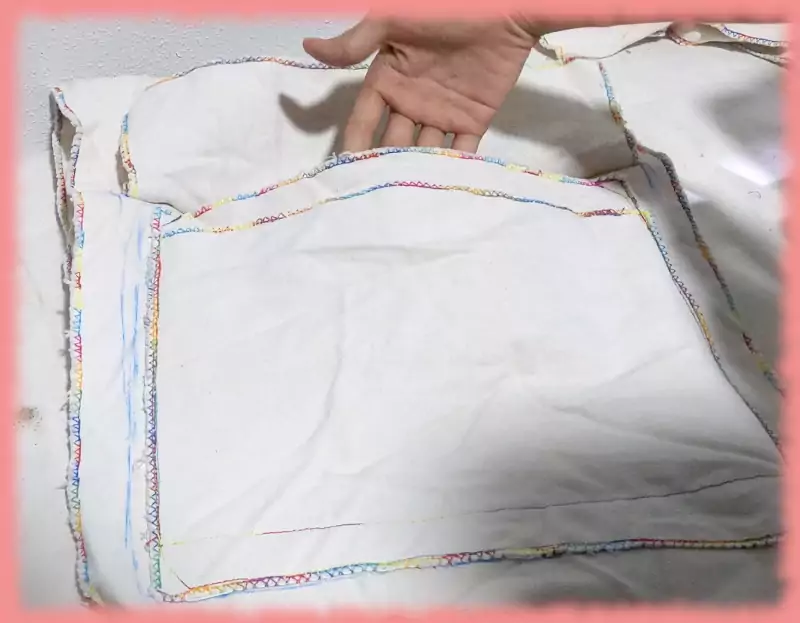
5.1 Sew front panel and side panels together*
5.2 Attach shoulder strap bracing to backpack
Sandwich long edge of shoulder strap bracing triangle between back panel and side panels towards the bottom of backpack. Sew panels together.
*If you want seams facing out - sew wrong sides together; if you want seams on the inside of backpack - sew right sides together.
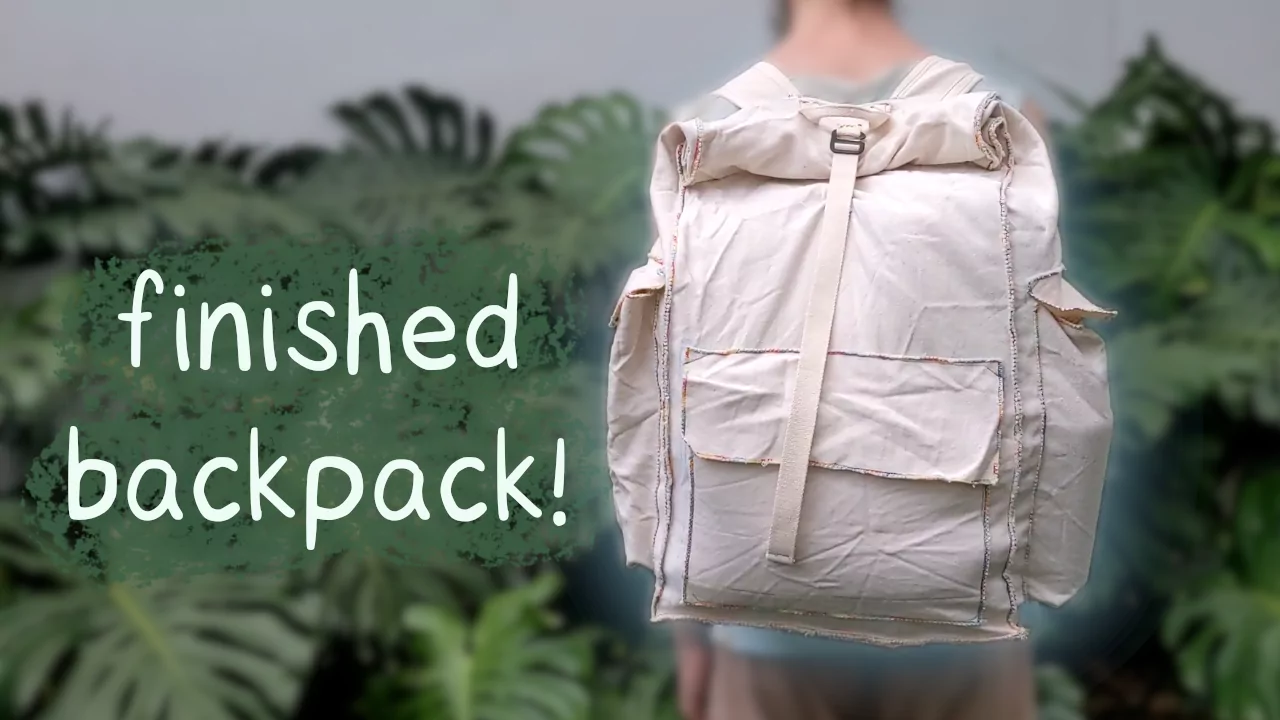
yay! backpack is finished!
PDF pattern download