Crochet Bean Bags for Outdoor Play | Easy Tunisian Crochet Pattern
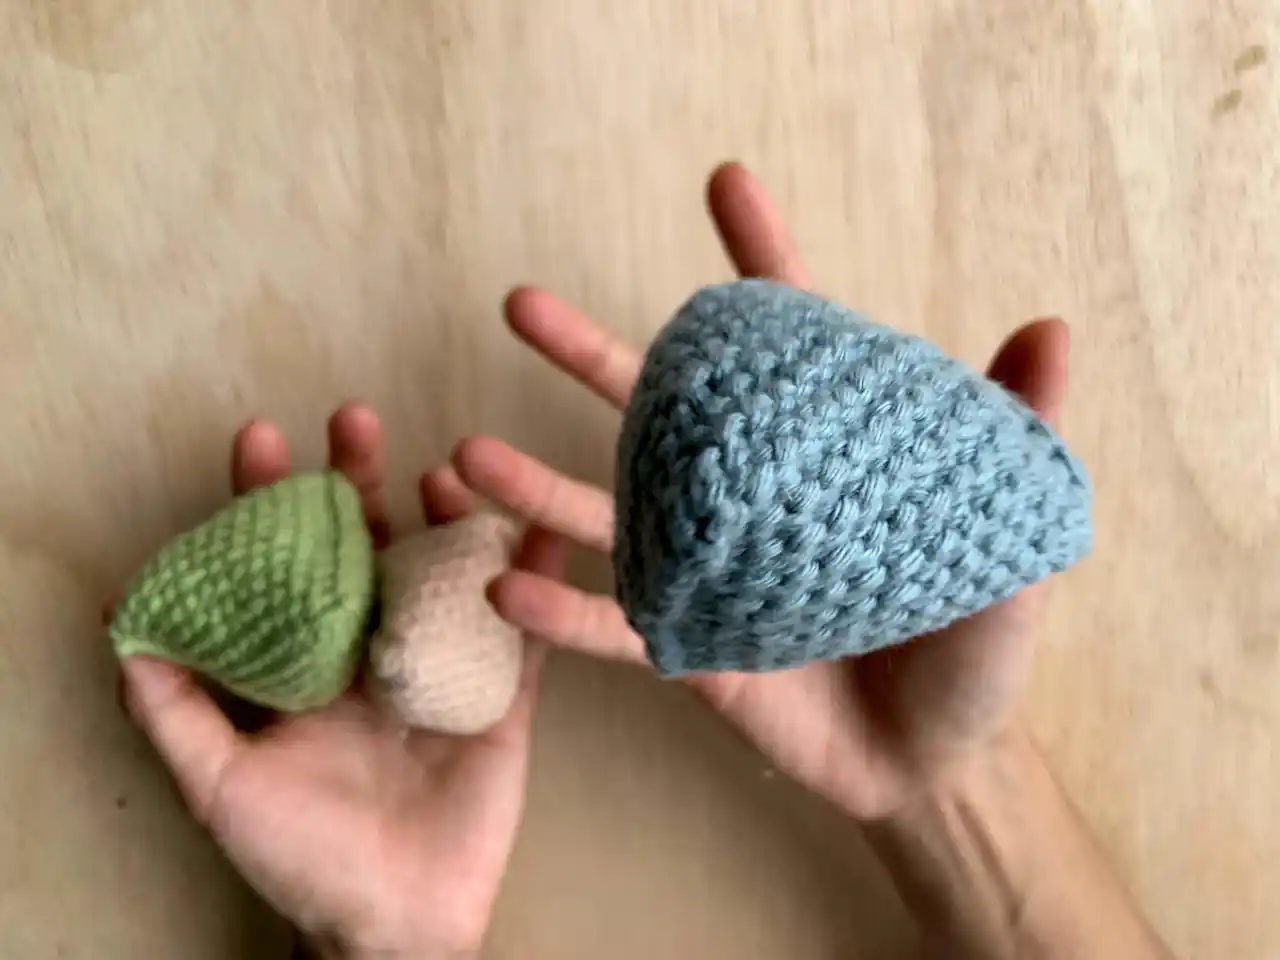
This Tunisian crochet pattern creates bean bags that are fun to play with as hacky sacks (footbag), as juggling balls or simply in a toss and catch game. They are simple to make yet bring so much joy! When you are done playing, they can also act as pattern weights for your sewing projects😄
Tunisian crochet — also known as Afghan crochet — is a combination of knitting and crocheting. You will be using a crochet hook to collect active stitches like you do in knitting and your work generally will not need to be turned. It creates a beautifully tight-knit and thick fabric, which will be perfect in keeping those beans contained!
Difficulty level: beginner-friendly

video tutorial
You can also watch it on YouTube.
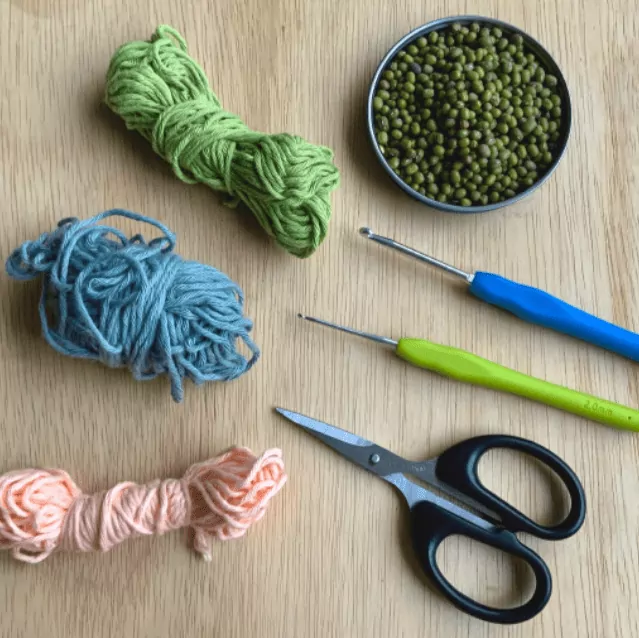
materials you need
❤️ We like to advocate using any yarn you have laying around. It’s the perfect way to use up any leftovers from your other projects. Just pick up a yarn and a suitable crochet hook to get started! You will need to adjust the stitch counts depending on your yarn thickness and how big you want the bean bags to be.
- Yarn: if you are looking for inspiration, we used Creative Cotton Aran from Rico Design (Weight: Aran; 8wpi; 10 ply), around 21 meters (23 yards) or 12 grams for one bean bag
- Crochet hook: 4 mm (US: G-6; UK 8). Make sure your hook has a long enough shaft to hold the active stitches
- Tapestry needle or a smaller sized hook
- Scissors
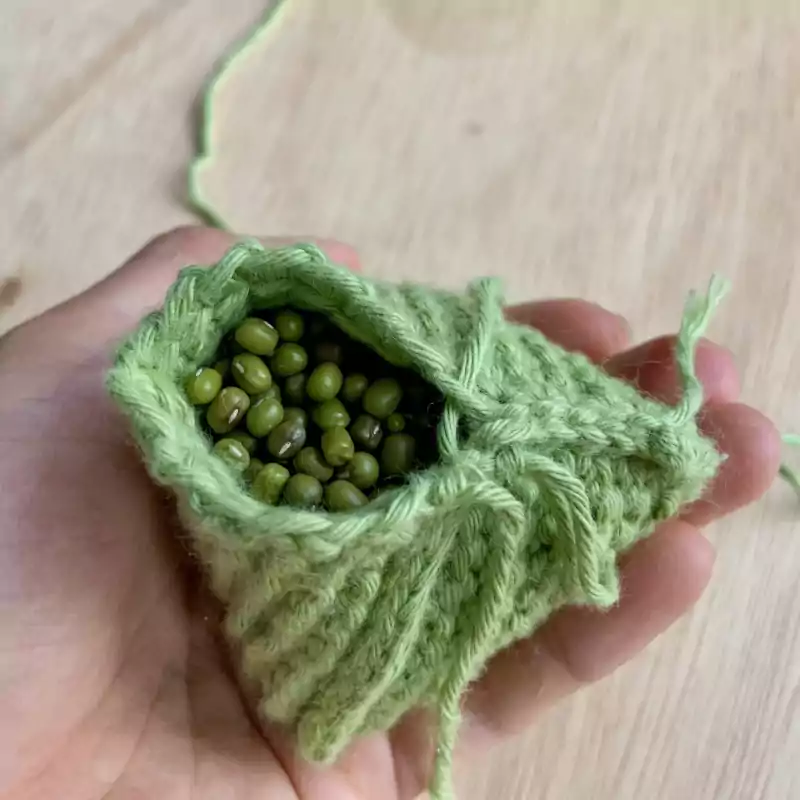
- A filling of your choice: beans, peas, rice… We used 40 grams of mung beans. Try not to use any small seeds as they tend to sprout quickly if they get wet!
terms and abbreviations
(abbreviations will be useful for the simplified pattern ⬇️)
- ch = chain, which is yarn over and pull through one loop
- fp = forward pass: when you collect active stitches onto the hook
- rp = return pass: when you work active stitches off your hook
- yo = yarn over
- rep = repeat
- st = stitch
- tog = together
- Tss = Tunisian simple stitch
- sl st = slip stitch, which is yarn over and pull through two loops
detailed pattern
- * photos will have purple highlighted bits with corresponding purple description text to guide you along the way
- * all stitch counts are based on the yarn we mentioned above, you may need to adjust them
- * if you are left-handed: mirror all the steps so that forward pass you work from left to right, and return pass you work from right to left
notes:
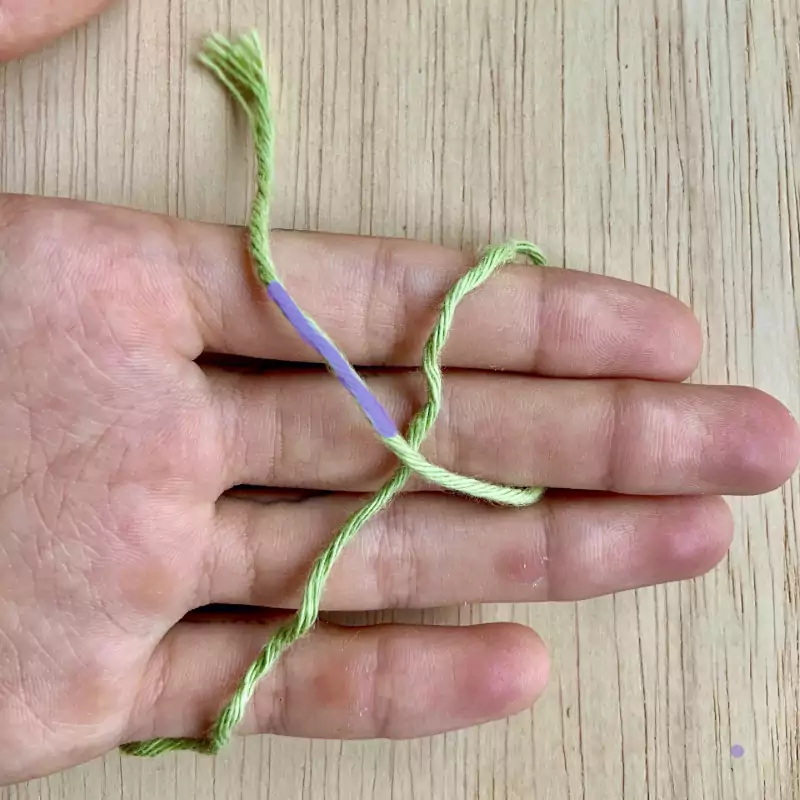
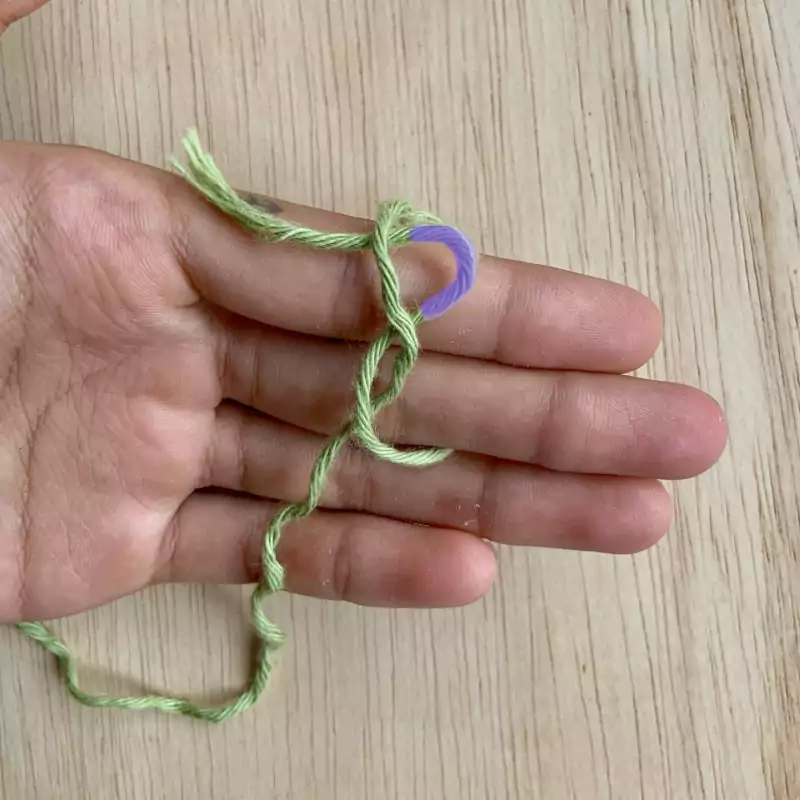
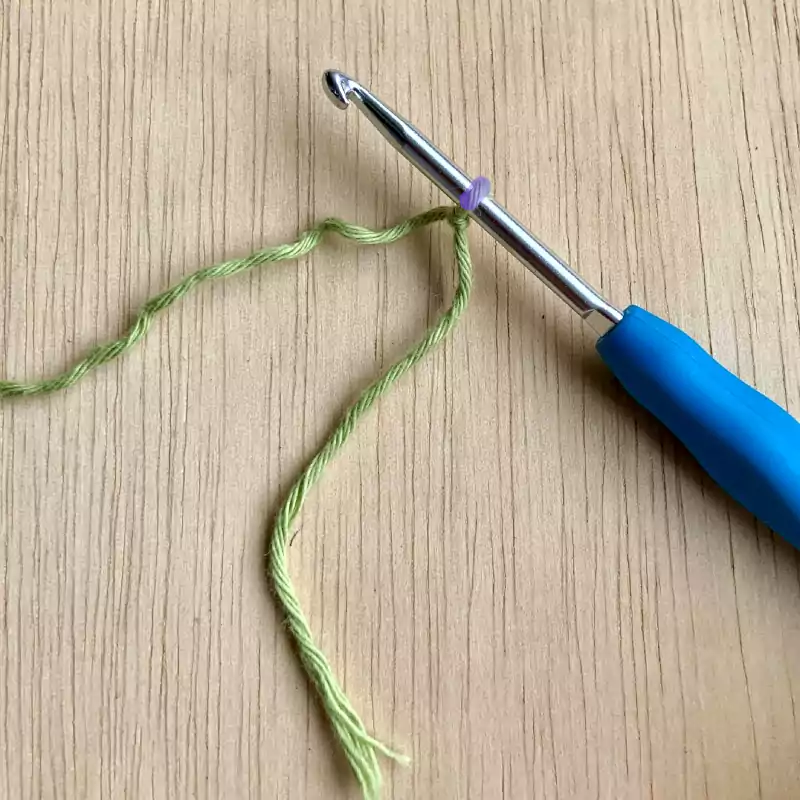
step 1 - slip knot
Create a slip knot and feed the hook through the loop.
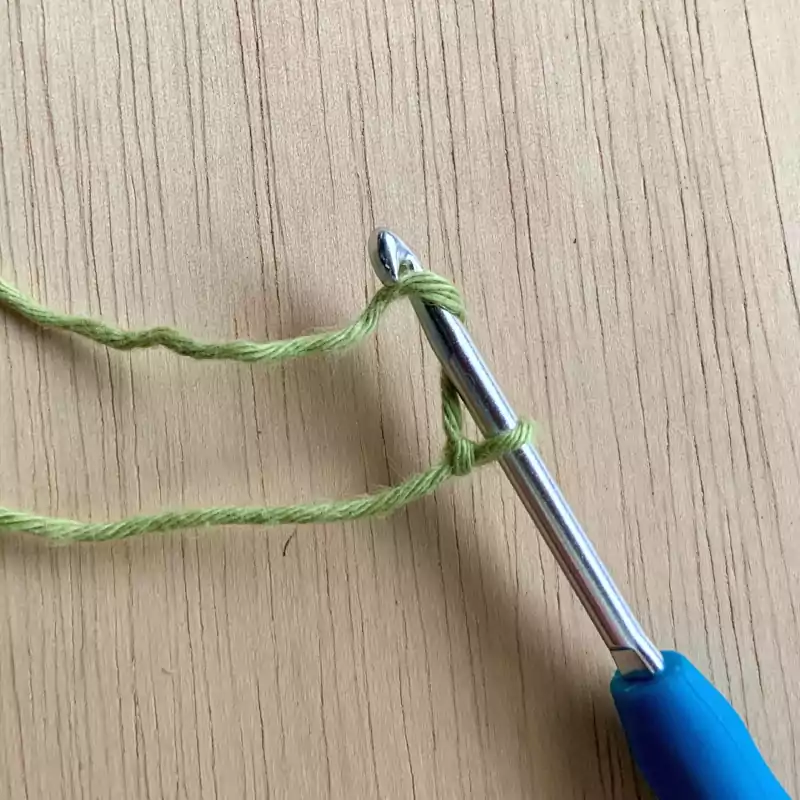
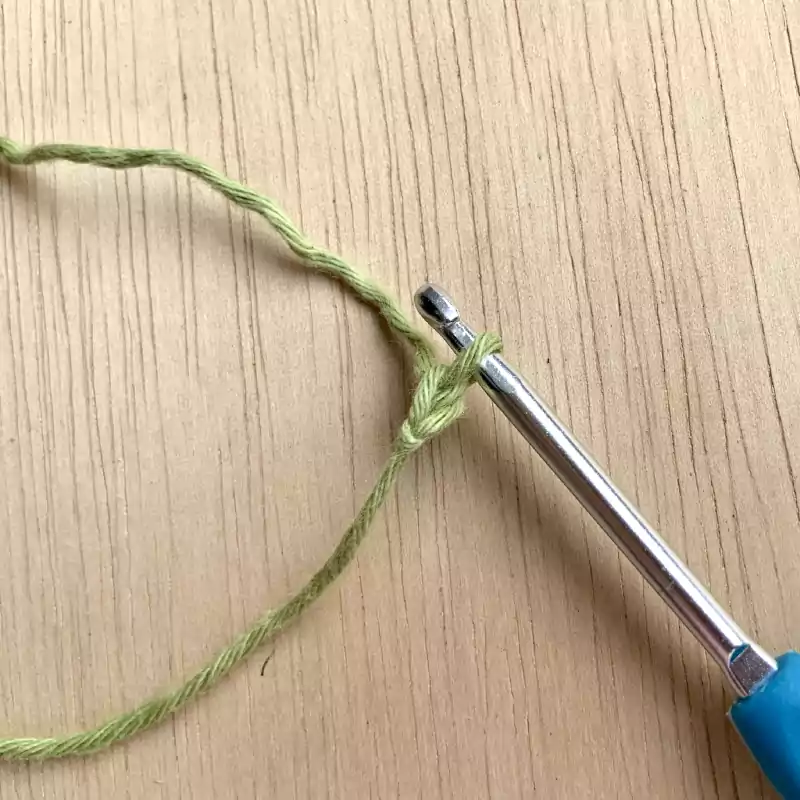
step 2 - chain stitch
Yarn over the hook and pull through to create a chain stitch. Complete a total of 14.
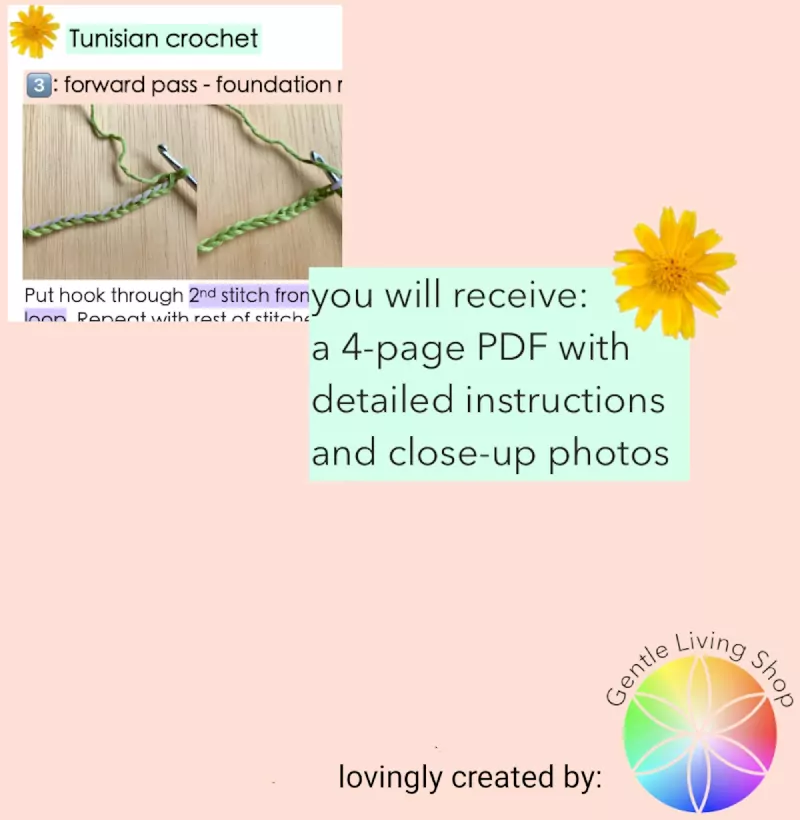
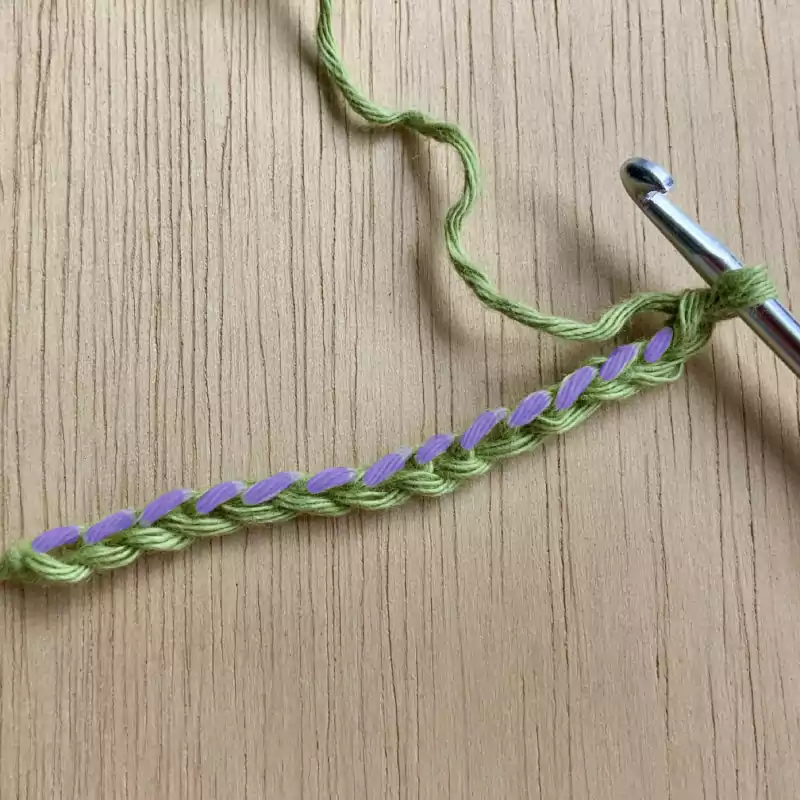
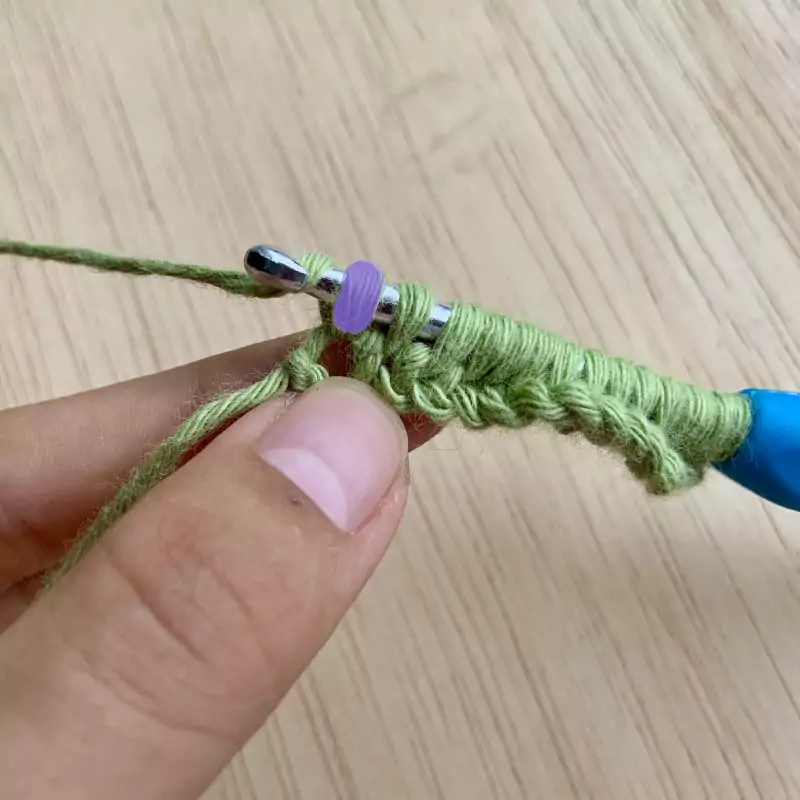
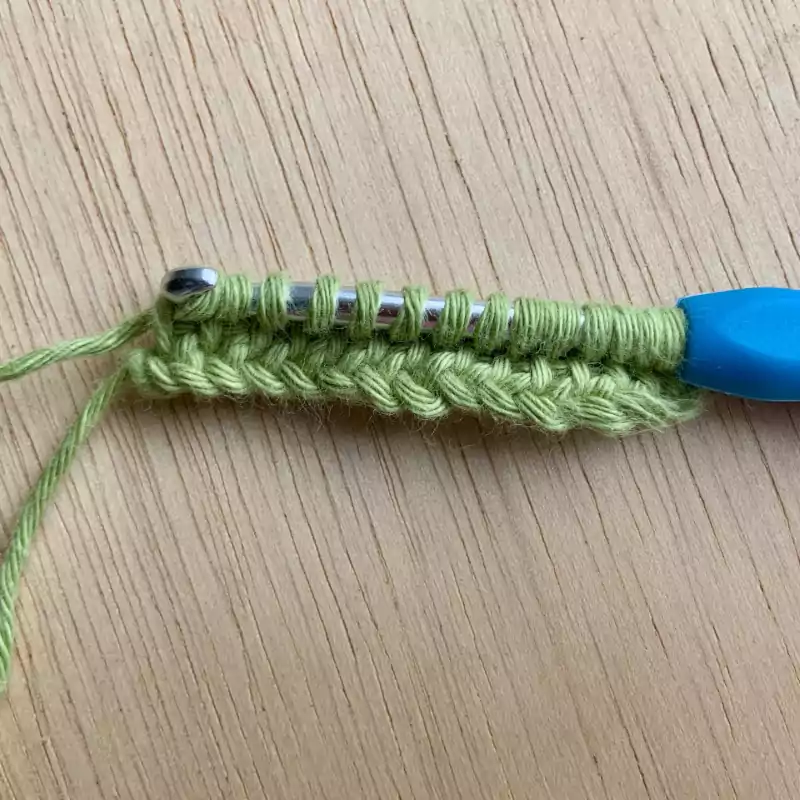
step 3 - forward pass – foundation row
Put hook through 2nd stitch from hook, yarn over and pull through only one loop. Repeat with rest of stitches, end with a total of 14 loops on hook.
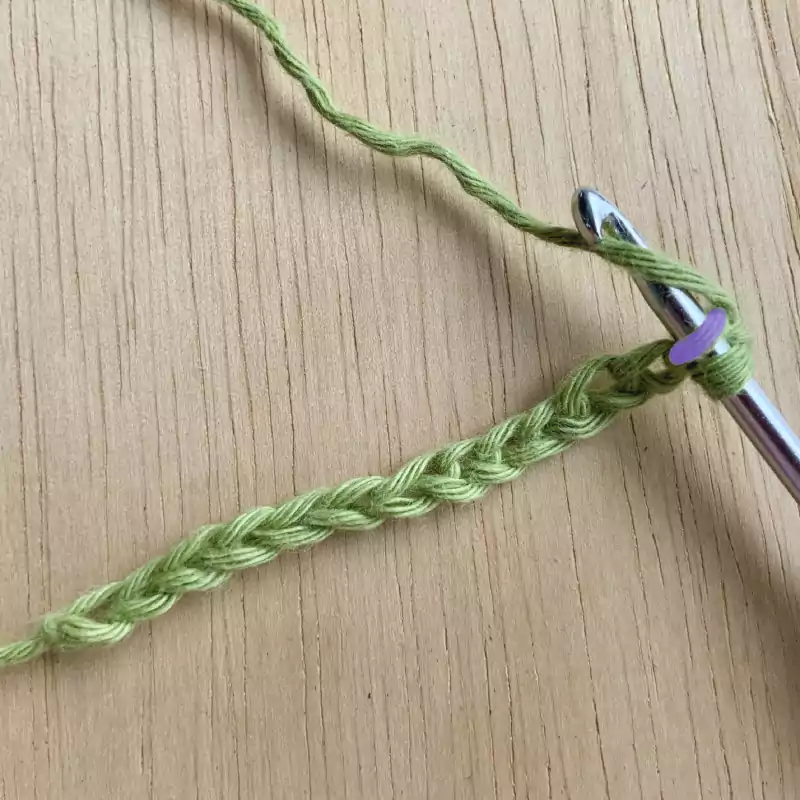
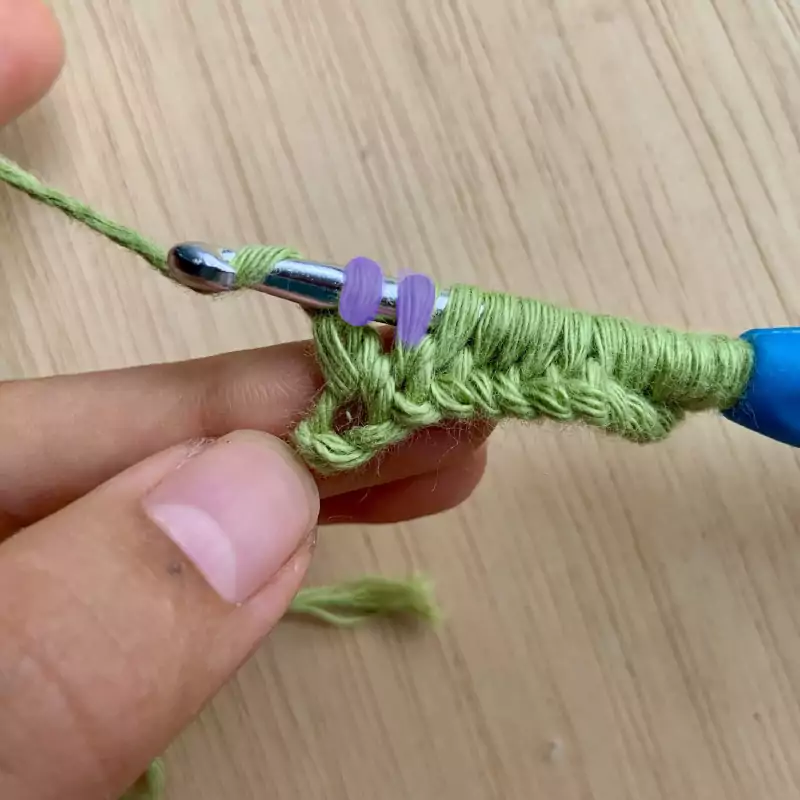
step 4 - return pass – foundation row
Yarn over and pull through one loop to create a chain. Yarn over and pull through two loops for rest of the stitches.
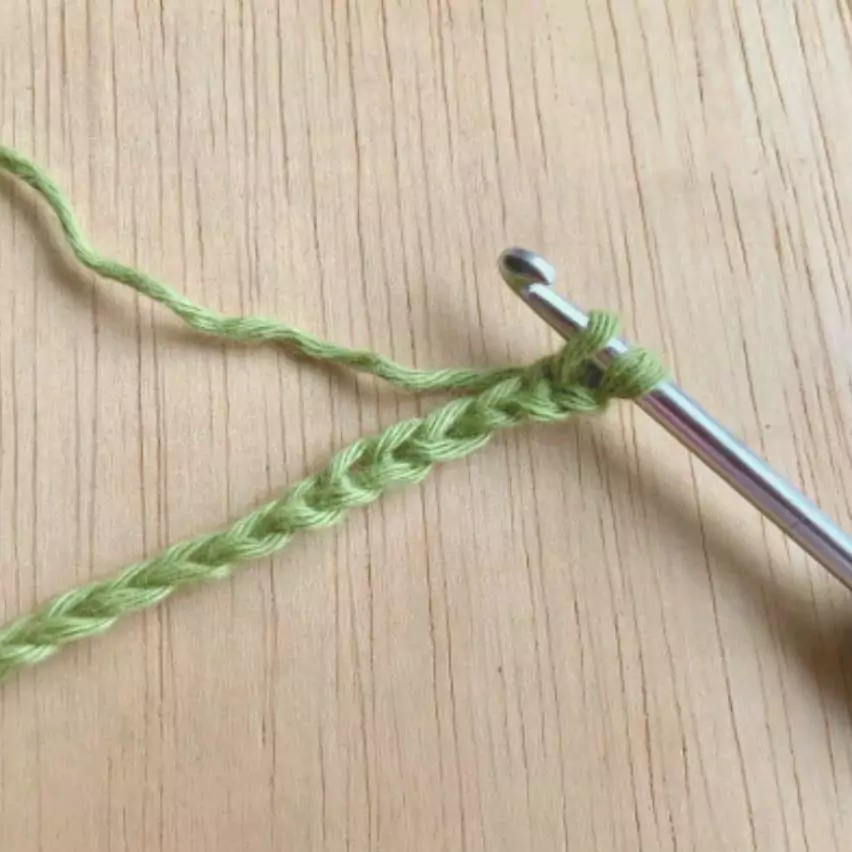
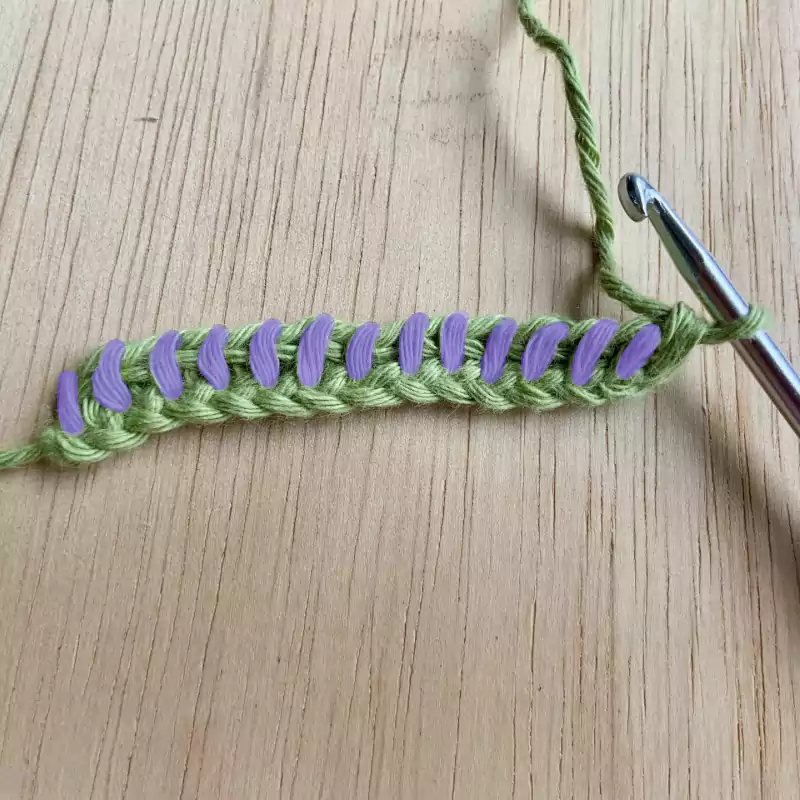
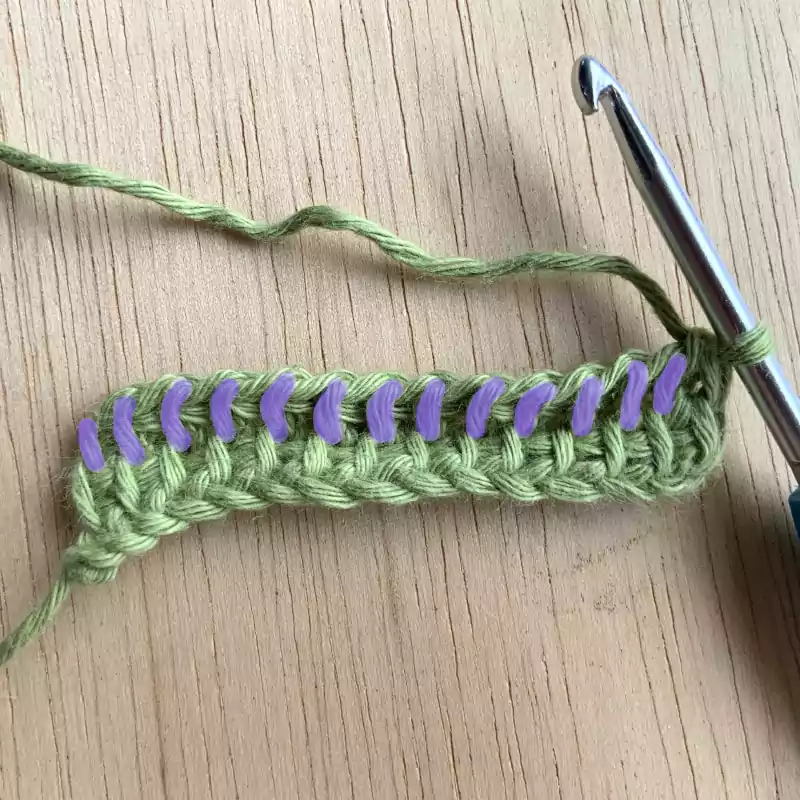
step 5 - forward pass & return pass – Tunisian simple stitch
Put hook through the second vertical bar from hook, yarn over and pull through only one loop. Repeat with rest of the vertical bars, end with 14 loops on your hook. Repeat Step 4 for return pass.
♡ This step is where you can experiment with other types of Tunisian crochet stitches, as all previous “casting on” steps are the same. There are Tunisian knit stitch, Tunisian purl stitch… and many more.
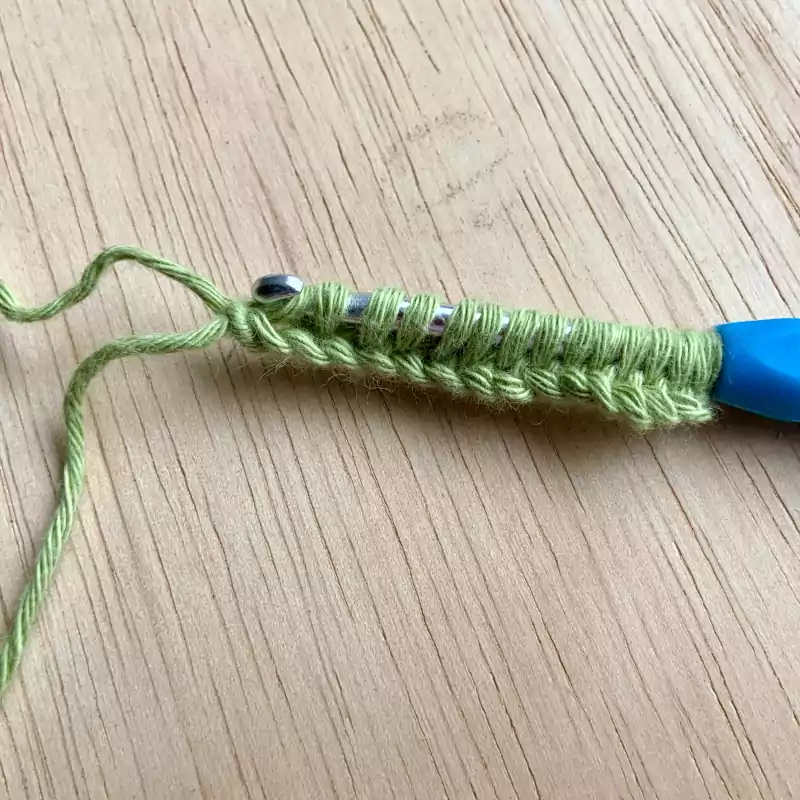
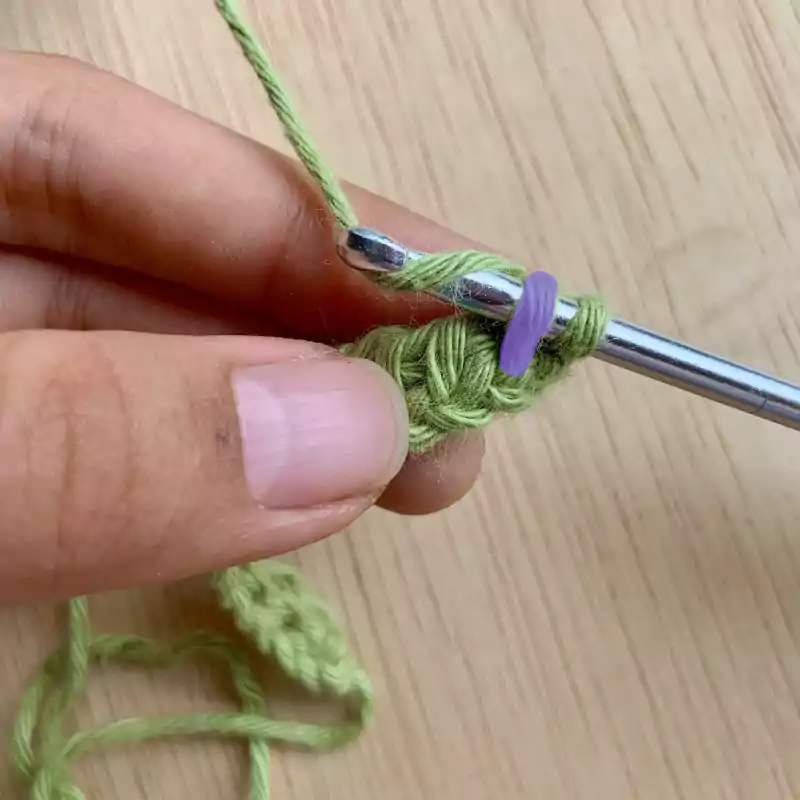
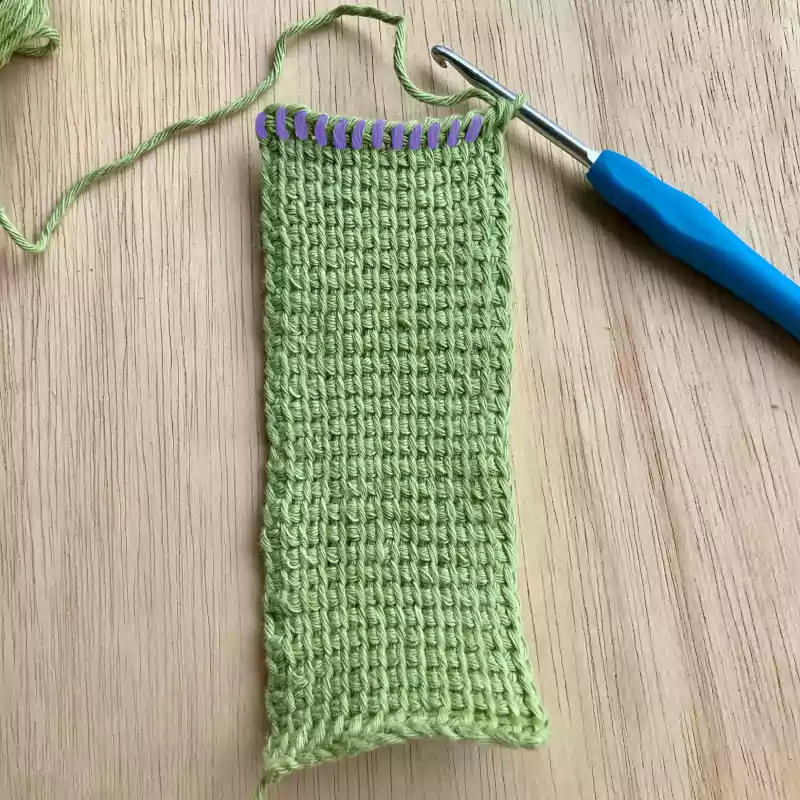
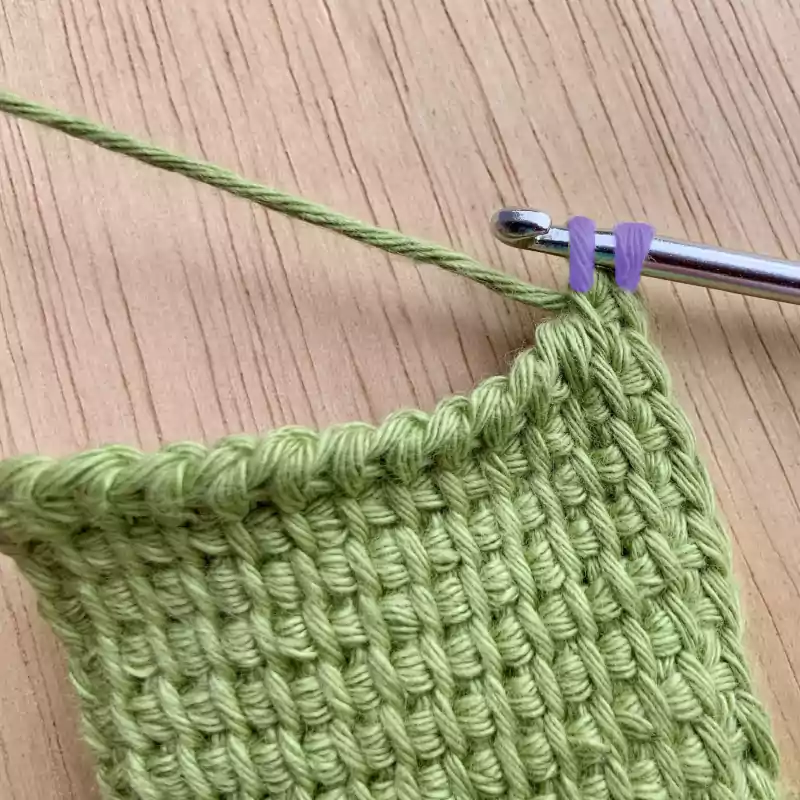
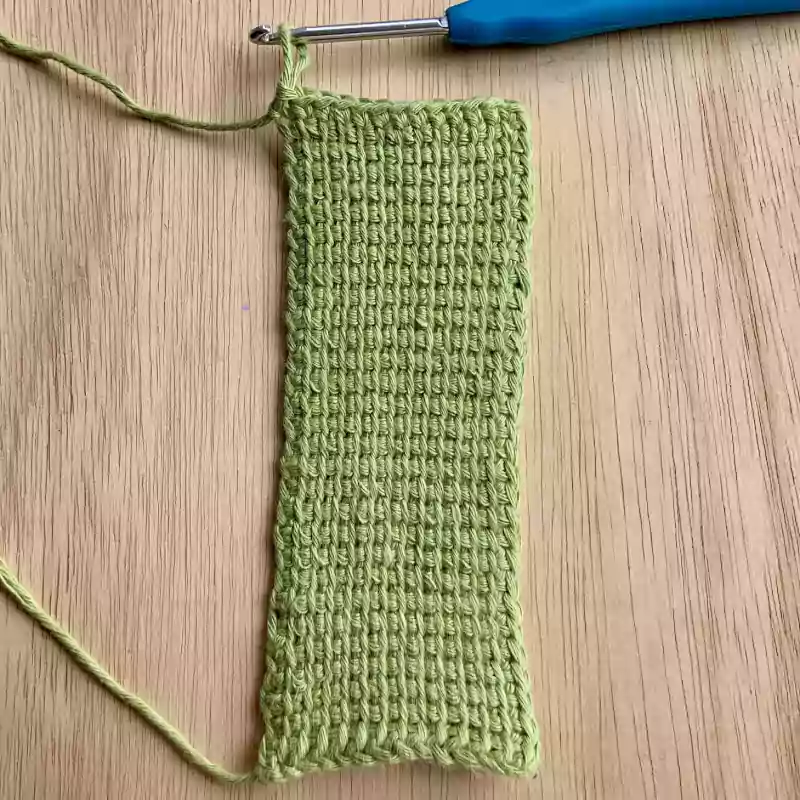
step 6 - repeat, repeat, and cast off!
Repeat Step 5 for a total of 29 rows. The 30th row of forward pass is where we will be casting off. Put hook through the second vertical bar from hook, yarn over and pull through two loops. Repeat till the end of the row and you should have a finished edge!

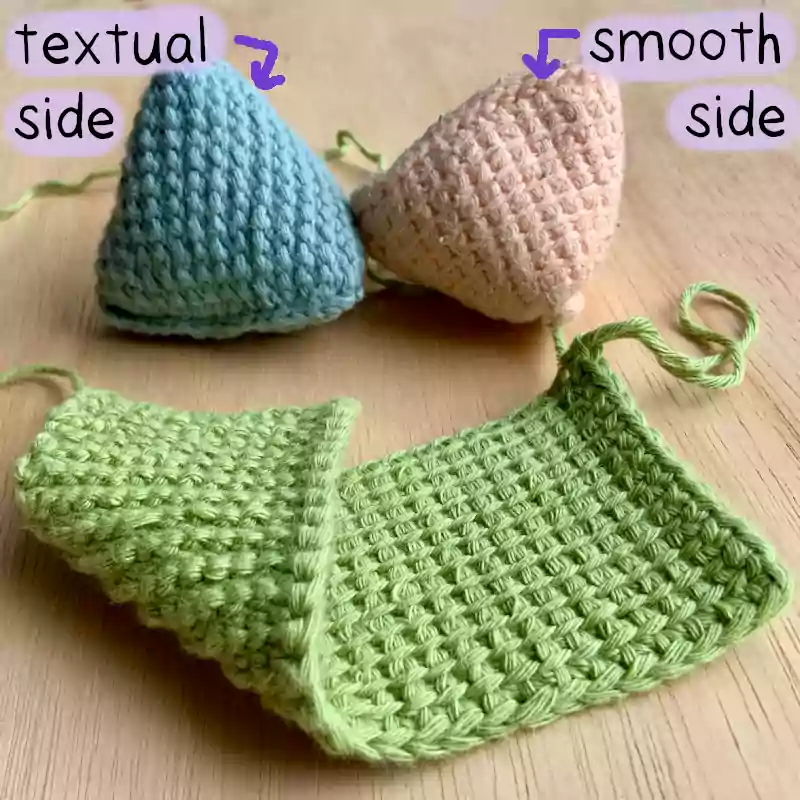
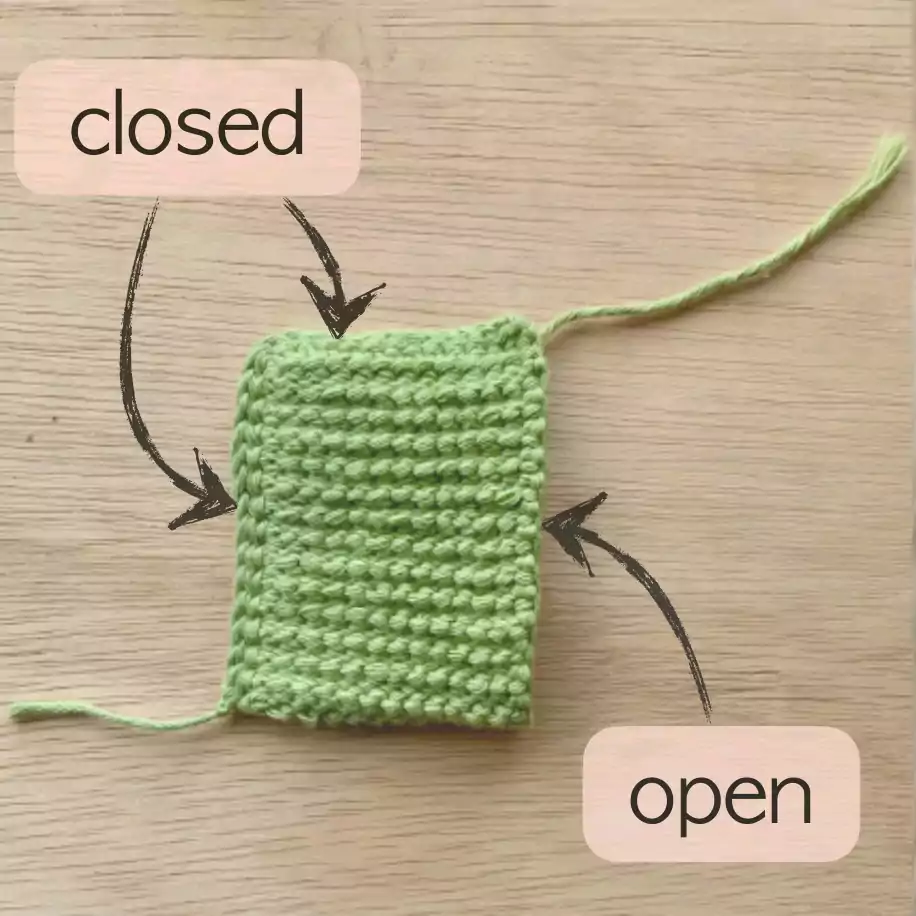
step 7 - creating the shape
♡ The fabric you created has two sides with different textures. You can deicde which side to show on the outside. To have the textual side be shown, stitch with the smooth side facing in.
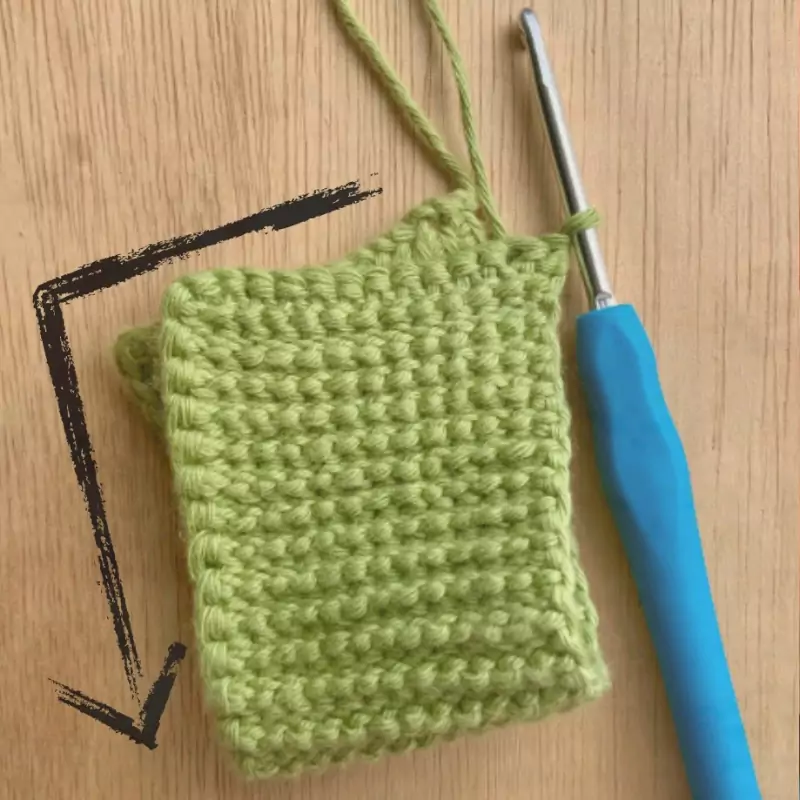
Stitch two sides of the fabric together in direction the arrow on the photo. Put hook through the top loops of fabric and use the yarn over and pull through two loops method to connect them. When you have closed off two sides of the fabric, fasten-off using a chain stitch and cut the end.
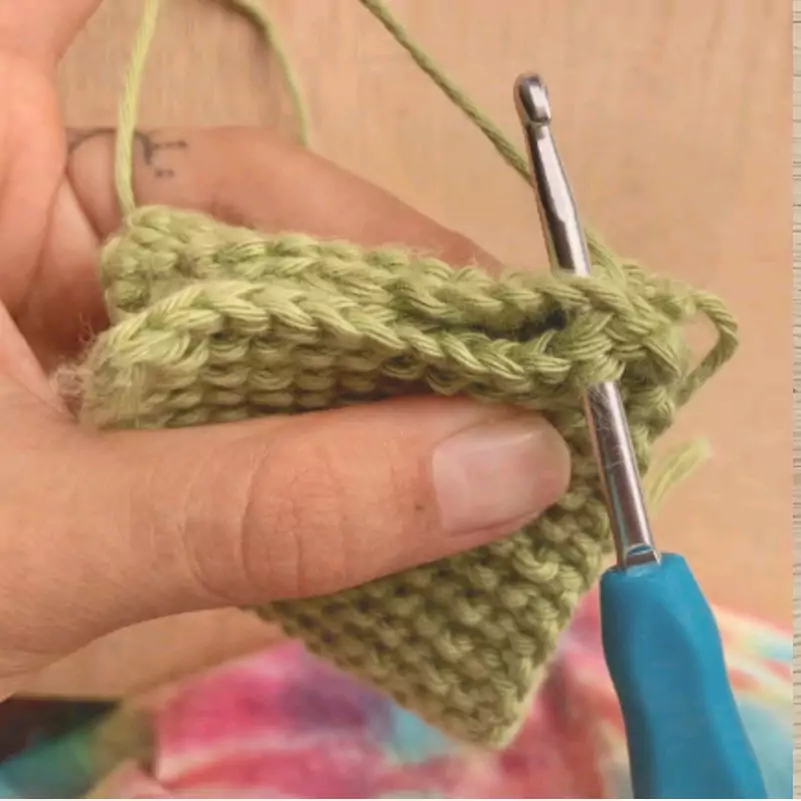
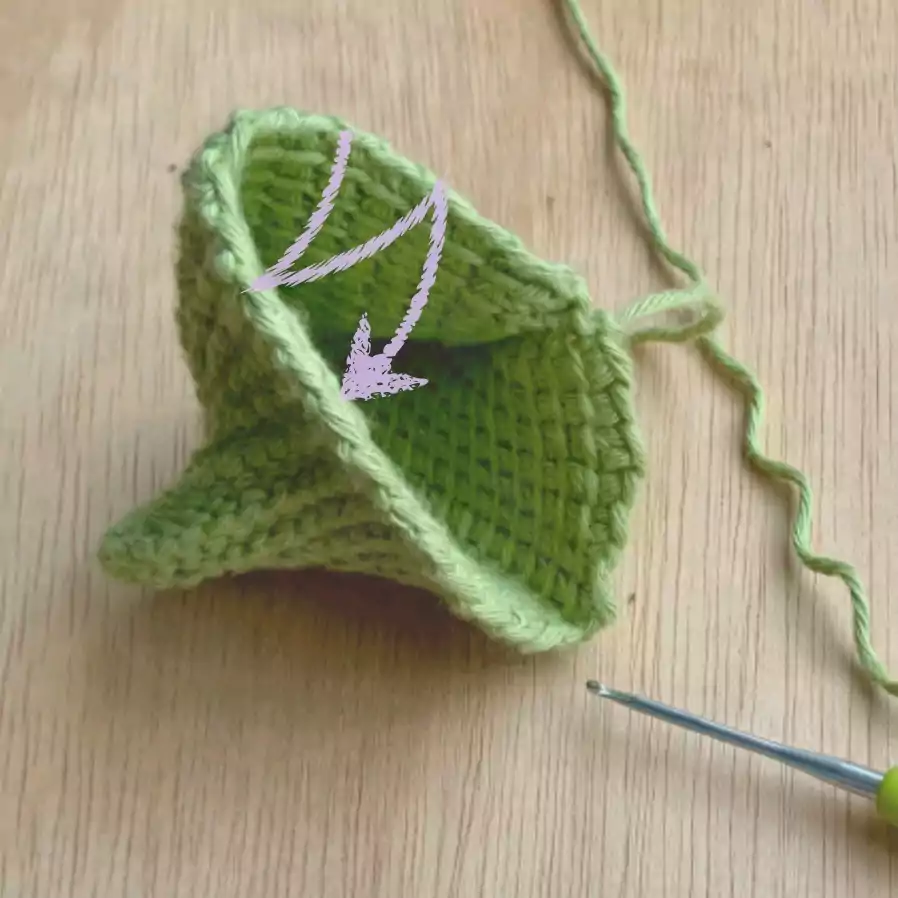
Stitch the last open side following the arrow in photo to create the triangular shape. It may be helpful to use a smaller hook. When you have closed it halfway, place the filling inside the bean bag and seal completely.
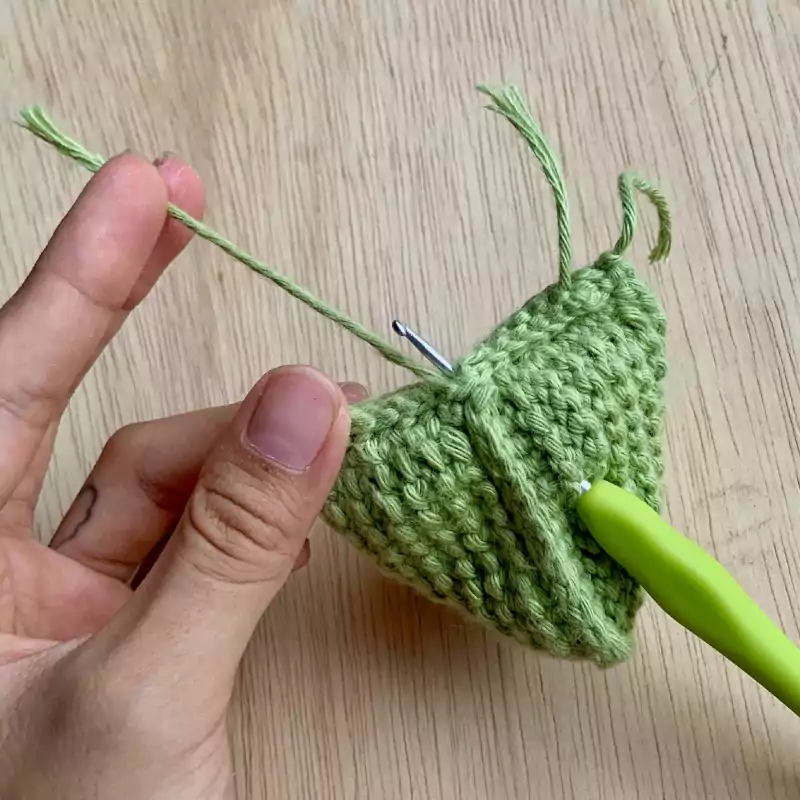
step 8 - finishing off
There may still be gaps in the fabric, which you can remedy by weaving in some yarn using a smaller hook or a tapestry needle. Fasten off with a chain stitch and trim the ends. To conceal the loose ends, poke your smaller hook/tapestry needle through the fabric and pull the yarn to the inside of the bean bag. You are all done!
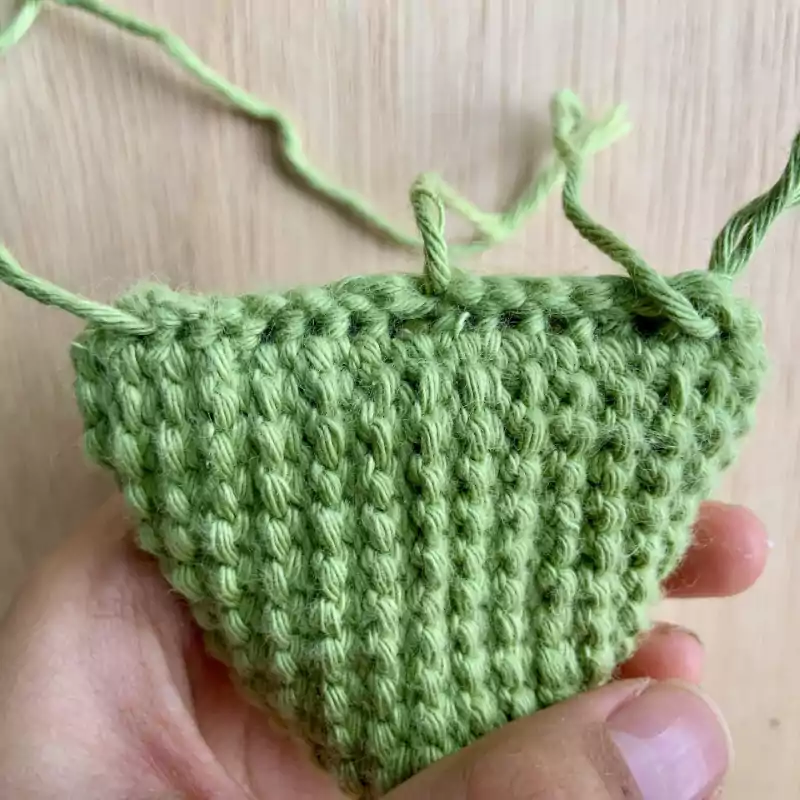
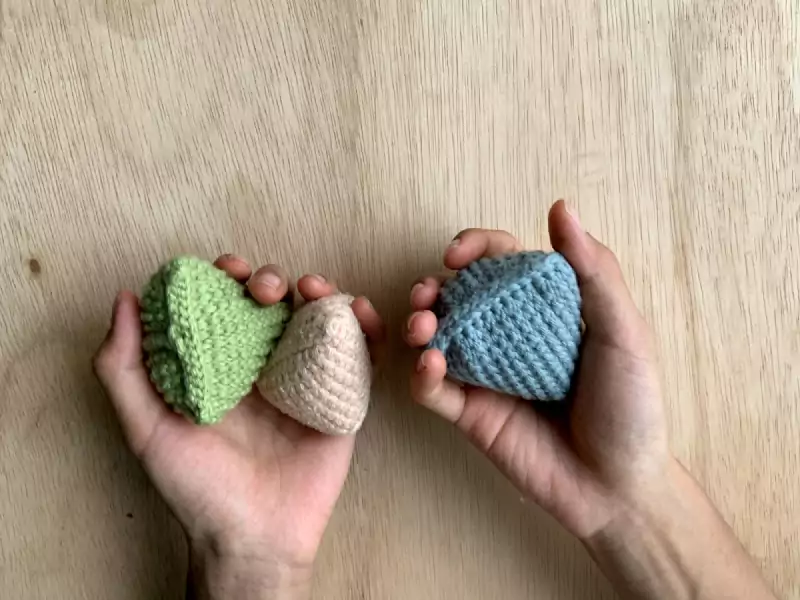
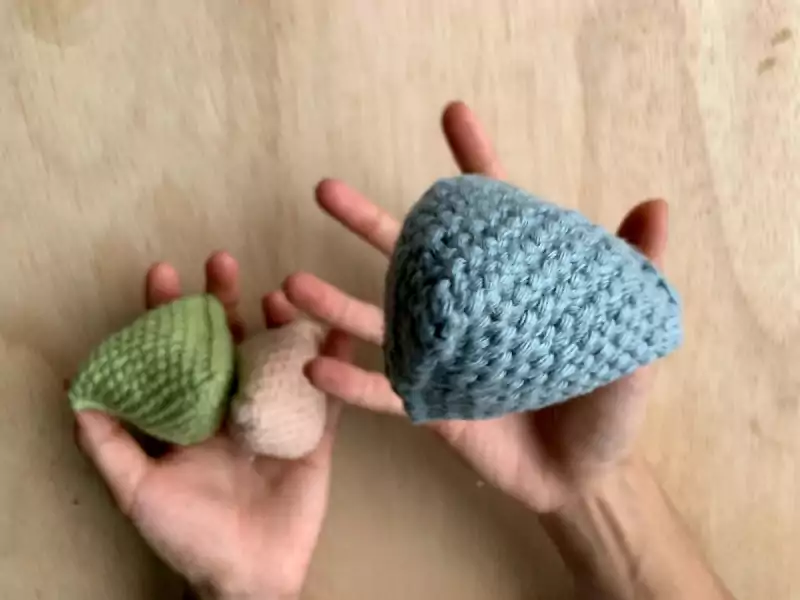
Congratulations on finishing your bean bag!
simplified pattern
- ch 14
- in 2nd ch from hook, yo pull through 1; rep across, with total of 14 loops on hook
- yo pull through 1
- yo pull through 2, rep across
- in 2nd vertical bar from hook, yo pull through 1, rep across, with total of 14 loops on hook
- yo pull through 1
- yo pull through 2, rep across
- rep fp and rp steps 5-7 for 29 rows
- on 30th row, in 2nd vertical bar from hook, yo pull through 2, rep across leaving 1 last loop on hook
- st short sides tog with sl st, continue to st long side tog leaving one long side open
- fasten off
- switch to a smaller hook, st last opening tog where seam is perpendicular to seams on the bottom to create a triangular shape
- after halfway, fill with choice of filling
- seal completely
- if there are still gaps in fabric, use smaller hook/tapestry needle to weave yarn through
- fasten off with ch1 and pull loose ends into the bean bag
fp – foundation row
rp – foundation row
fp & rp – Tss
PDF pattern download