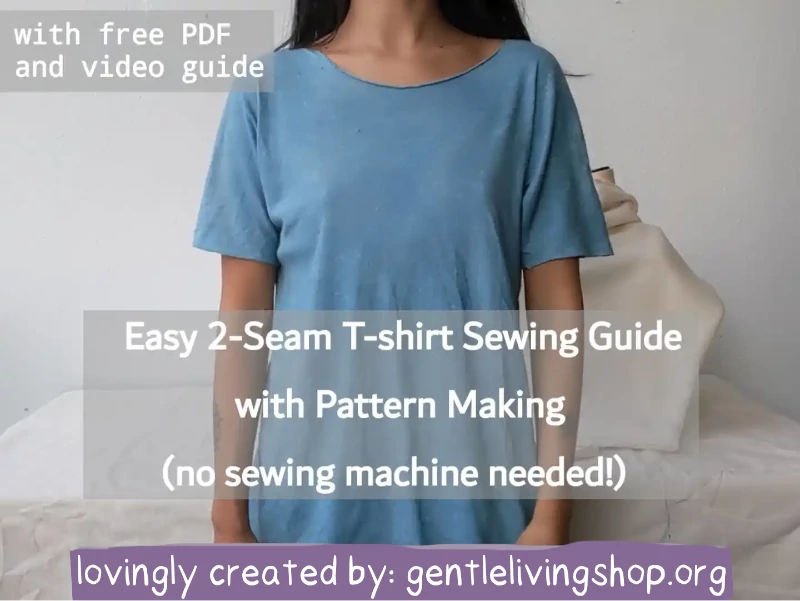
漢服短袖T恤剪裁教學 – 可不用縫紉機
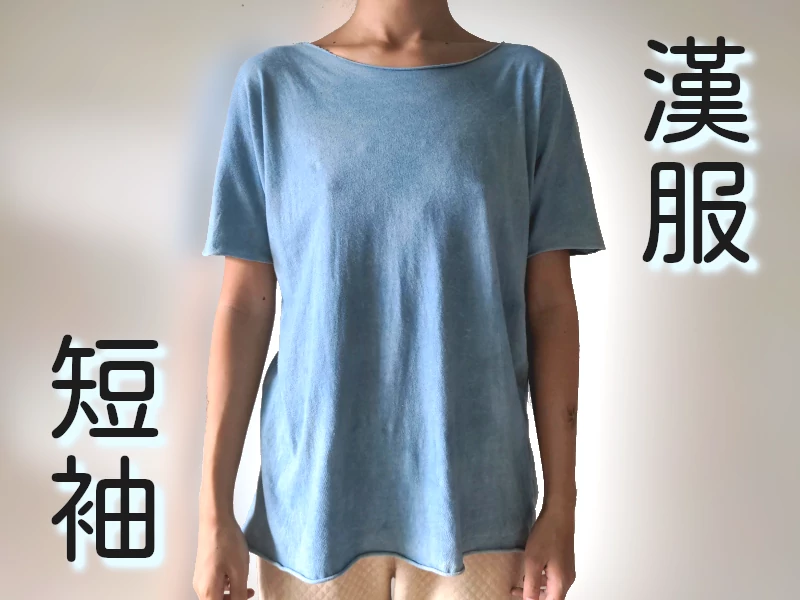
漢服的剪裁採用平面打板, 用這個方式製作T恤既易懂又省時間 – 它只有兩個需要縫合的地方! 如果你有被一般t恤的袖子打板難道, 那這個教程可以解除你的憂愁😄
視頻教程(字幕)
或在YouTube上觀看。
工具和材料
- 皮尺
- 筆
- 布料 (有無彈性都可)
- 布用筆
- 布用剪刀
- 針和線或縫紉機
- (可選)打印PDF教程
難度:適合初學者
所需時間:一小時左右
一般t恤 vs 漢服t恤
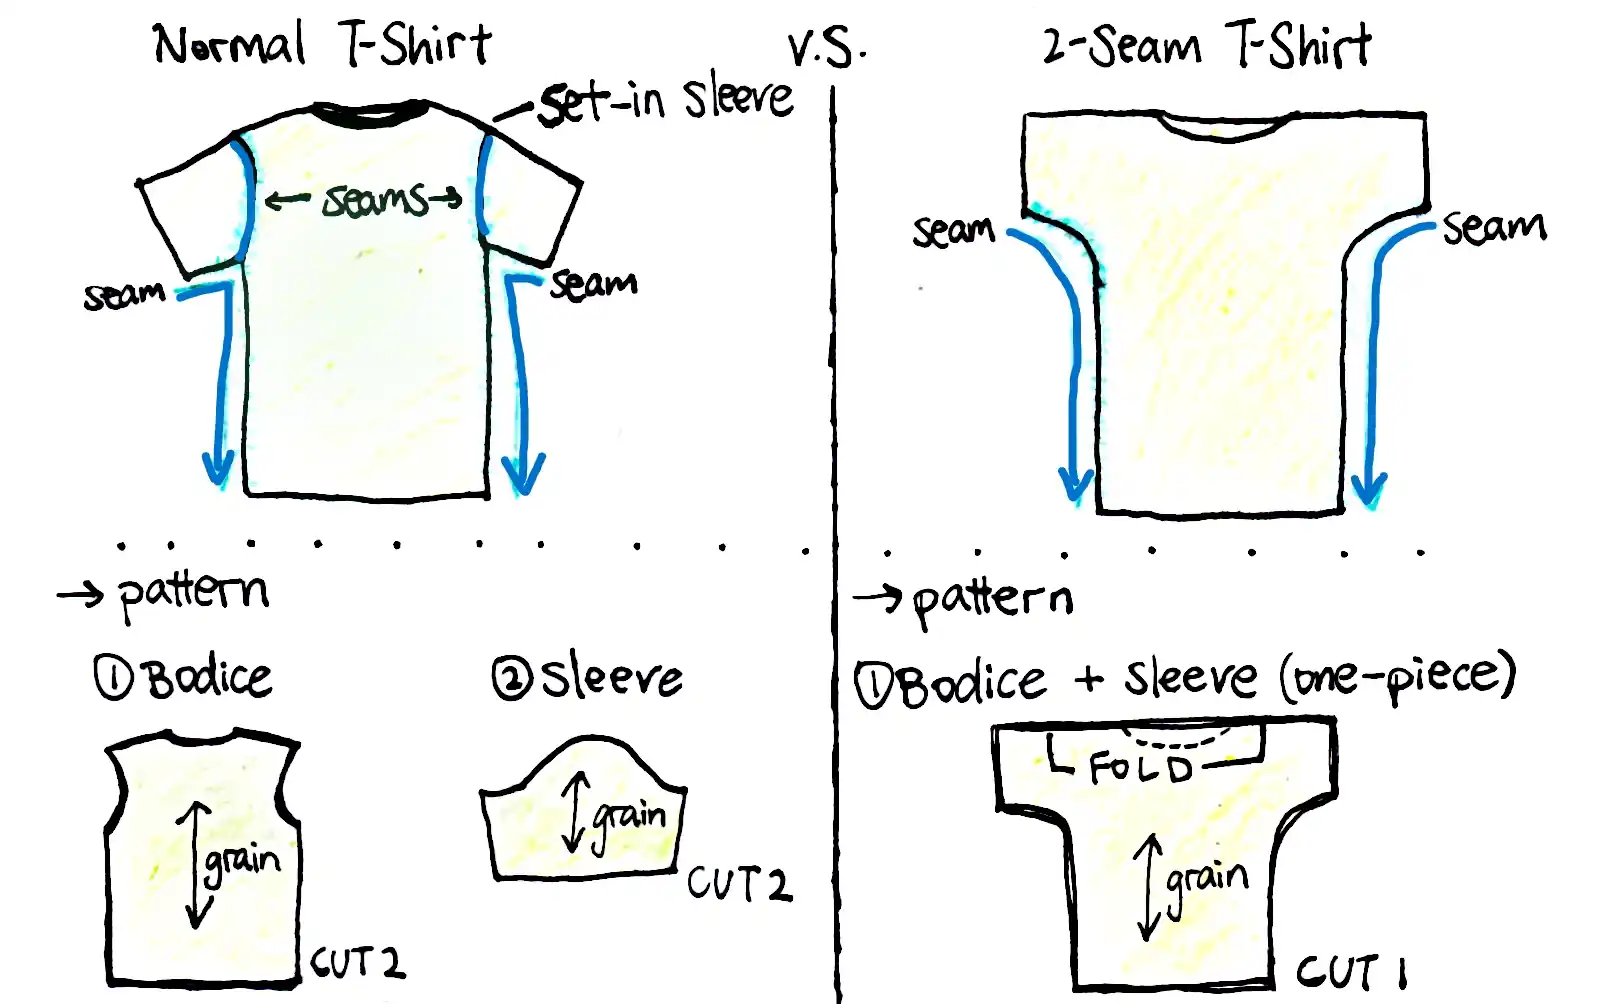
| 一般t恤 | 漢服t恤 | |
|---|---|---|
| 打板 | 立體打板 | 平面打板 |
| 袖型 | 標準肩袖 | 漢服袖/蝙蝠袖 |
| 縫合處 | 4 | 2 |
| 紙樣 | 2片+ (上身, 袖) |
1片 (上身+袖合一體) |
| 上身效果 | – 可以比較合身 – 手臂靈活性較小,腋下無多餘的布料 |
– 寬鬆 – 手臂靈活性大但腋下會有多餘的布料 |
兩種t恤雖然不同,但不意味着誰勝出一節。重點是對穿者來說哪個更合適。
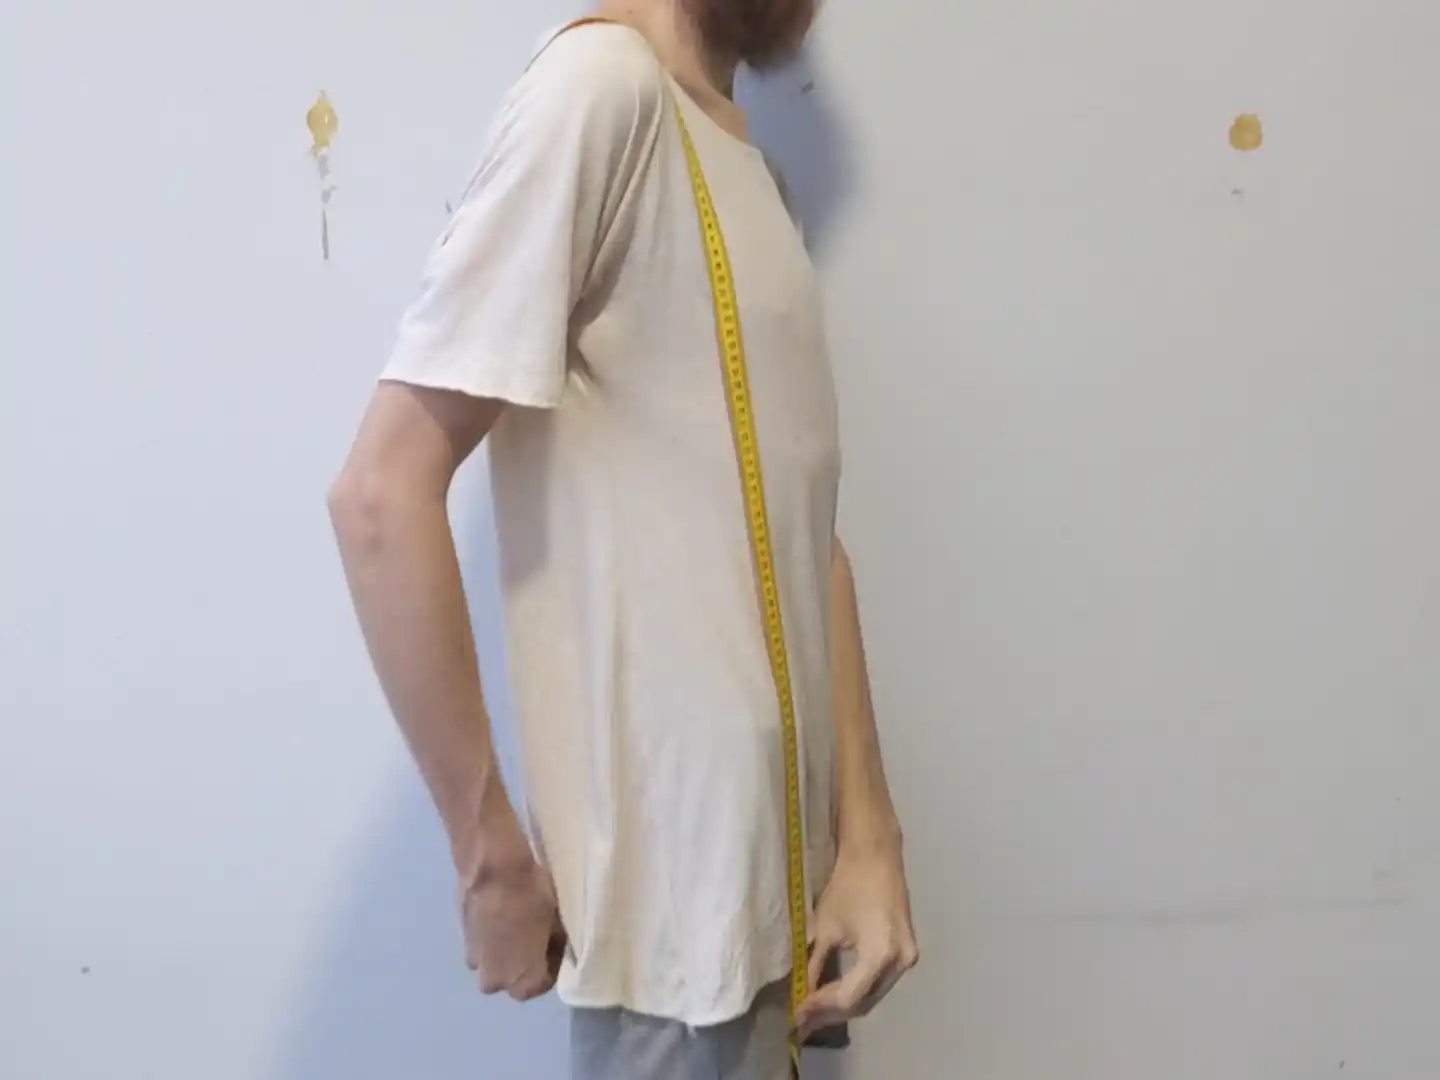
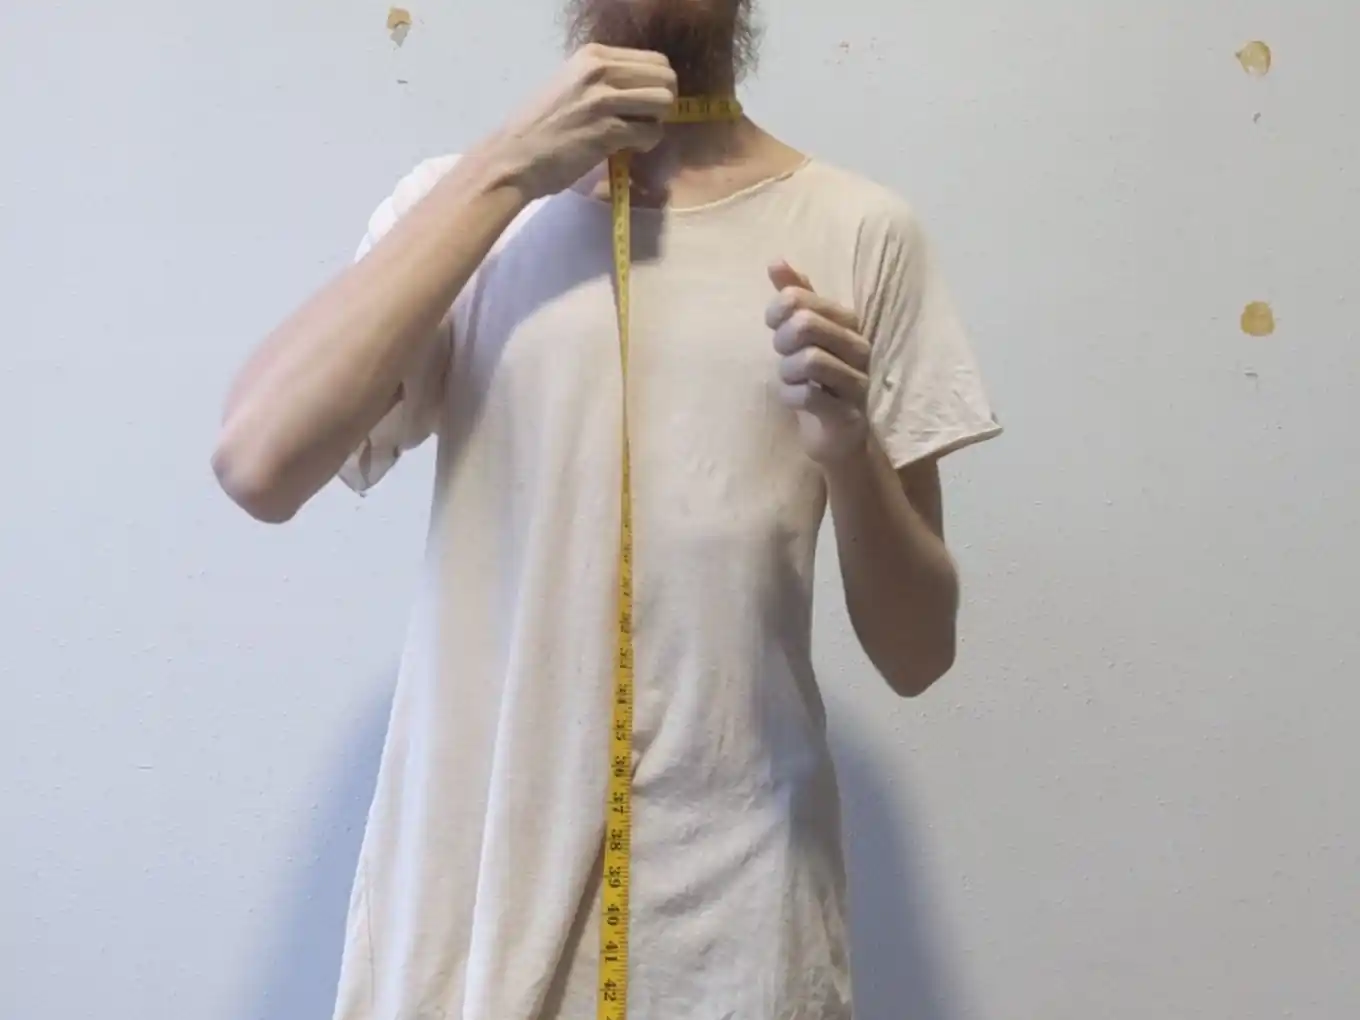
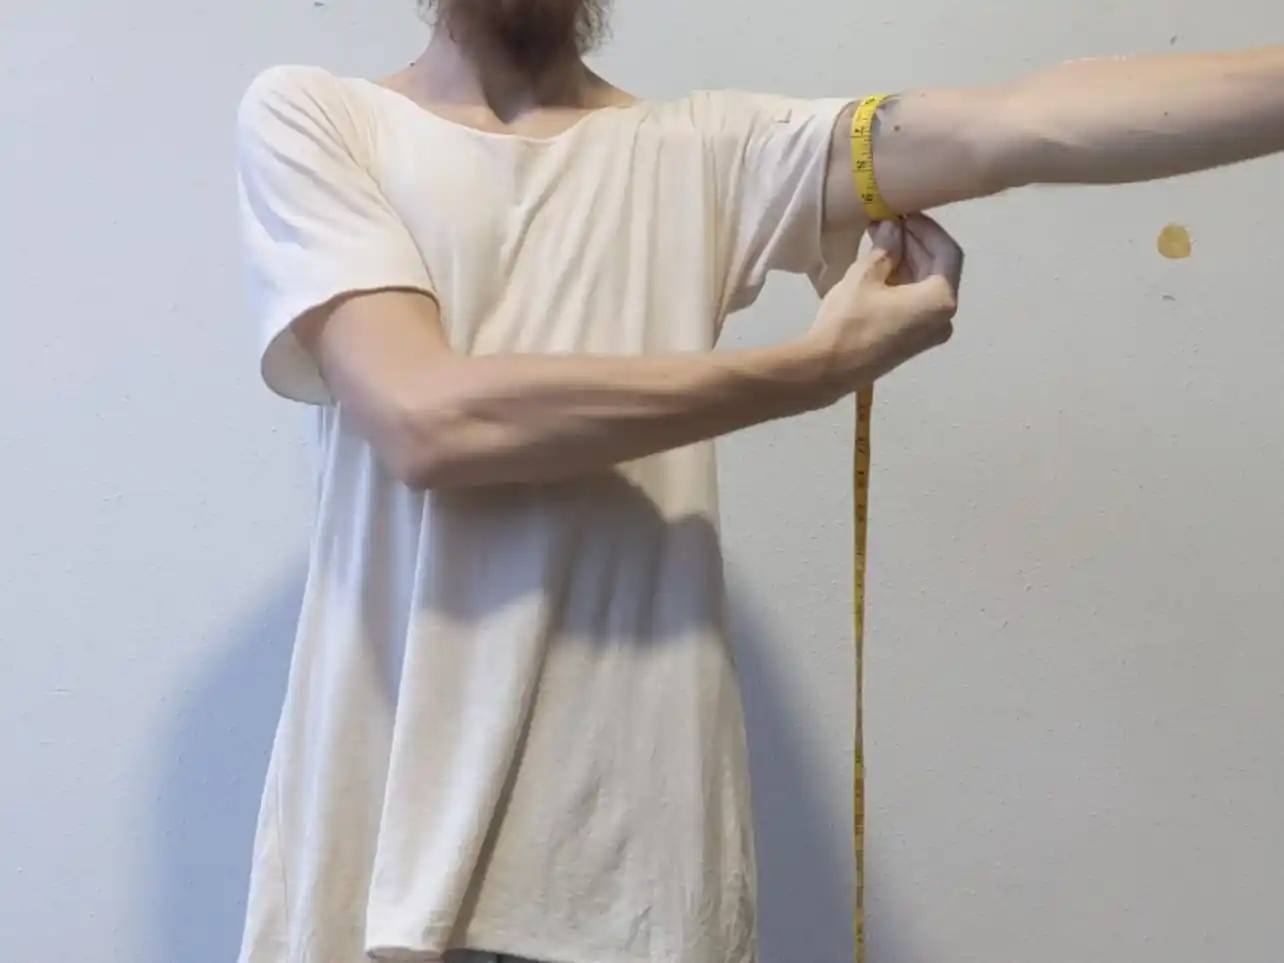
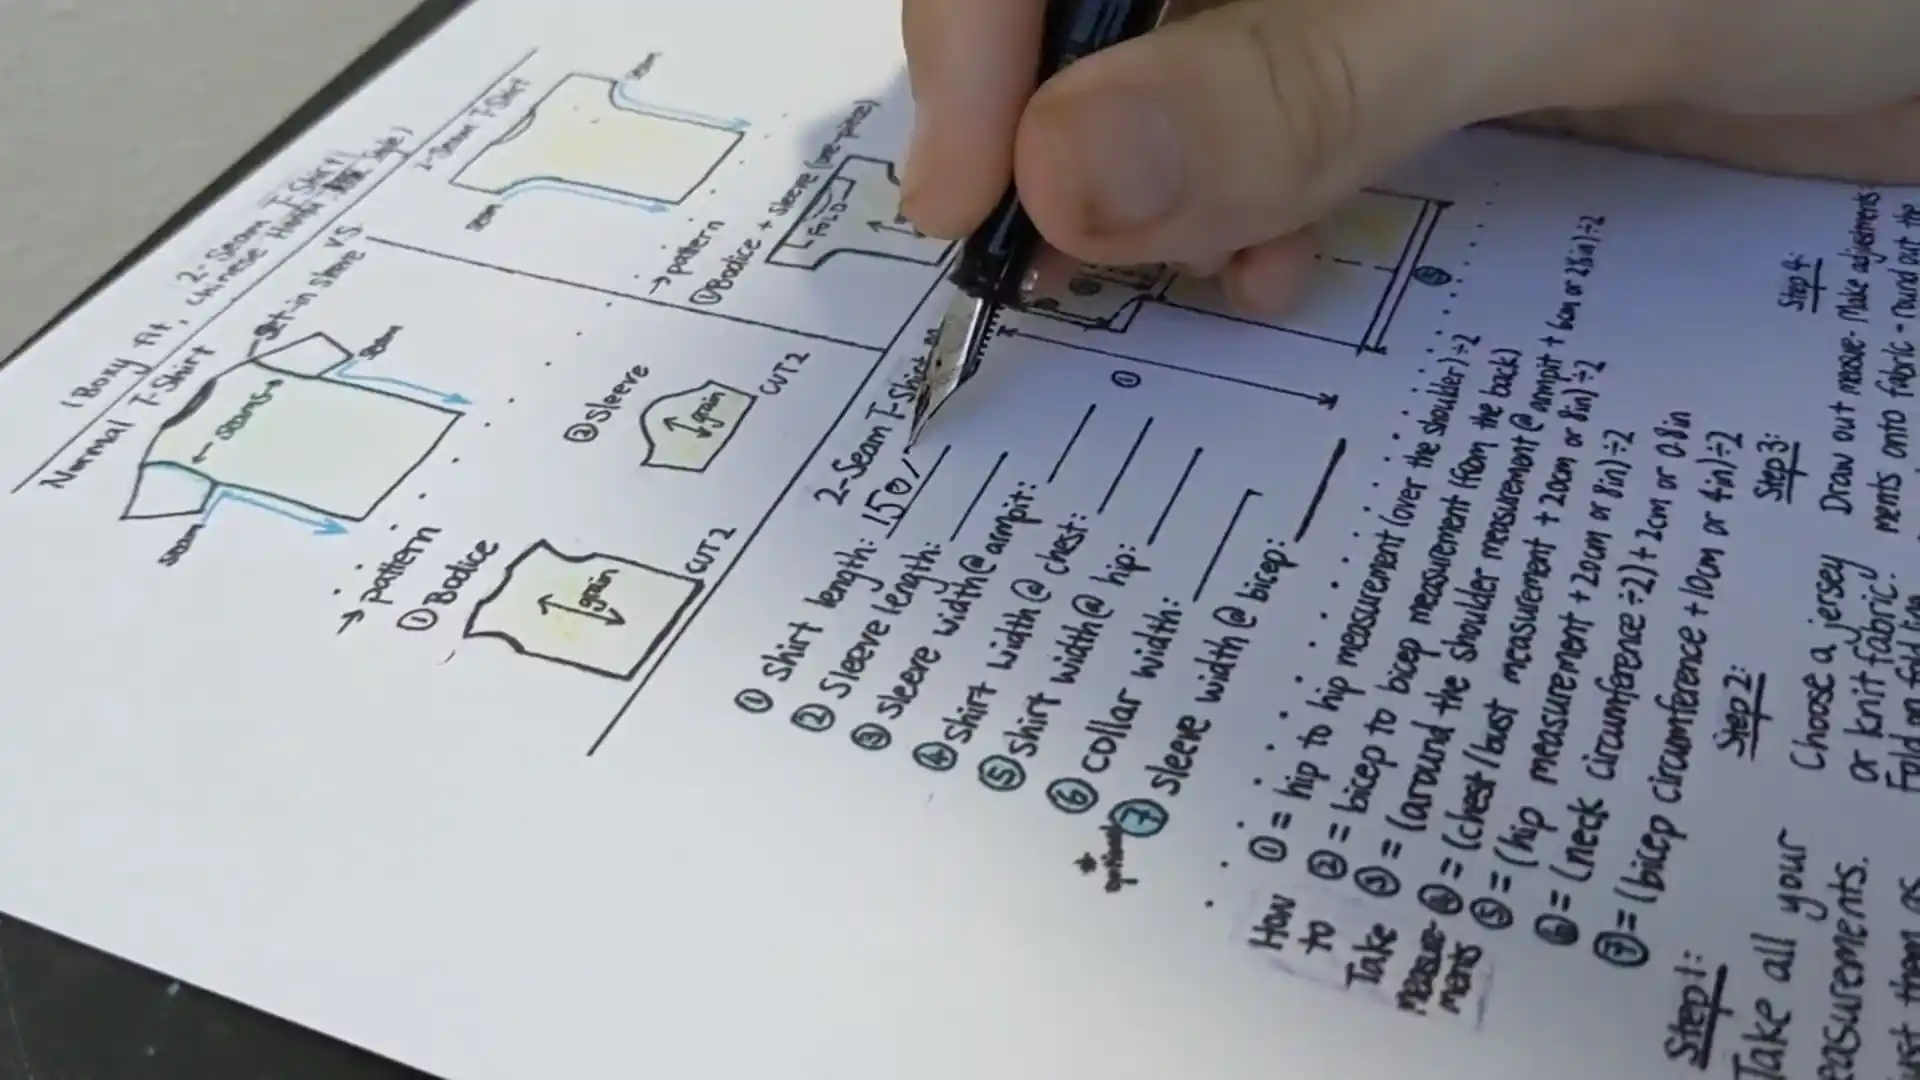
如何量身
測量以下的尺寸,然後用公式計算出最終打板用的尺寸:
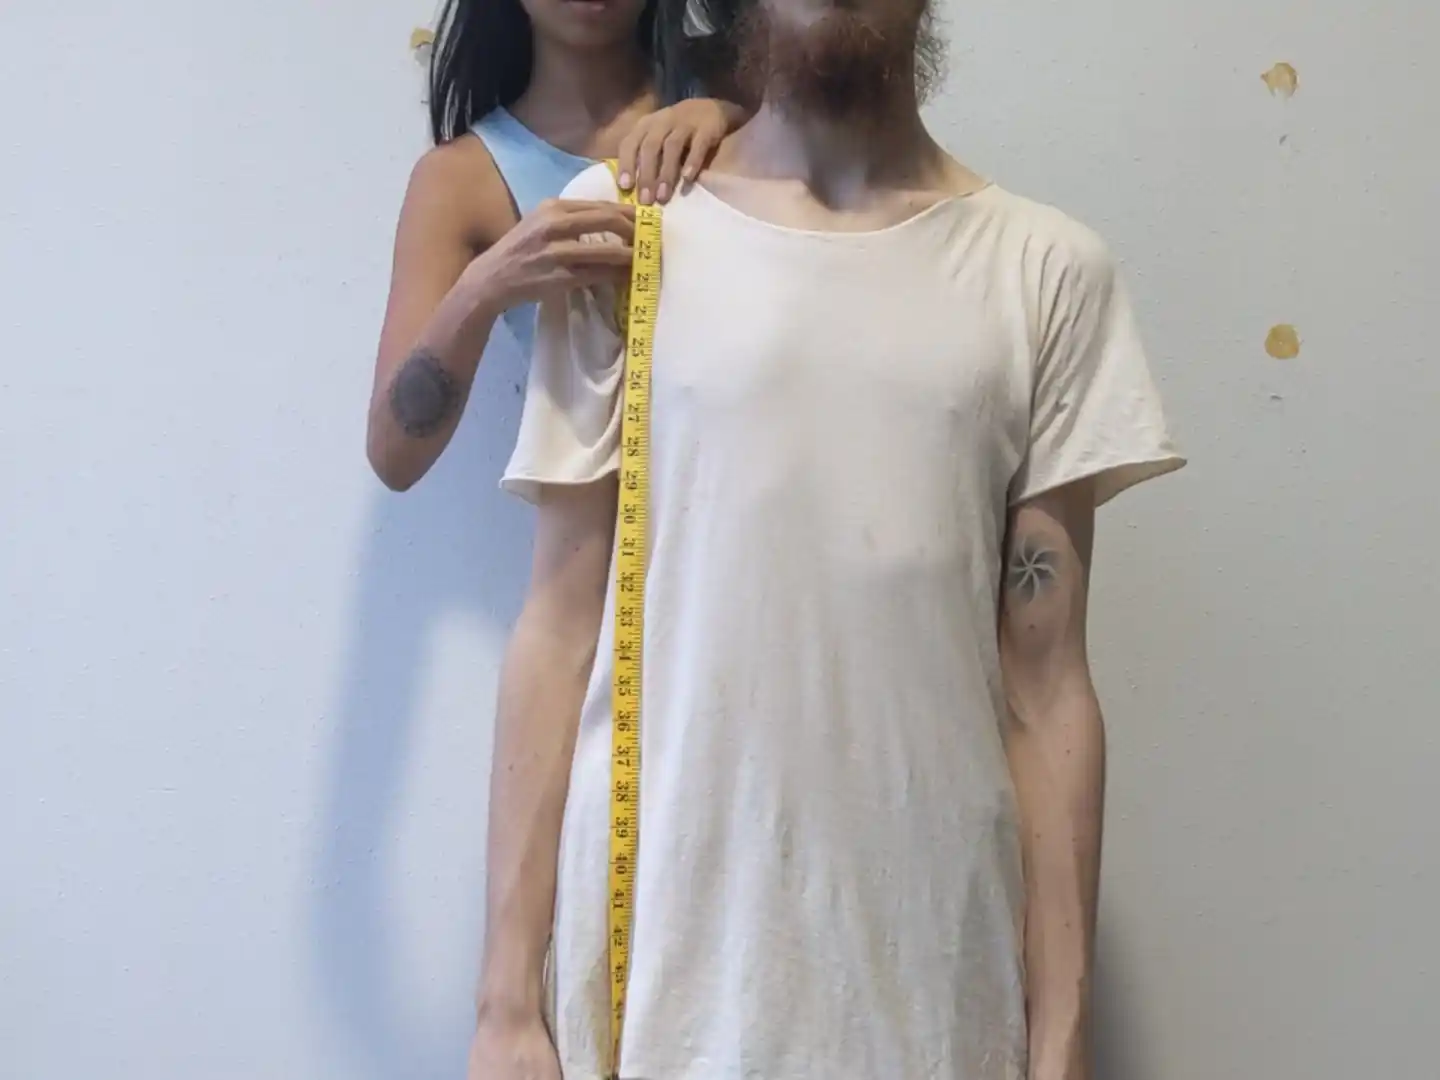
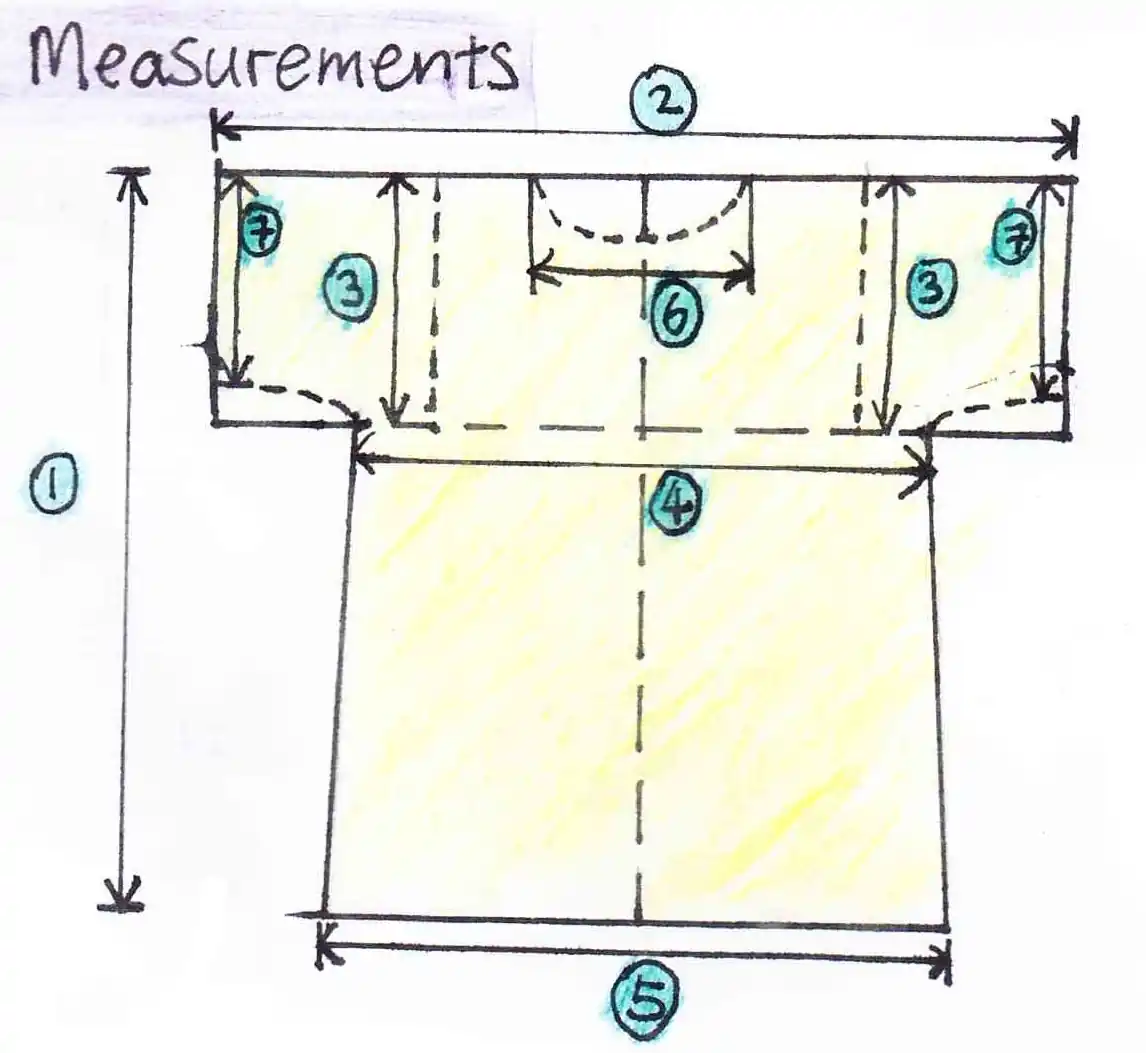
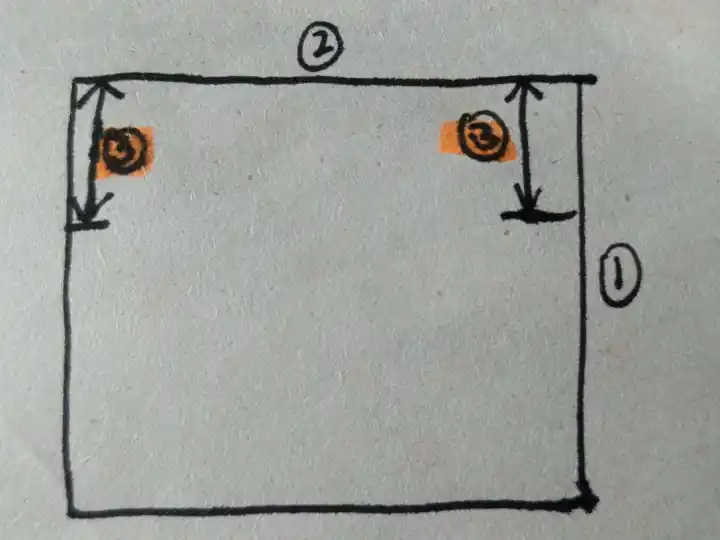
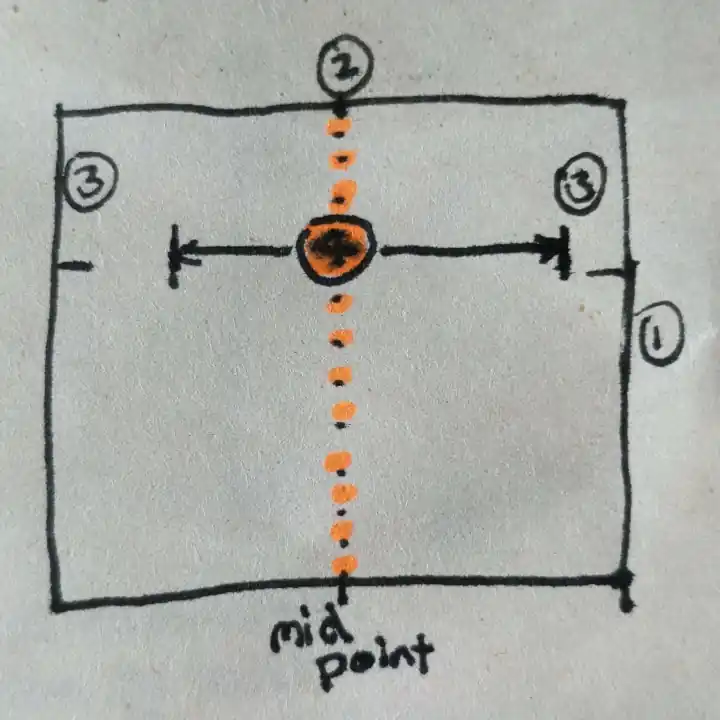
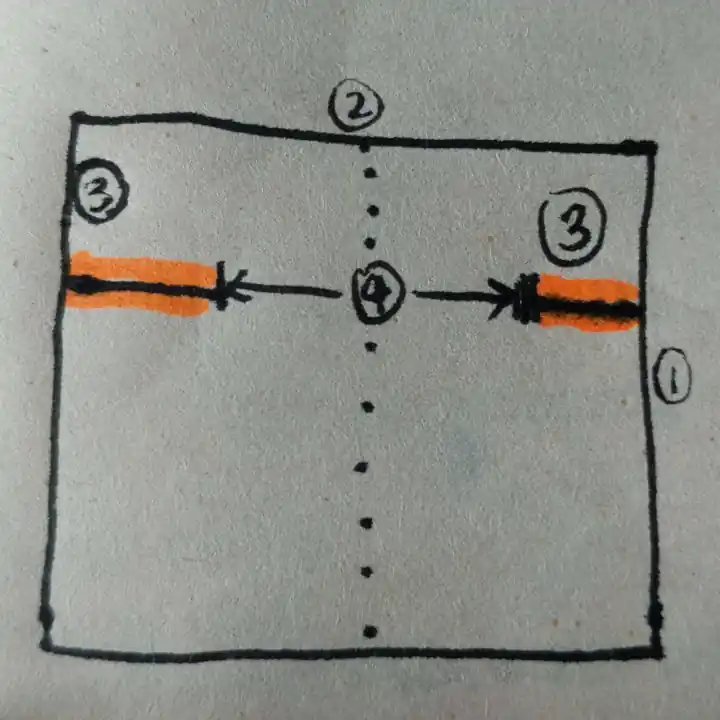
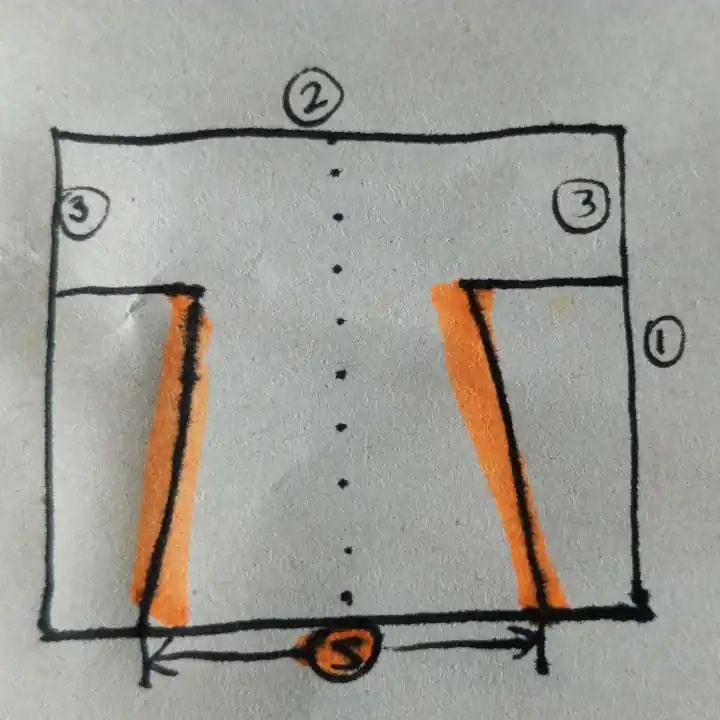
- 衣長 = 臀線至臀線(過肩)÷ 2
- 袖長 = 上臂至上臂(從身後量)
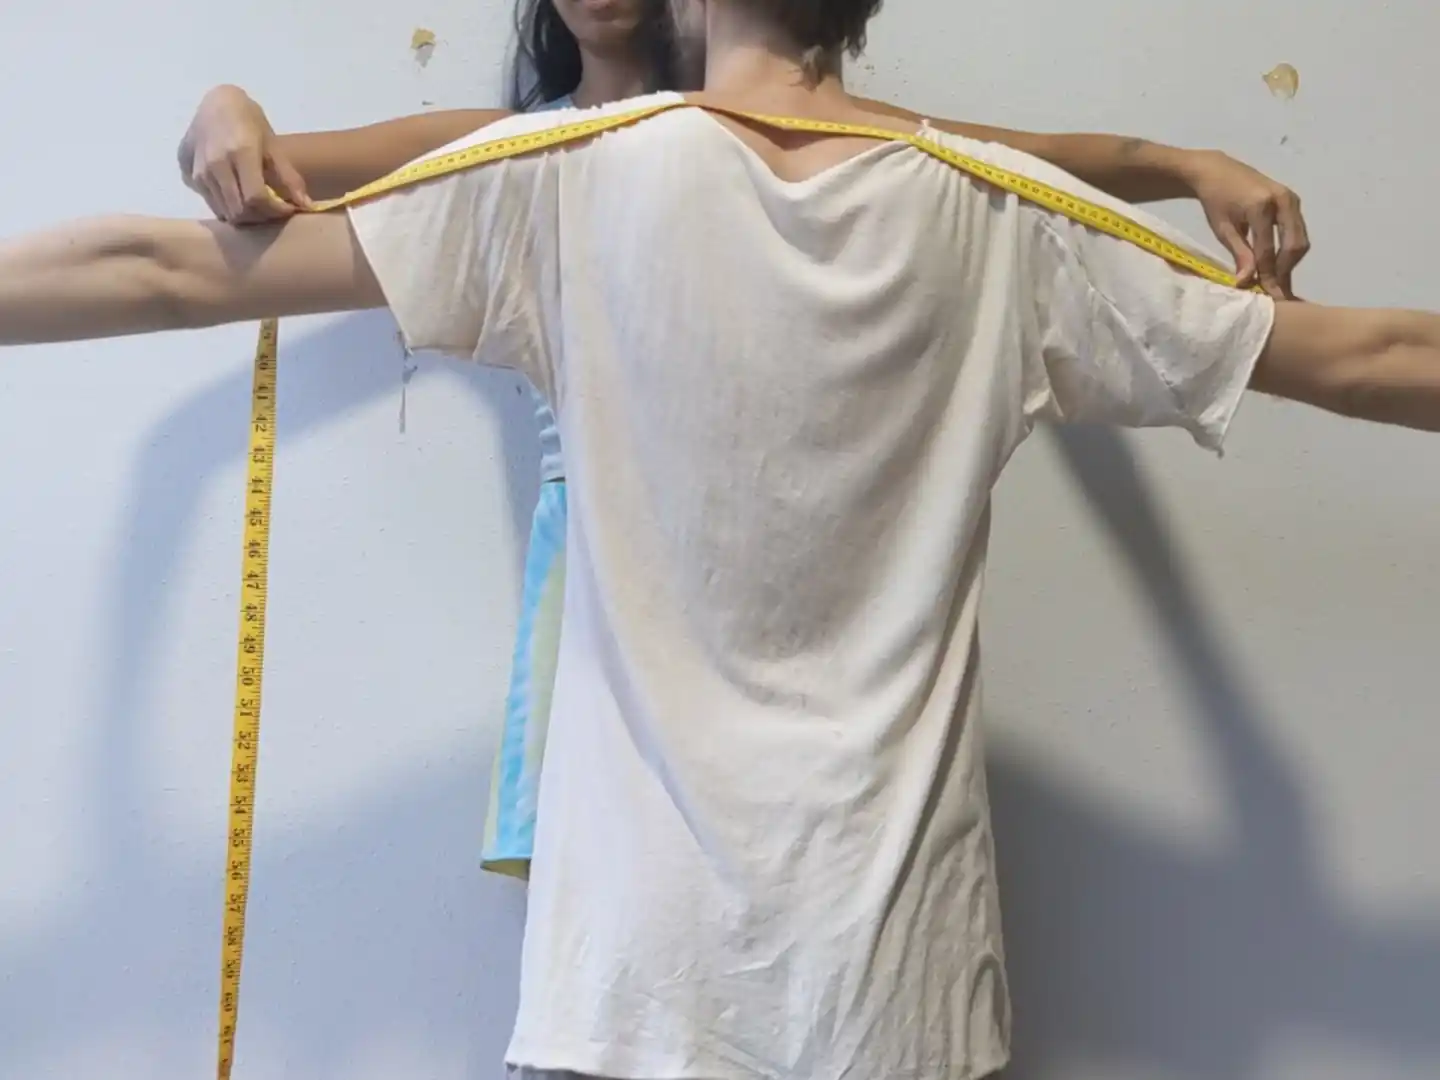
- 袖根 =(手臂根圍(腋下繞肩)+ 6cm或2½in) ÷ 2

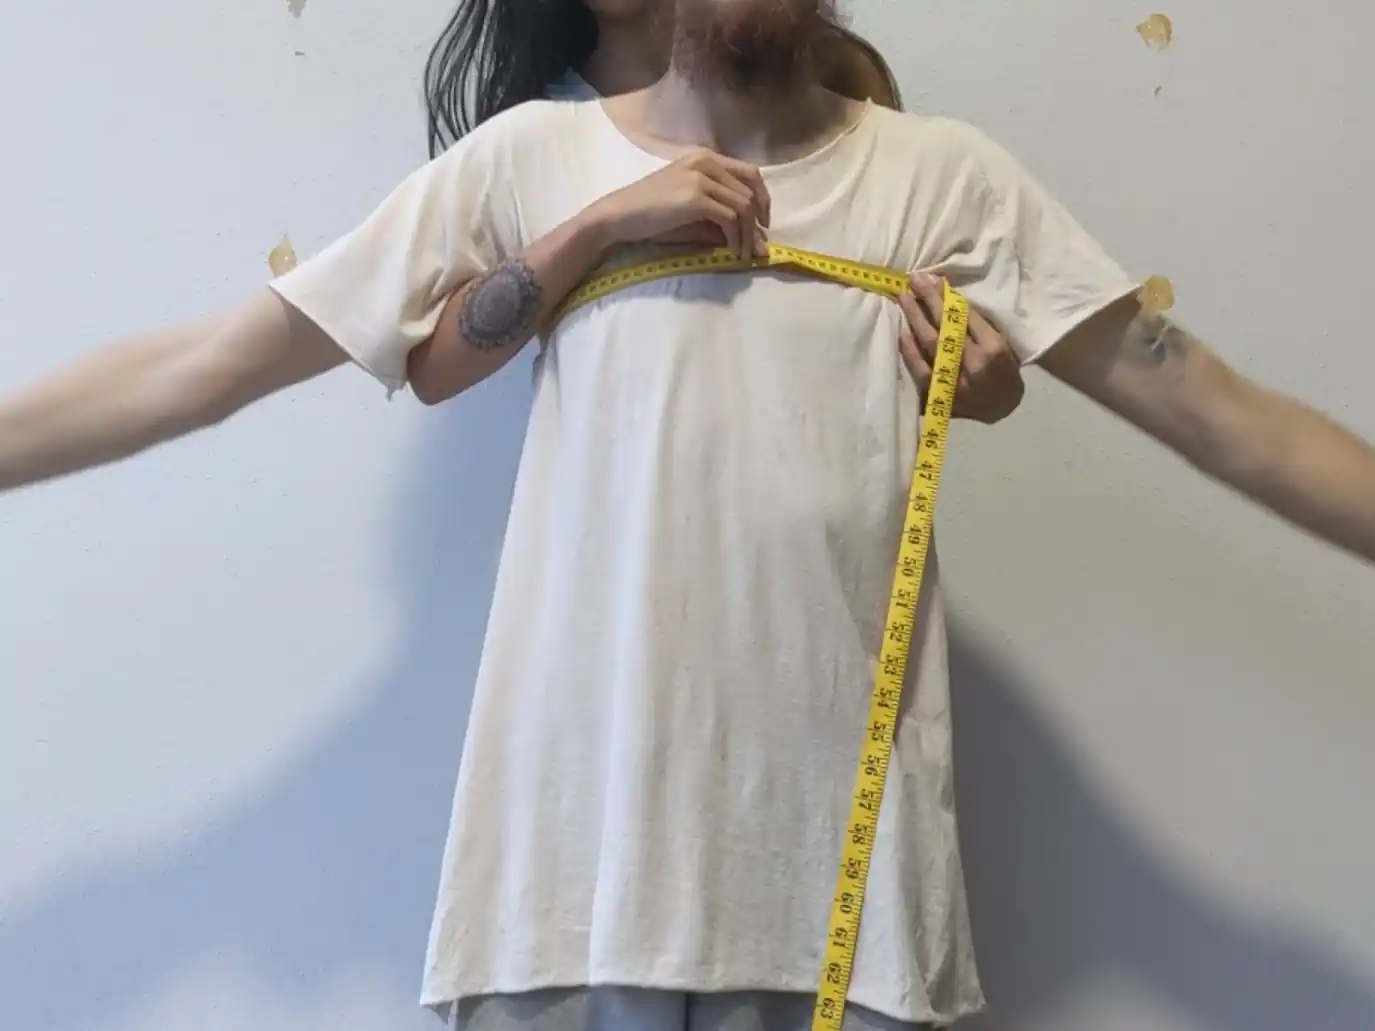
- 衣寬(胸) =(胸圍 + 20cm或8in) ÷ 2
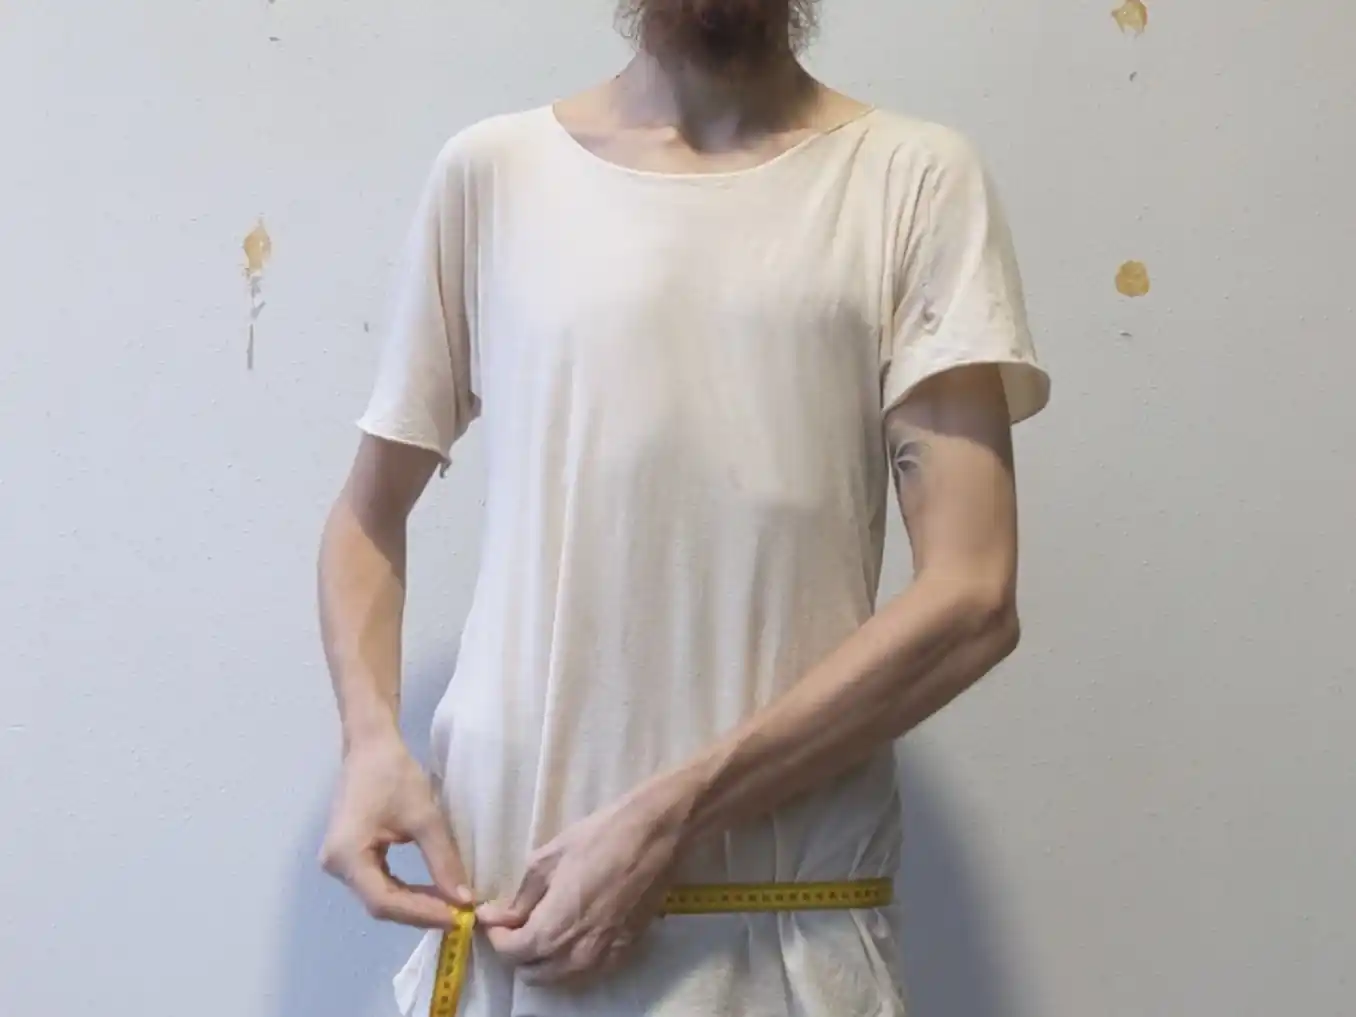
- 衣寬(臀) =(臀圍 + 20cm或8in)÷ 2
- 領寬 =(脖子周圍 ÷ 2)+ 2cm或0.8in
- *可選* 袖寬(上臂) =(上臂圍 + 10cm或4in)÷ 2
製作流程
步驟1
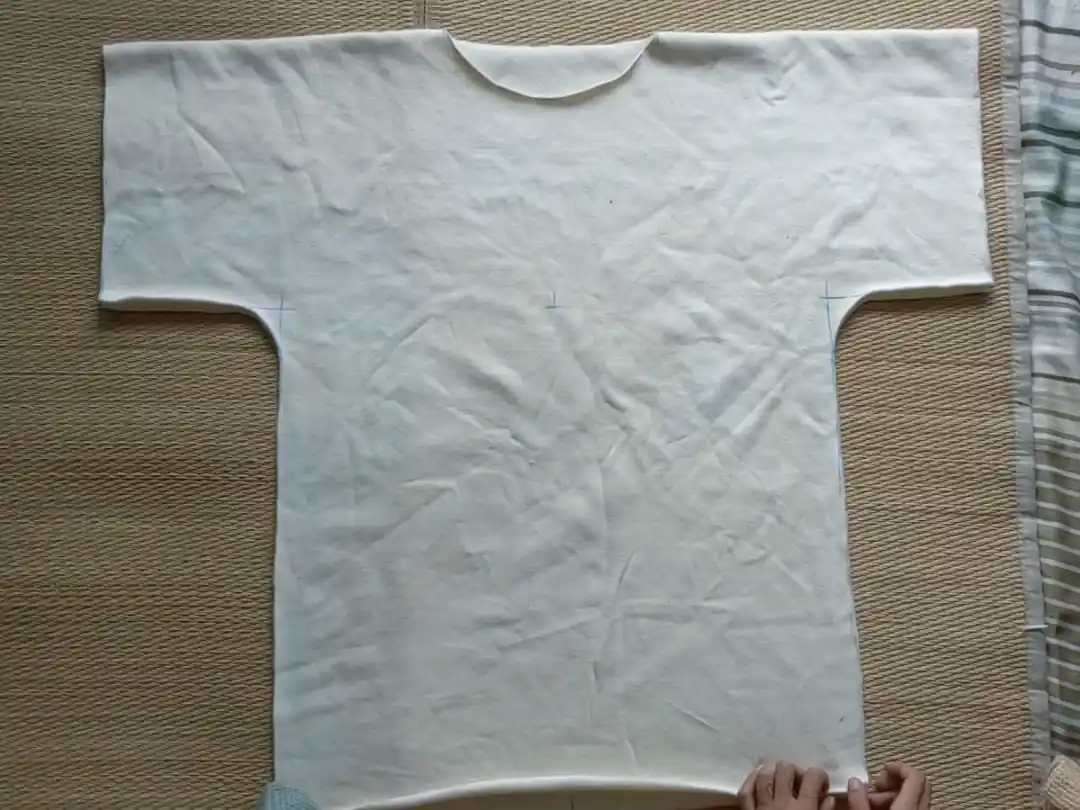
量身。依個人喜好更改尺寸—做長袖就增加袖長, 做t恤裙就增加衣長。
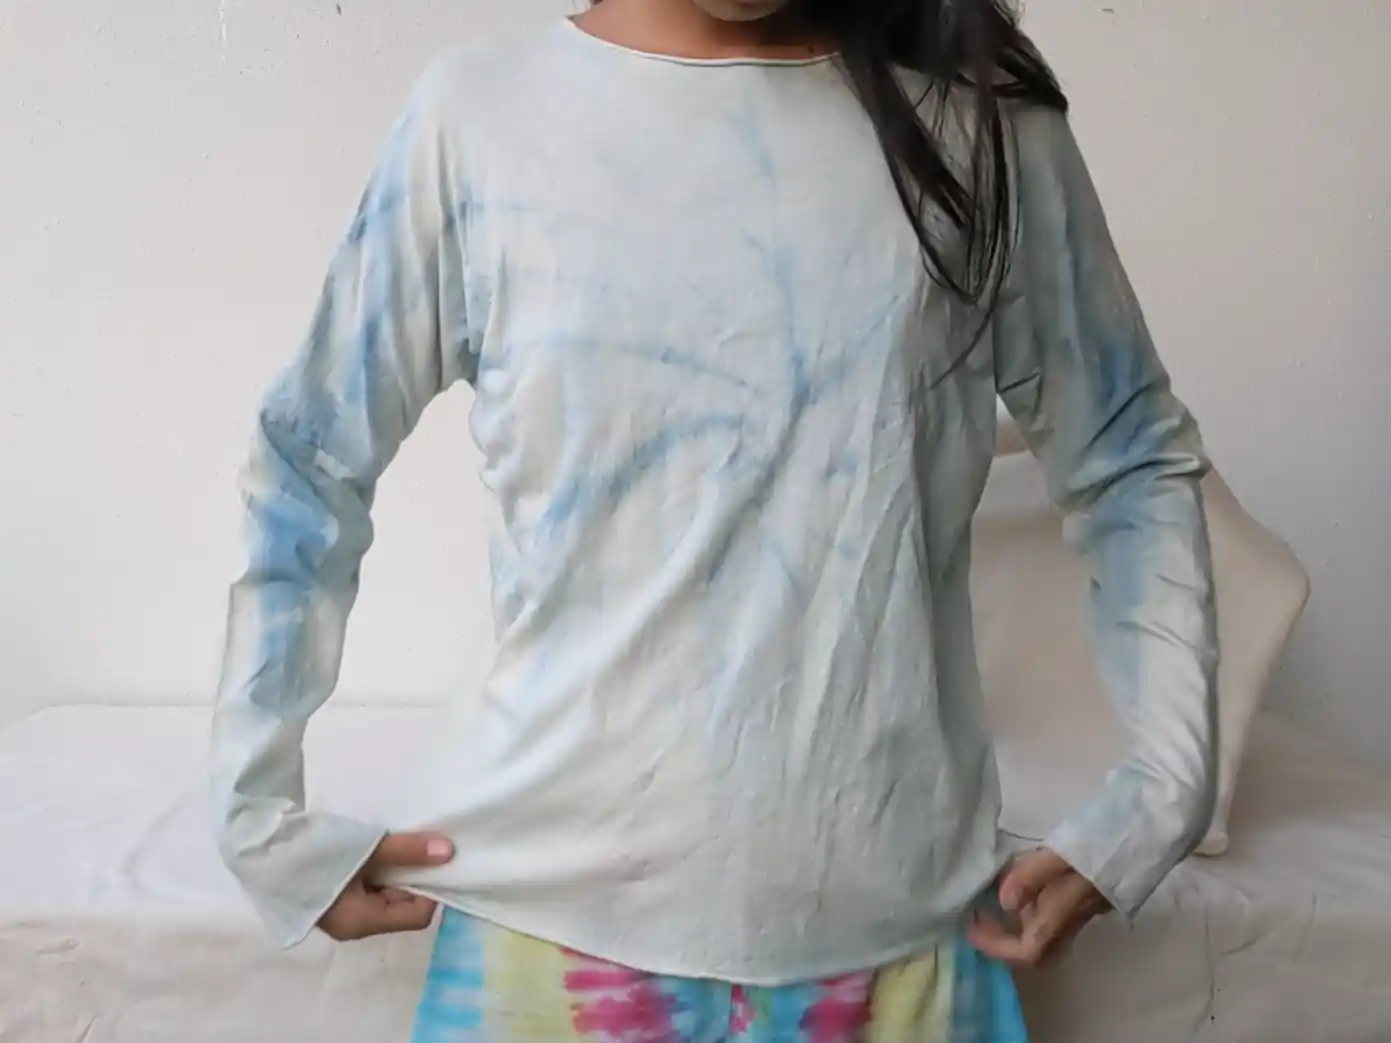
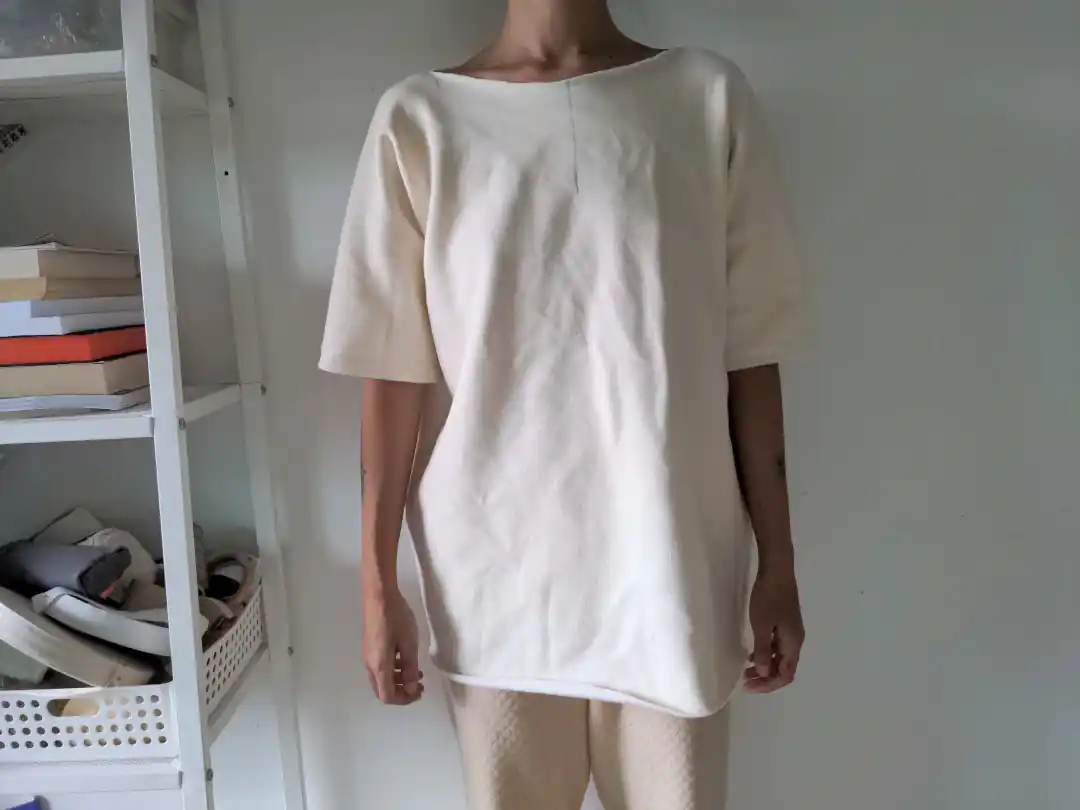
(右)半袖 oversized t恤
不必要剪出紙樣,可以直接在布料上畫出樣子。
步驟2
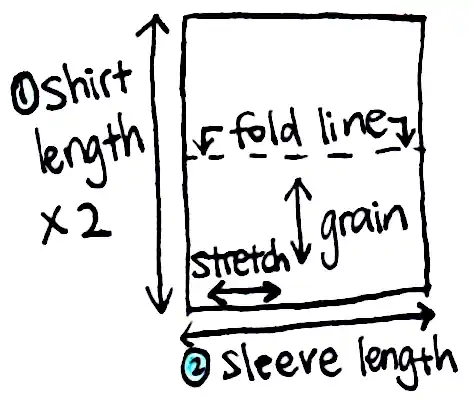
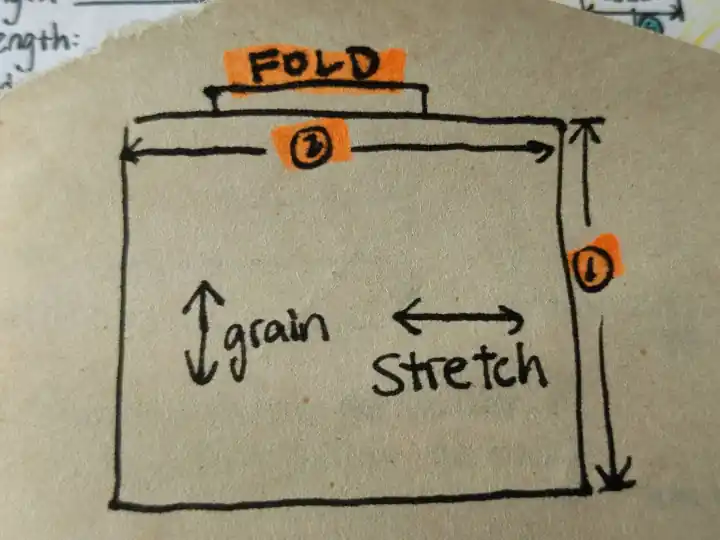
選好布料。布料大小需要:衣長x2比袖長。按曲線對摺布料。
步驟3
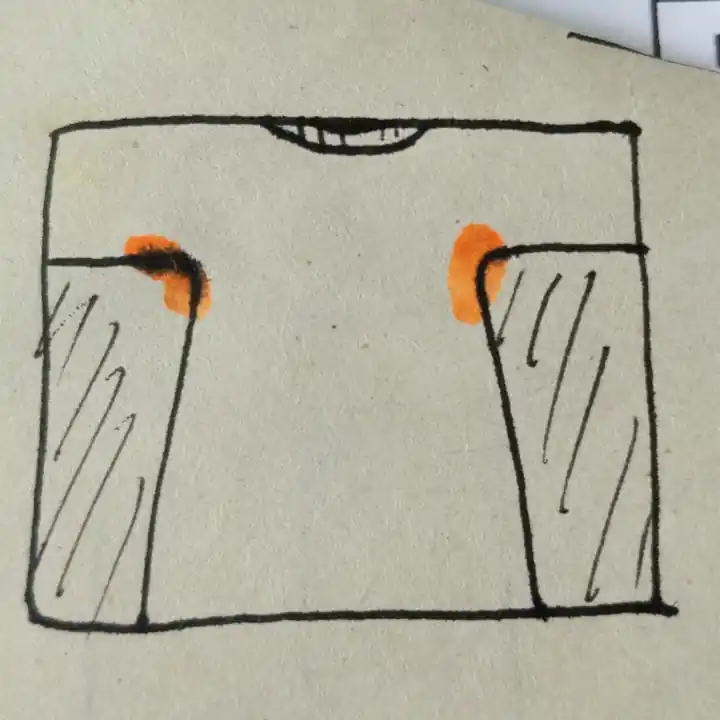
從1-6把尺寸畫在布上,畫出t恤的樣。
希望縫邊的就要加縫份。

不懂的地方可以參考視頻⬆。
步驟4
做些調整:

步驟5
剪出布樣然後手縫/車縫
步驟6
試衣,做需要的調整。
步驟7
縫邊/包邊或直接穿!領口也不必要包邊!
完工啦!
你做的成功嗎?可以發郵件告訴我們😃
我們喜歡用天然的靛藍泥來染我們的t恤。不同的布料會給不同色調的藍色,真的很美!
PDF教程下載(英文)