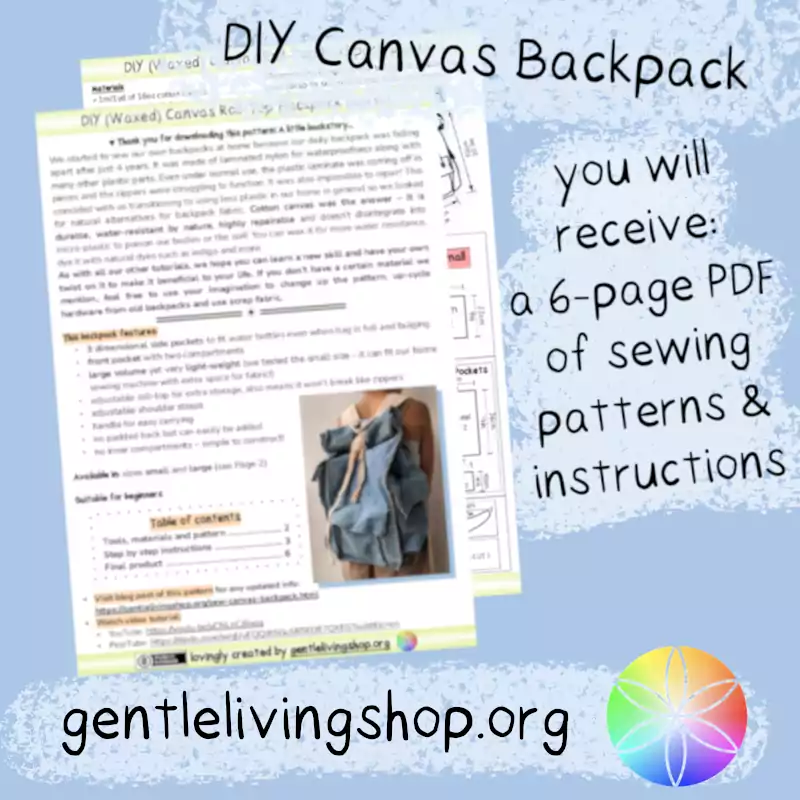
Naai een Canvas Rugzak vanaf Nul (Handleiding + Patroon)
🗫 Bezig met de vertaling, kom morgen terug voor meer!
Video Uitleg
Je kan hem ook kijken op YouTube.
Een kort achtergrondverhaal...
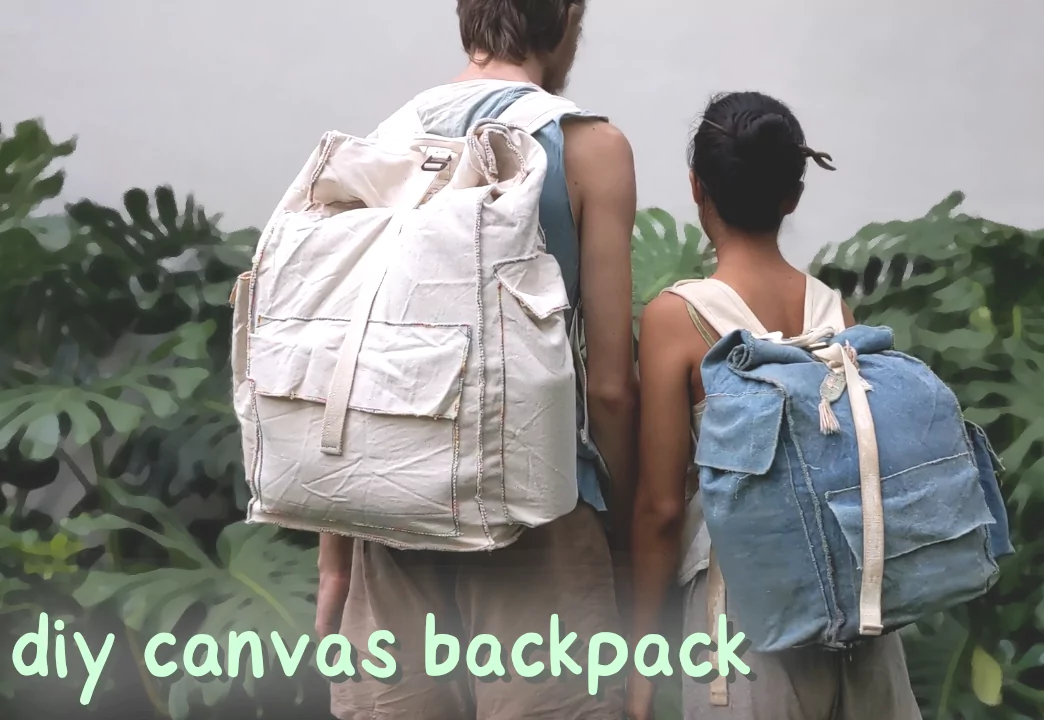
We zijn begonnen met het thuis maken van onze eigen rugzakken omdat onze dagrugzak uit elkaar viel na slechts 4 jaar gebruik. Hij was gemaakt van gelamineerd nylon voor waterdichtheid met daarbij veel andere plastic onderdelen. Zelfs met normaal gebruik viel het plastic laminaat in stukjes ervanaf en de rits had werkte ook niet goed meer. Het was ook nog eens onmogelijk om te repareren! Dit viel samen met onze inspanningen in het minderen van ons plastic gebruik in ons huis en in het algemeen, dus we heben gezocht naar natuurlijke alternieven voor rugzak stof. Katoenen canvas was het antwoord - het is duurzaam, van nature waterafstotend, zeer repareerbaar en het breekt niet af in plastic microvezels die ons lichaam en de grond vergiftigen. Je kan het waxen voor betere waterafstotendheid, verven met natuurlijke verf zoals indigo, en meer.
Zoals met al onze handleidingen, hopen we dat je een nieuwe vaardigheid kan leren en je eigen draai eraan kan geven zodat het iets toe kan voegen aan je leven. Als je niet een specifiek materiaal hebt wat we noemen, voel je dan vooral om creatief te zijn en het patroon aan te passen, stukken van je oude rugzak te hergebruiken en met stof restjes te werken.
Kenmerken van de rugzak
| 3 dimensionale steekzakken | zodat je waterflessen passen ookal is de tas bol vol |
|---|---|
| handgreep | om makkelijk op te pakken |
| voorzakken | waar je snel bij kan |
| verstelbare rolsluiting | groot volume, we kunnen in de kleine versie een naai machine stoppen met nog extra ruimte voor stof! |
| verstelbare schouderbanden | zodat het beter zit |
| geen binnencompartimenten | simpel om te maken en functioneel in het gebruik |
| geen ritsen | omdat ze breken en lastig zijn om te repareren :( |
| geen gevoerd achterpaneel | op deze manier is het meer lichtgewicht, structurele constructies kunnen altijd toegevoegd worden indien nodig |
| geen andere toeters en bellen | we vinden op normale rugzakken veel teveel gespen, sluitingen, haakjes... |
Benodigdheden
- Needle & thread / sewing machine
- Fabric chalk
- Fabric scissors
- 1m/1yd of 16oz cotton canvas (fabric width 1.6m/1.7yd)
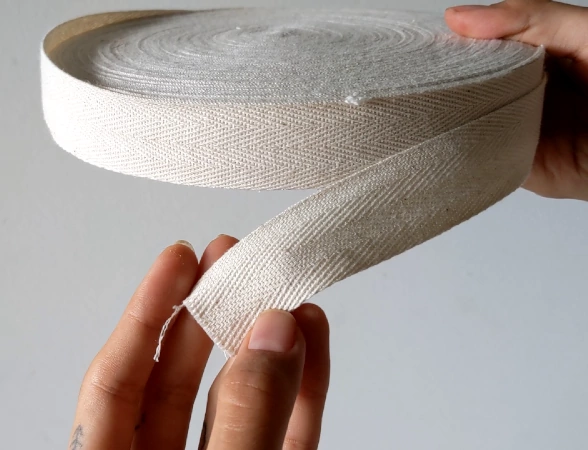
- 2m/2yd of 2.5cm/1in canvas webbing
- 2m/2yd of 2.5cm/1in light-weight cotton twill ribbon (for edge binding)
- (optional) soy wax
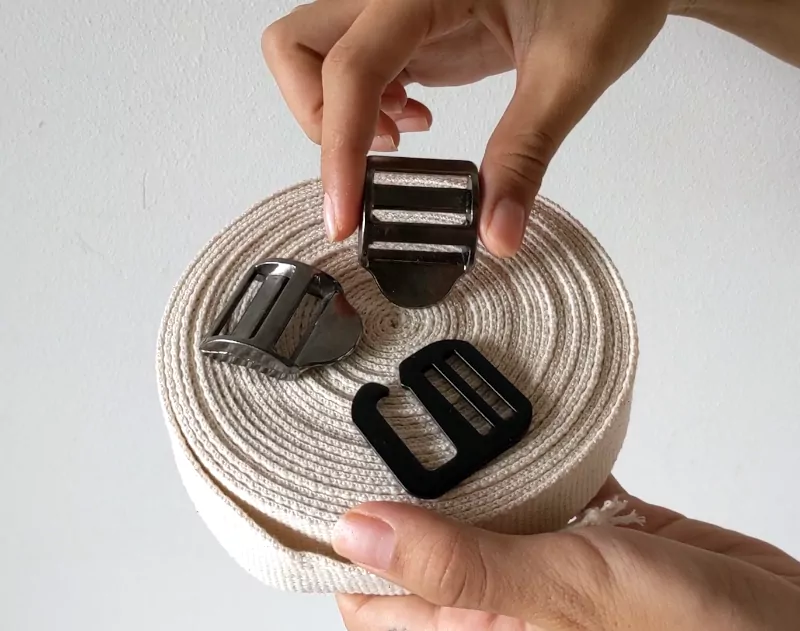
- 2 pieces 2.5cm/1in ladder slider adjustable buckle (double bar)
- 1 piece 2.5cm/1in adjustable G hook
Gereedschap
Materials
Hardware (we used metallic ones)
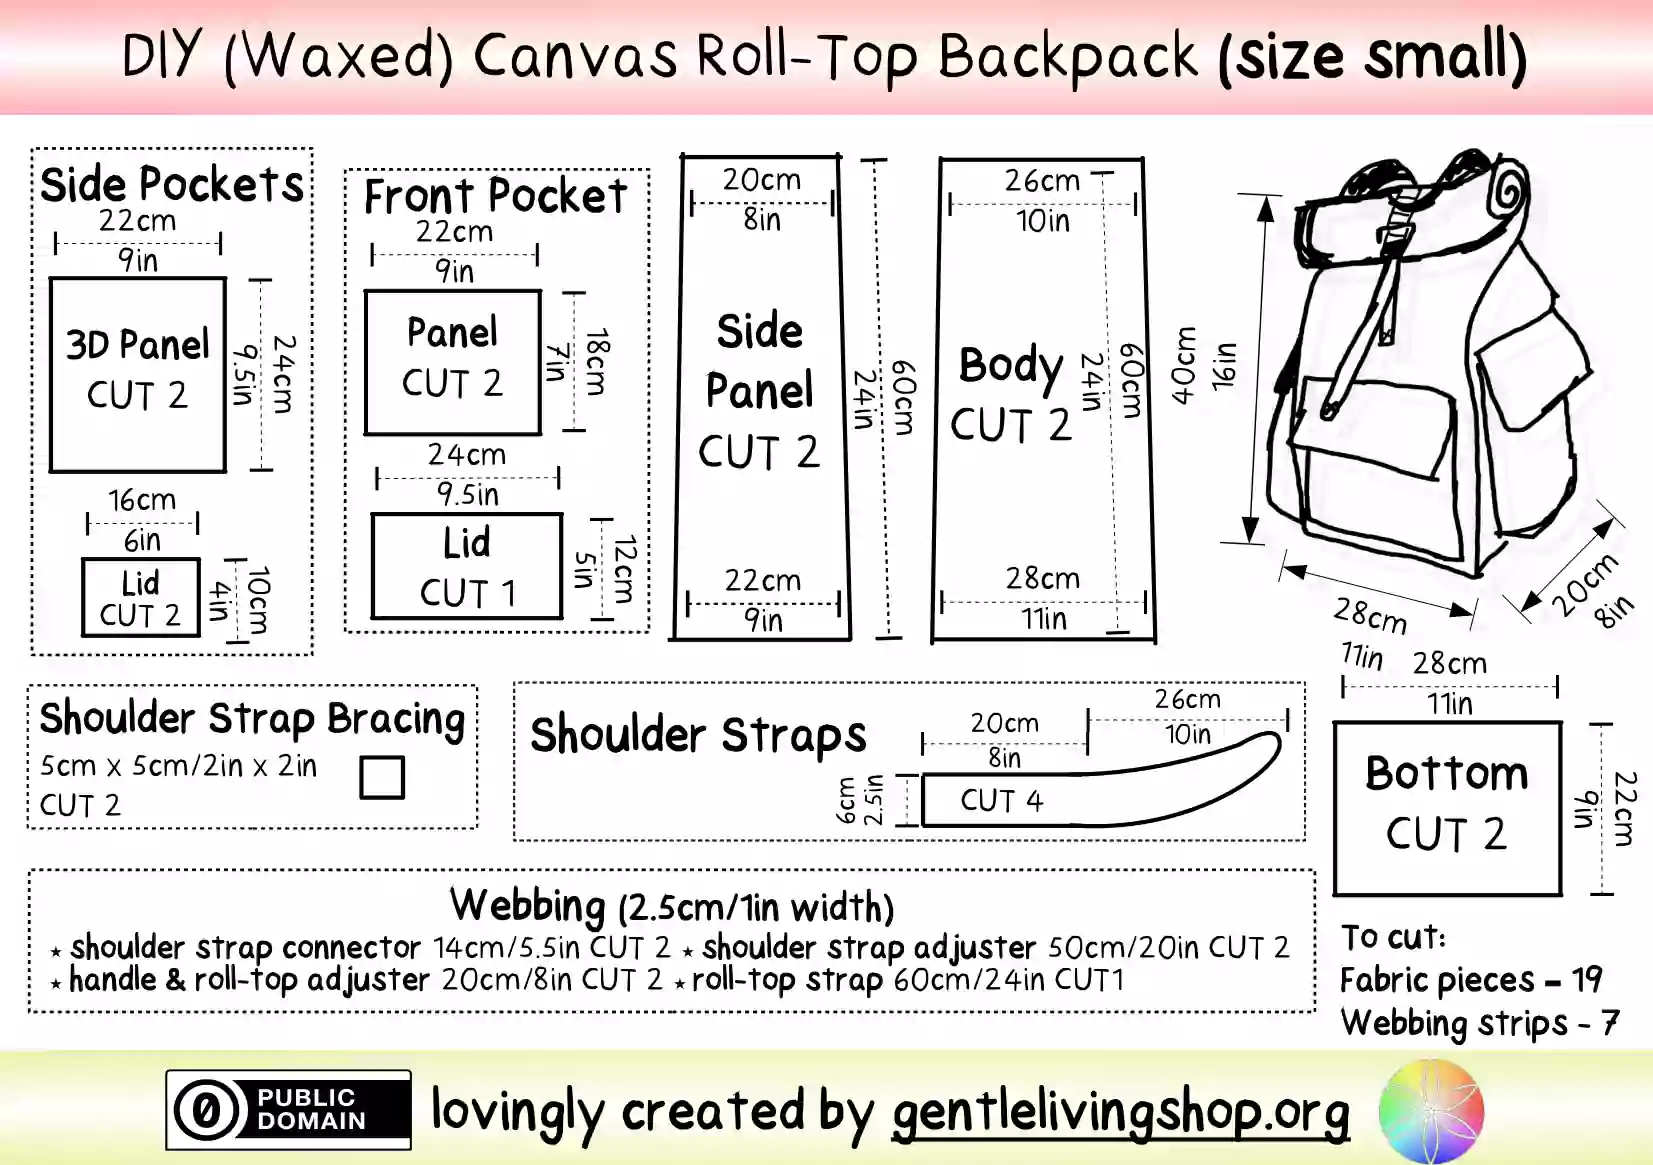
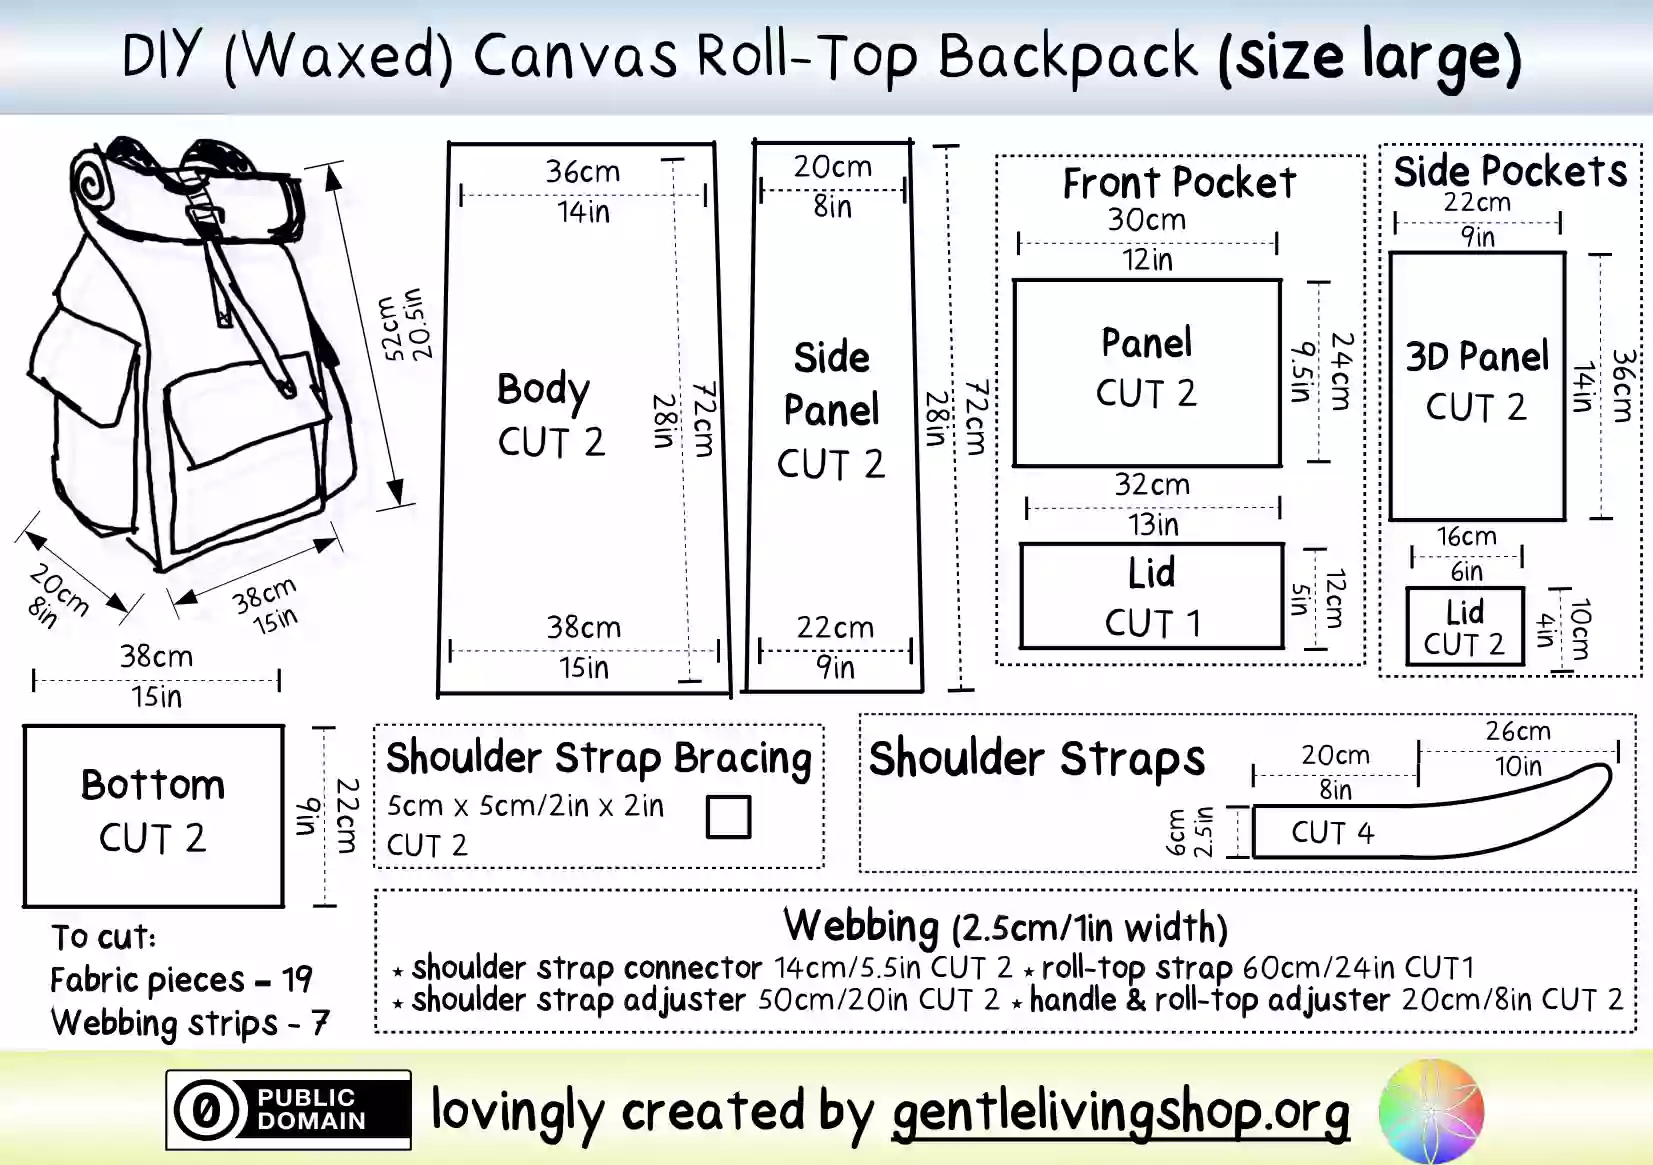
Simplified pattern
Size small (PDF download)
Size large (PDF download)
Step by step instruction
Stage 1 – Prepare canvas fabric
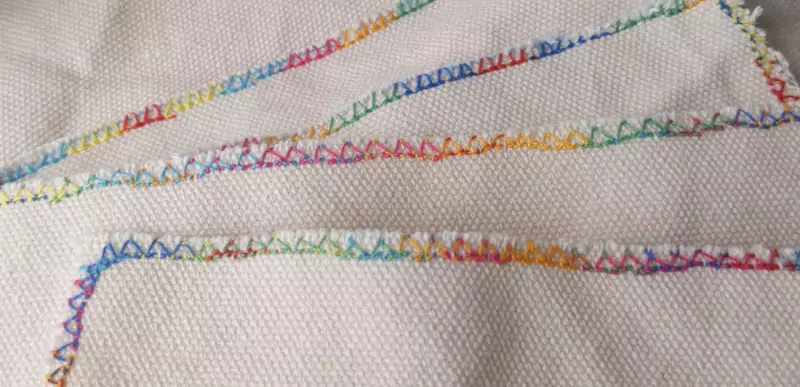
1.1 Measure, cut and overcast
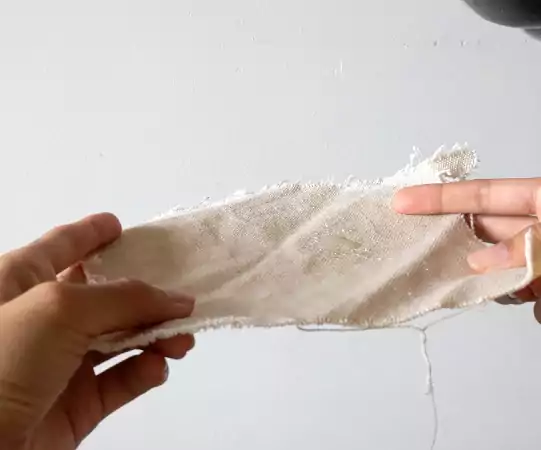
Cut out all pieces (19 fabric pieces; 7 webbing strips). To prevent fraying edges, overcast edges by hand or machine, skip shoulder straps. Dye fabric if you want.
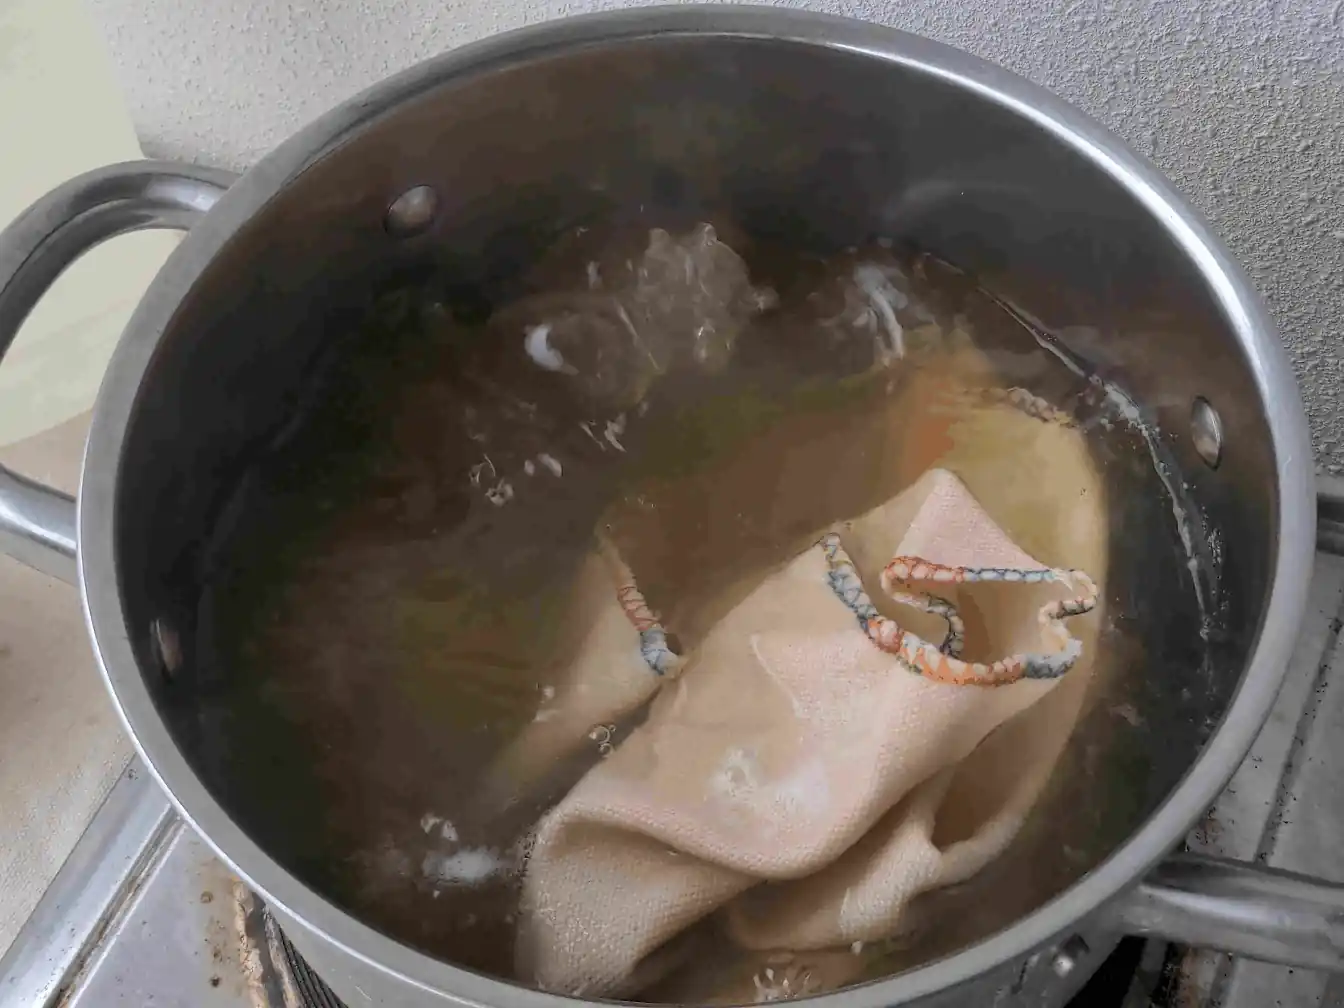
1.2 (optional) Scour and wax
- Scour all pieces but shoulder straps. Scouring uses soap and washing soda in boiling water to clean fabric of oils and in turn makes it lighter. Read more about scouring.
- Wax all pieces but shoulder straps. Waxing helps canvas be more water and cut resistant but adds weight. Read more about waxing canvas.
Stage 2 – Basic construction
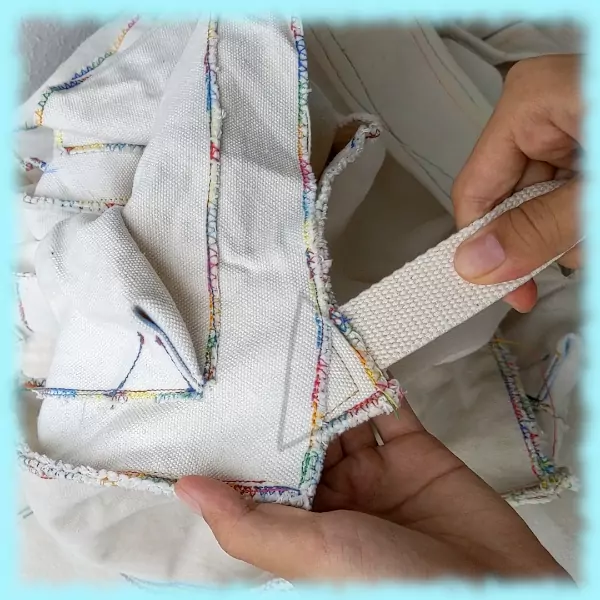
2.1 Side Pockets
Mark out a 4 by 4cm (1.5in) square at bottom corners of the fabric. Fold and sew down the corners in so two lines marked out are touching.
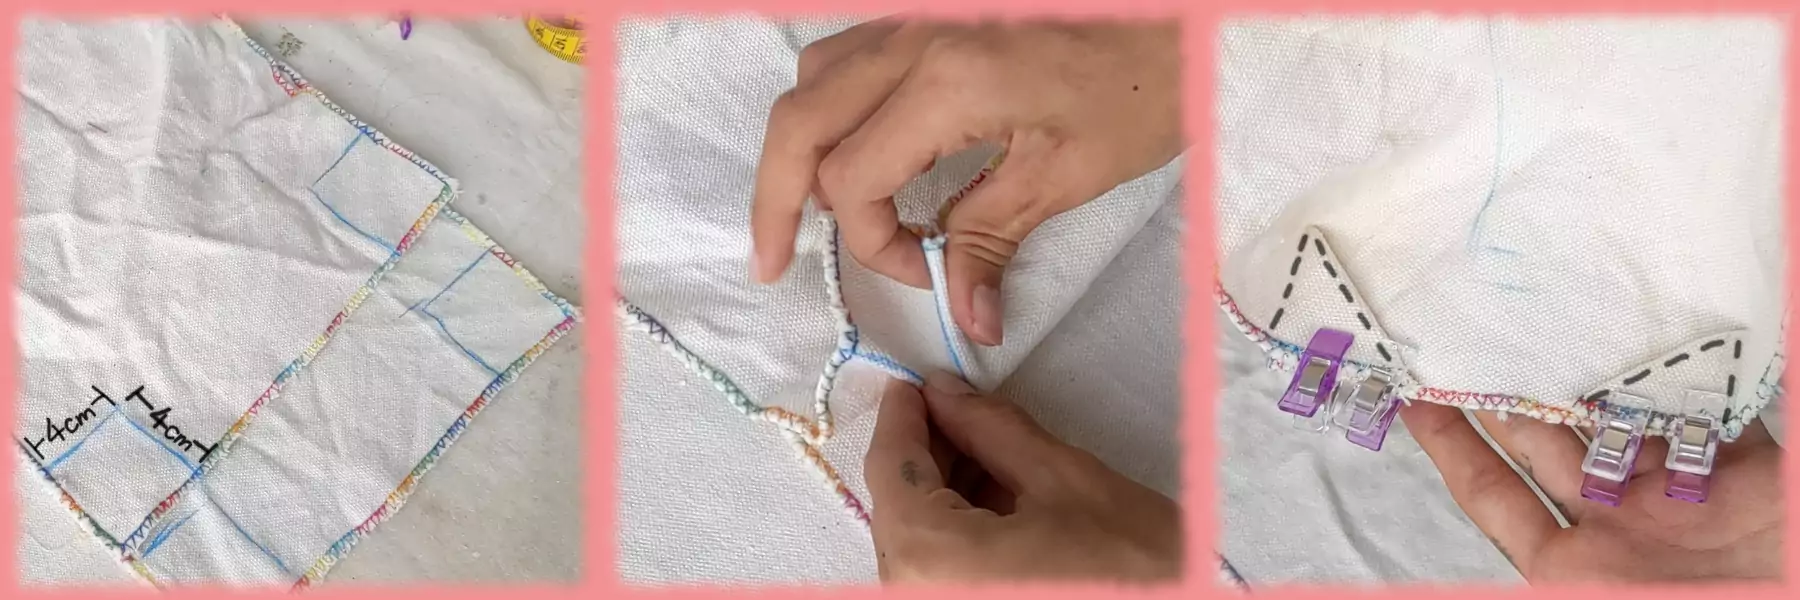
Make a little snip at each of the bottom corners, flatten the edges and sew onto the side panels. Sew on the lids.
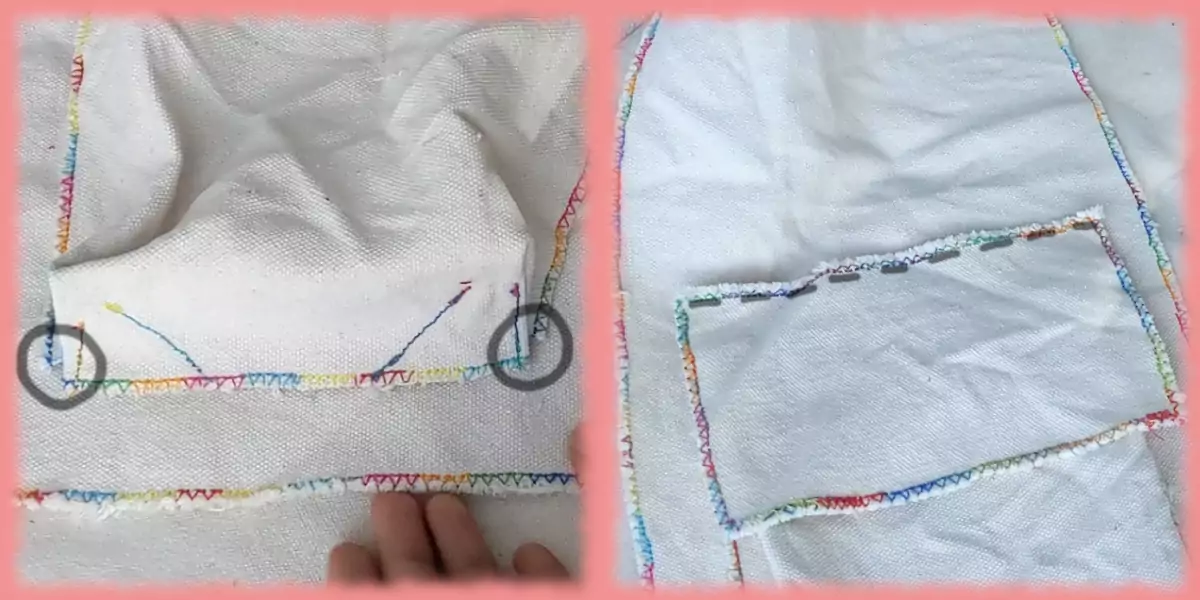
2.2 Front Pockets
Sew two front pocket panel together (customise it to your liking! we stacked them). Sew that and lid onto front panel.
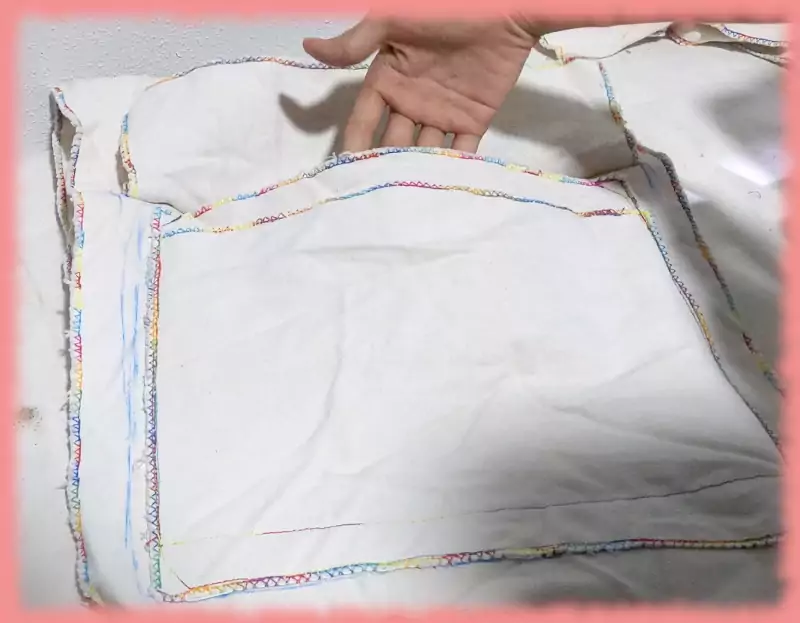
2.3 Bottom, front, back and side panels*
- Sew two bottom pieces together.
- Sew front, back and side panels onto bottom panel.
Stage 3 - Shoulder straps
3.1 Prepare shoulder straps
- Sew two pieces of shoulder straps together, so you end up with 2 straps, each with two layers.
- Bind edges with cotton ribbon to prevent fraying.
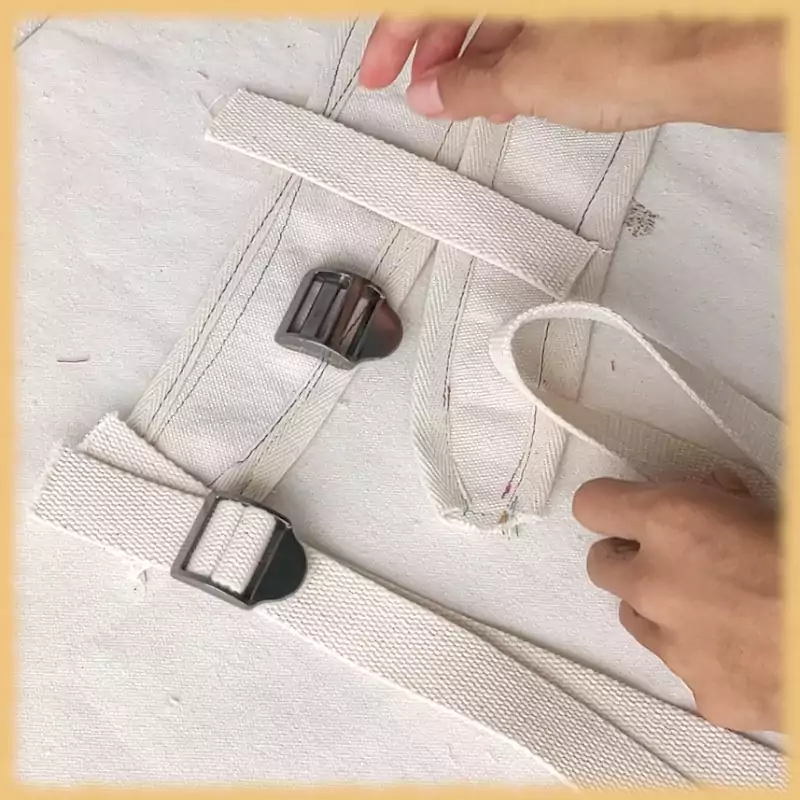
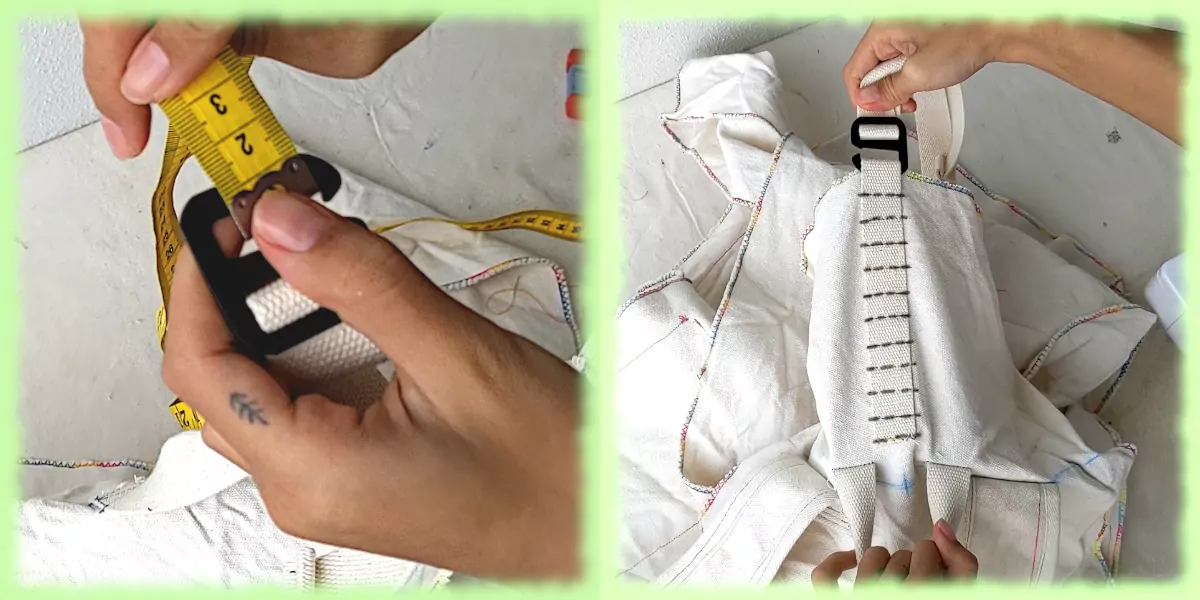
3.2 Prepare ladder slider adjustable buckle
- Loop the 14cm/5.5in long canvas webbing around top bar of ladder slider adjustable buckle.
- Loop the 50cm/20in long canvas webbing around bottom bar of ladder slider adjustable buckle. Thread it through the middle opening back to front and through the bottom opening front to back.
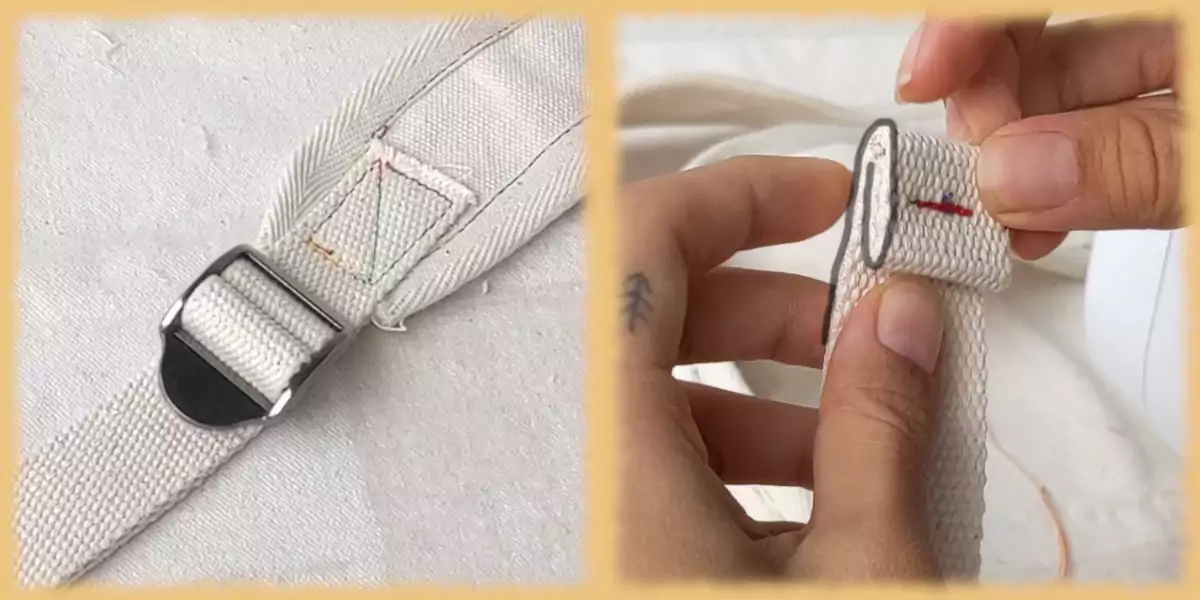
3.3 Shoulder strap & buckle sandwich
- Sandwich the shoulder straps end in between short webbing strips and sew together with 'box x' stitch (webbing-shoulder strap-webbing).
- For the long webbing strip side wrapped around bottom bar of buckle, fold tips of top half in twice and sew (prevent it from coming out of the buckle).
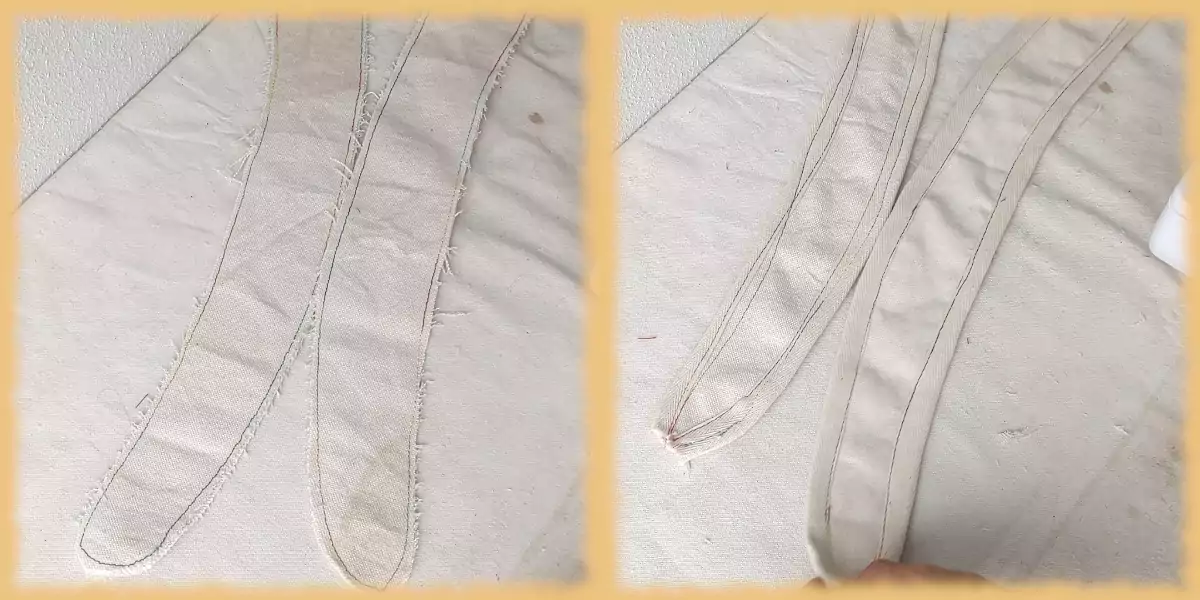
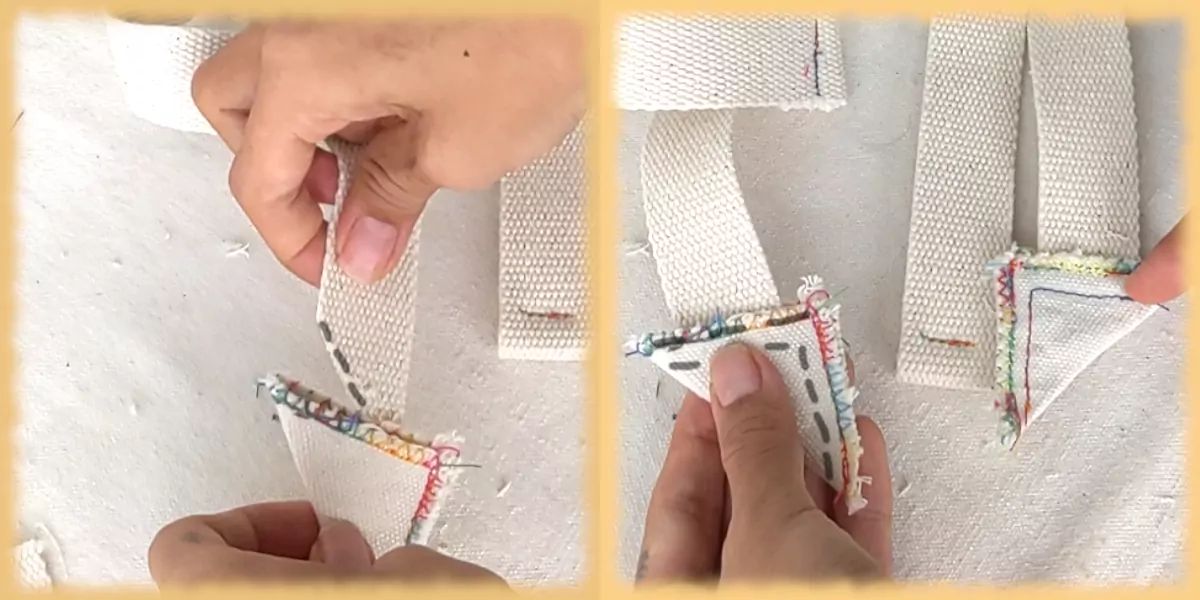
3.4 Shoulder strap bracing
- Fold shoulder strap bracing squares in half into triangles and sew one open edge closed.
- Trim outside corners off the ends of bottom half of the long canvas webbing strip and sandwich trimmed corner between the opening of the shoulder strap bracing. Sew attached.
3.5 Attach straps to backpack
The roll-top of backpack is 20cm long so stitch shoulder straps onto back panel 20cm below top edge with a ‘box x’ stitch.
Stage 4 – Handle & Adjustable roll-top
4.1 Handle
Fold middle section (10cm long) of 20cm/8in long canvas webbing strip in half. Stitch to secure. Attach handle to middle of the back panel just above shoulder straps.
4.2 Roll-top strap
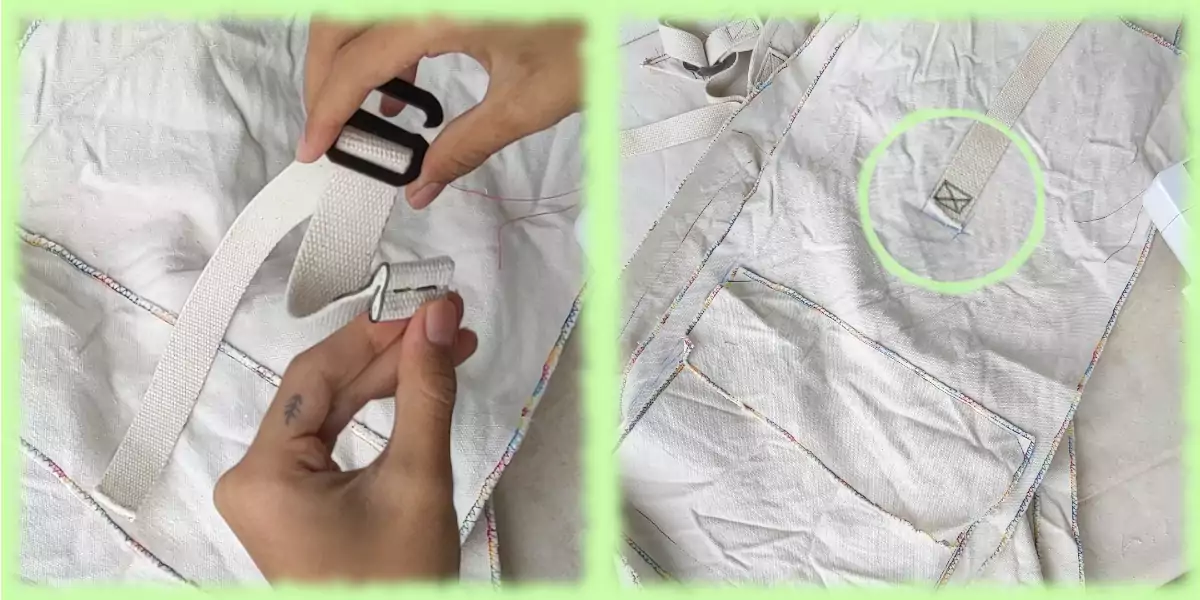
Thread 60cm/24in long canvas webbing strip onto G hook. Fold and sew one end like the should strap webbing. Attach roll top strap onto centre of front panel about 25cm/10in below top edge with a ‘box x’ stitch.
4.3 Roll-top slots
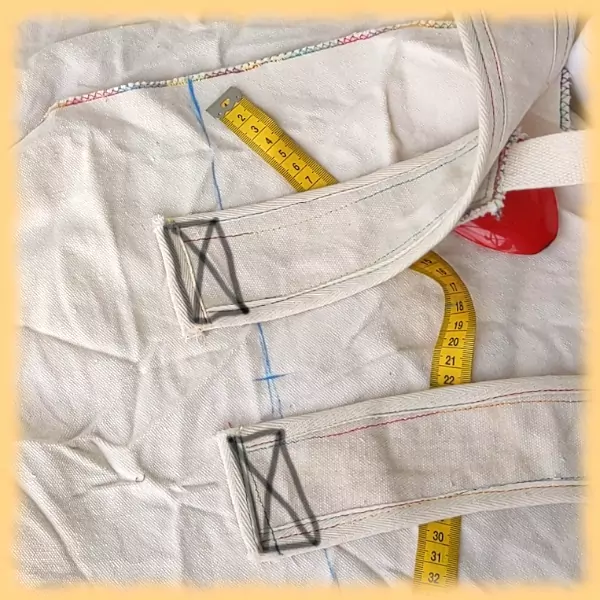
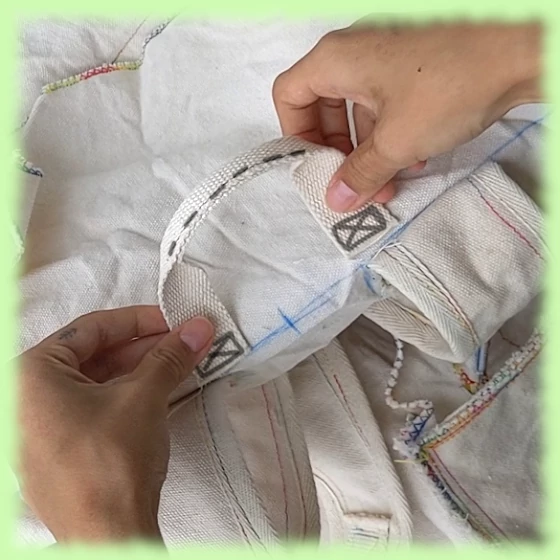
Measure G hook’s size, mark out appropriate slots for it onto 20cm/8in long canvas webbing strip. Sew down each slot onto top of back panel leaving a bit at the top to fold to the inside.
Stage 5 – Final assembly
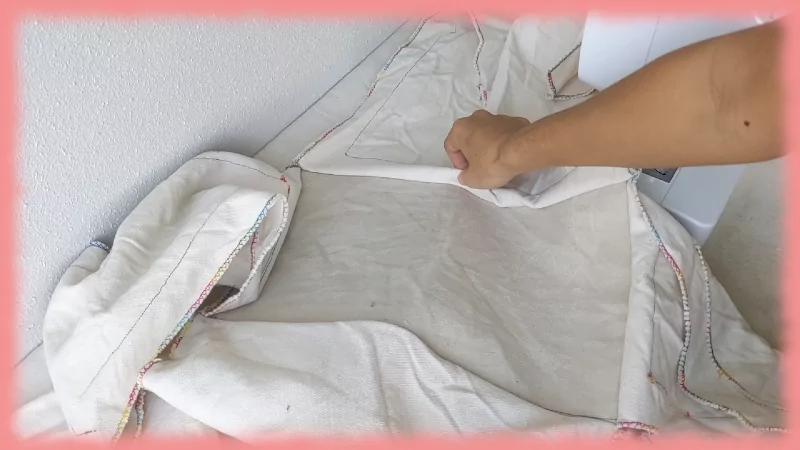
5.1 Sew front panel and side panels together*
5.2 Attach shoulder strap bracing to backpack
Sandwich long edge of shoulder strap bracing triangle between back panel and side panels towards the bottom of backpack. Sew panels together.
*If you want seams facing out - sew wrong sides together; if you want seams on the inside of backpack - sew right sides together.
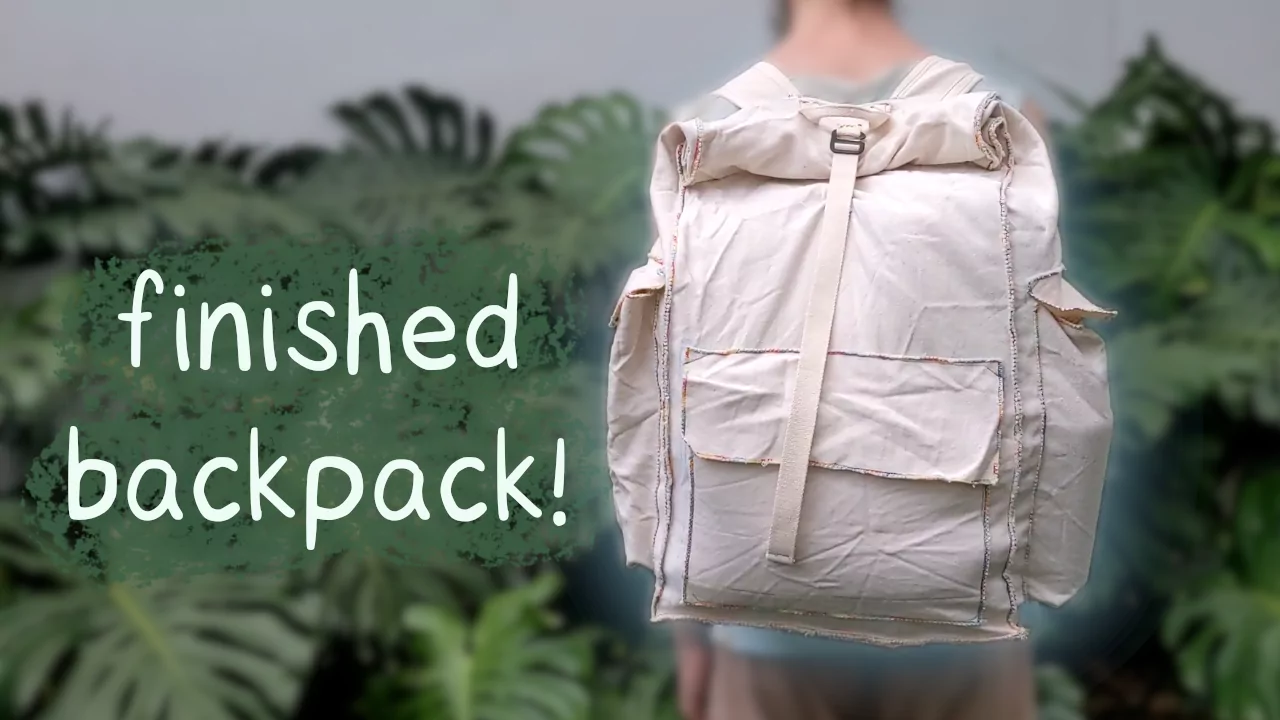
yay! backpack is finished!
PDF pattern download